
Payment Settings
The Payment Settings screen controls how PartnerPortal handles revenue, commissions, approvals, exports, and whether the payments tools are visible across the portal.
Open it from Portal Setup → Payment Settings.
General Payment Settings
Section titled “General Payment Settings”This section applies across your whole commission workflow, whether commissions are created manually or on a schedule.
Currency
Section titled “Currency”Set the portal currency here before your portal starts collecting commission or revenue data.
Once your portal already has money data or connected payment or accounting integrations, currency changes may be locked.
Commission Statuses
Section titled “Commission Statuses”PartnerPortal supports two status models:
- Modern: Needs Approval, Approved, Do Not Pay, and Paid
- Legacy: older statuses such as Pending, Scheduled, Processing, and Complete
Modern statuses are usually the better fit for export-based finance workflows.
Require Approval for Commissions
Section titled “Require Approval for Commissions”When this setting is enabled, new commissions start in Needs Approval so your team can review them before payout.
This setting matters most when:
- your portal uses the modern status model
- your payout workflow happens outside PartnerPortal
- finance or ops wants an approval step before export or payment
AP Export Defaults
Section titled “AP Export Defaults”This section stores the accounting fields that should travel with exported commissions.
Examples include:
- Expense Account
- Tax Code
- Class
- Location
- Department
- Tracking Category names and values
If your team exports commissions into systems like QuickBooks, Ramp, or BILL, setting these defaults once here reduces cleanup later.
Revenue Tracking
Section titled “Revenue Tracking”Use this section when your portal wants PartnerPortal to store revenue from Stripe or QuickBooks inside the app.
Capture provider revenue
Section titled “Capture provider revenue”When capture is enabled:
- Stripe charges and refunds or QuickBooks payments that match your leads appear on the Revenue page
- revenue with no connection to any lead is not captured, so non-partner revenue stays out of PartnerPortal
- your team can review and correct that revenue inside PartnerPortal
- the in-app revenue ledger becomes available as a commission source
Historical import status
Section titled “Historical import status”Revenue capture handles new incoming records. Older history usually needs a manual import or backfill.
If your team started capturing revenue after activity already existed in Stripe or QuickBooks, use the import tools from the Revenue page.
Delete Captured Revenue
Section titled “Delete Captured Revenue”If your team needs to clear the in-app revenue ledger for the portal, this section also exposes the destructive delete action for captured revenue.
That action removes captured revenue records, but it does not automatically disconnect the integration or turn capture off.
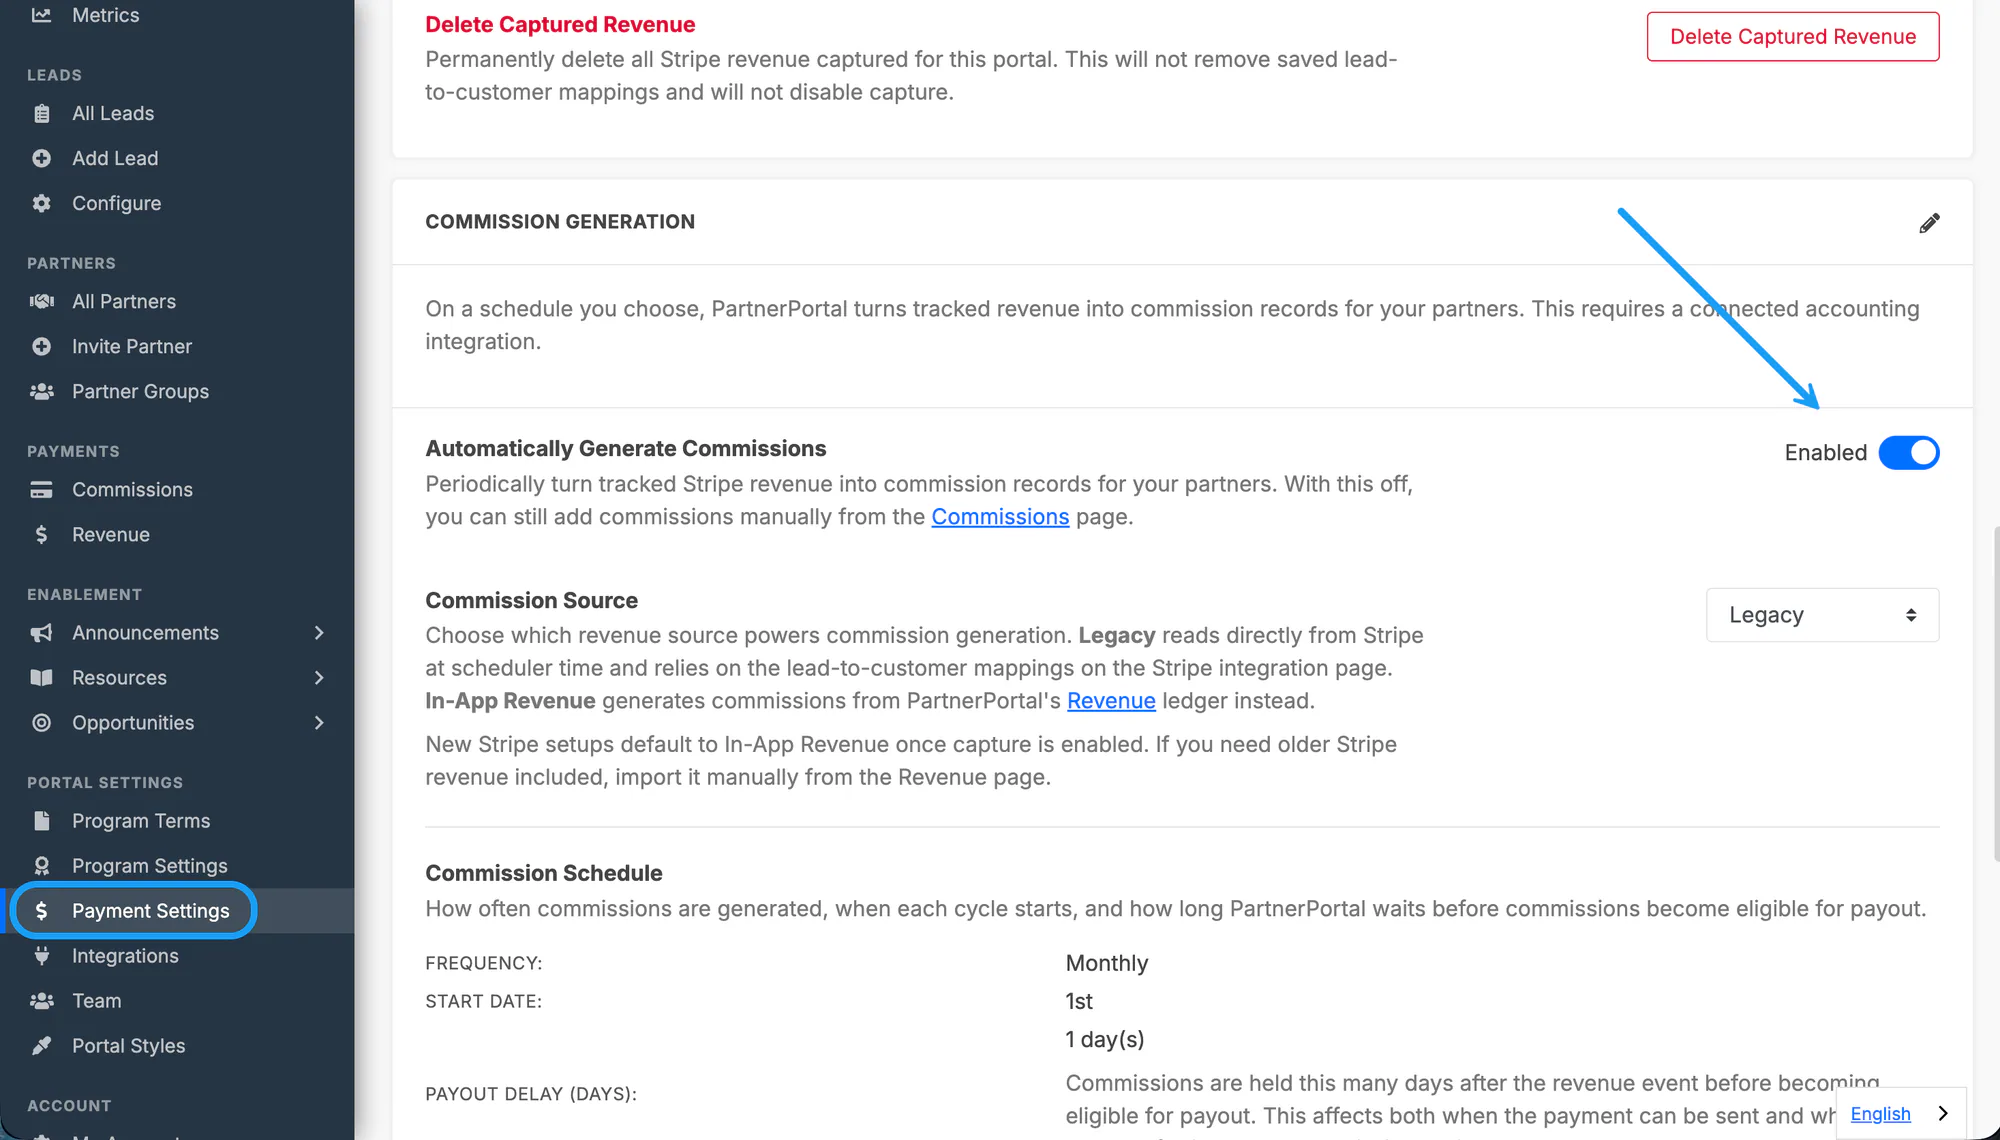
Commission Generation
Section titled “Commission Generation”Older docs may call this the Commission Scheduler. In the current app, this section is named Commission Generation.
This is where PartnerPortal creates commission records for you automatically — instantly from a lead’s close value when it is marked Closed Won, on a schedule from eligible revenue, or both.
Generate Commissions on Closed Won
Section titled “Generate Commissions on Closed Won”Turn this on when you want PartnerPortal to create a commission the moment a lead is marked Closed Won, using the lead’s Close Value as the revenue figure.
When a lead enters the won phase:
- PartnerPortal creates one commission for the lead, calculated from the lead’s commission setup — a fixed amount pays that amount, and percentage types pay that percentage of the Close Value
- the Close Value is recorded as a revenue entry labeled CRM Close on the Revenue page, linked to the commission
- the commission enters your normal review workflow, exactly like any other commission
This works with every CRM integration and with leads marked won by hand, and it does not require Stripe or QuickBooks. It is intended for portals that track revenue by CRM close value instead of an accounting integration.
Automatically Generate Commissions
Section titled “Automatically Generate Commissions”Turn this on when you want PartnerPortal to create commissions for you automatically.
If it is off, your team can still create commissions manually from the Commissions page.
Commission Source
Section titled “Commission Source”This setting decides which revenue source powers scheduled commission generation.
- Legacy reads directly from Stripe or QuickBooks when the scheduler runs
- In-App Revenue generates commissions from the revenue already stored on PartnerPortal’s Revenue page
For many portals, In-App Revenue is the clearer workflow because your team can review the revenue before commissions are created.
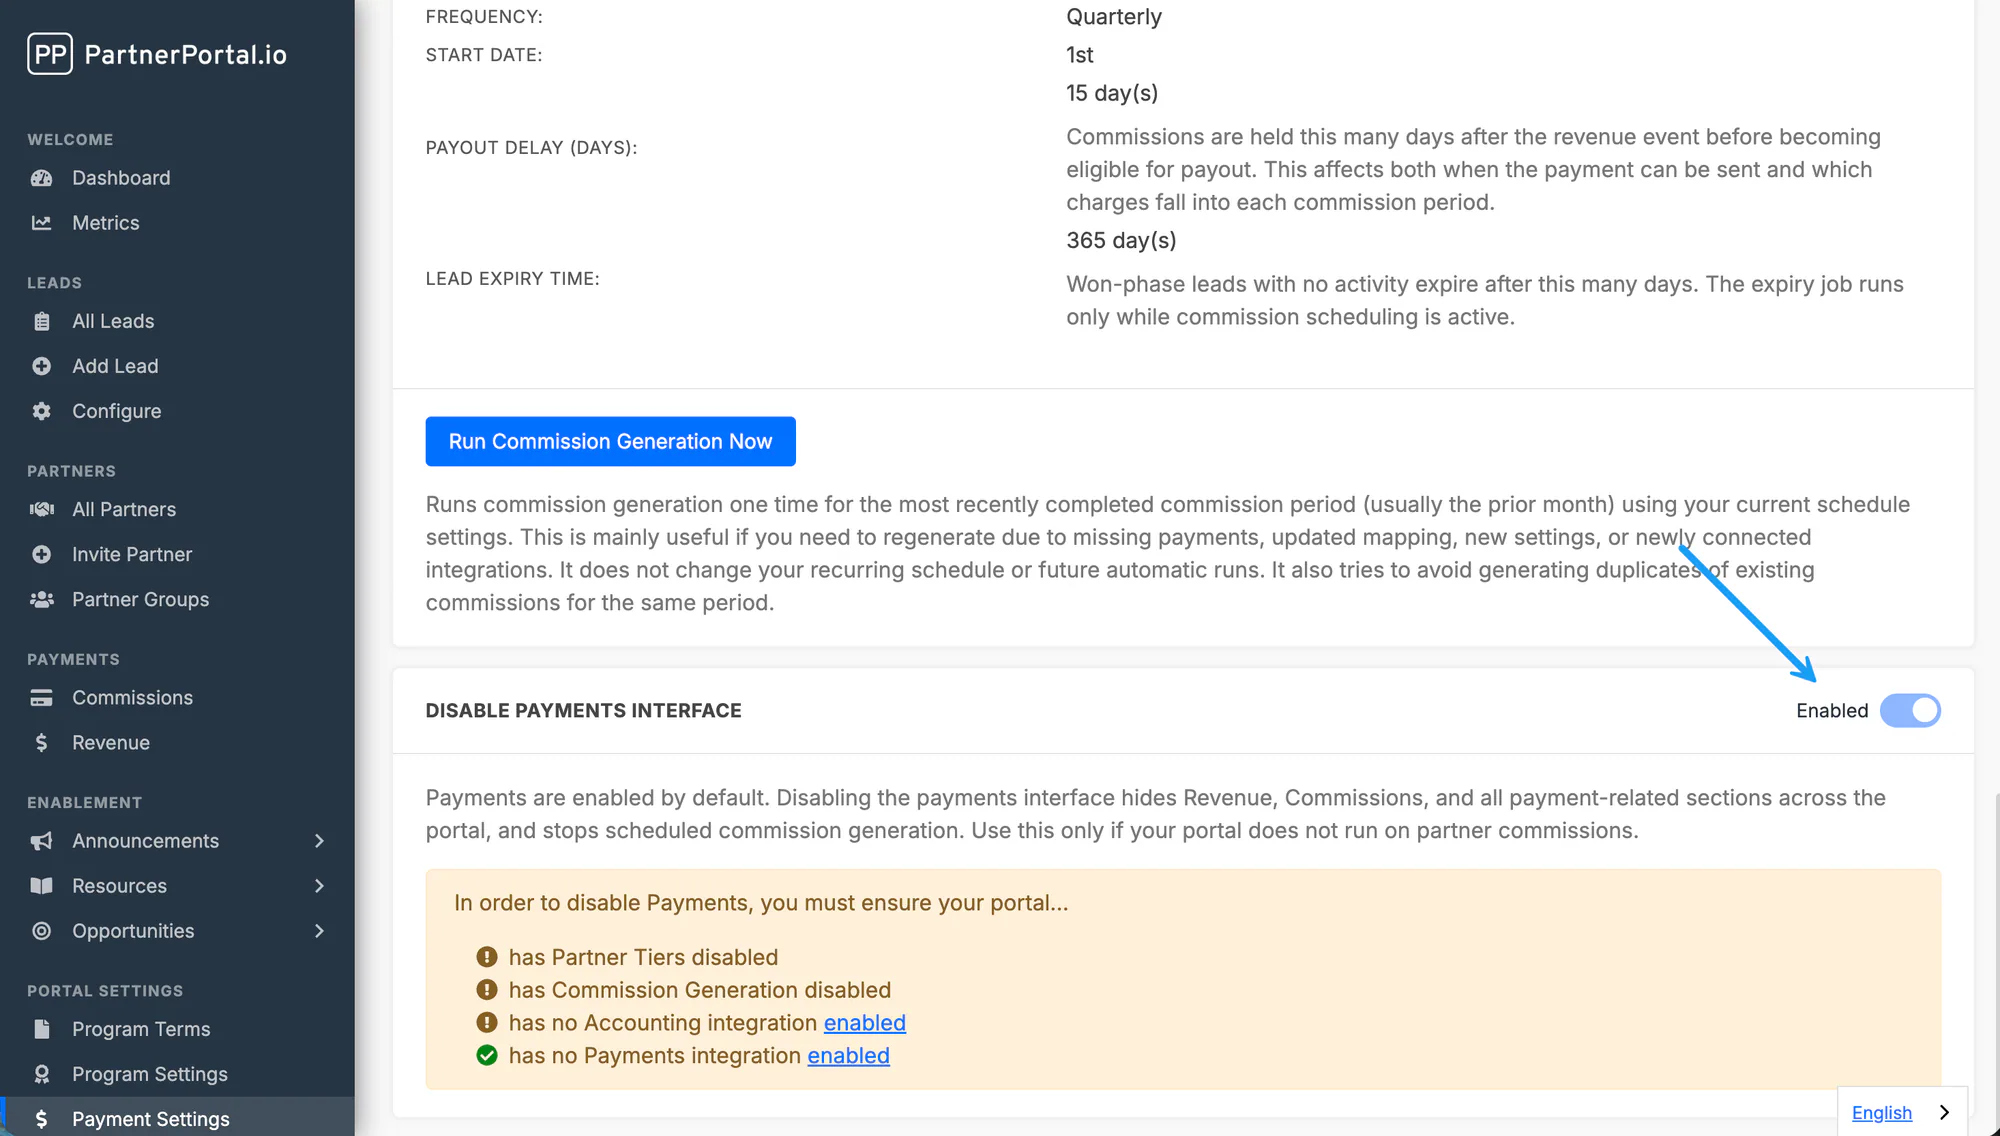
Commission Schedule
Section titled “Commission Schedule”This part controls the timing rules:
- frequency: monthly, quarterly, or in some older portals yearly
- start date: when the cycle starts for yearly schedules
- payout delay: how long PartnerPortal waits before revenue becomes eligible for payout
- payment type: manual or an enabled payments integration such as PayPal
Run Commission Generation Now
Section titled “Run Commission Generation Now”Use the run-now button when you need a one-time generation pass for the most recently completed commission period.
This is useful after fixing revenue, updating mappings, changing settings, or connecting an integration after the normal run should have happened.
Maximum Payout Duration for Won Leads
Section titled “Maximum Payout Duration for Won Leads”This setting caps how long a won lead keeps earning payouts. After a won lead’s close date passes the number of days you set, PartnerPortal marks the lead Expired on its nightly run. Expired leads stop earning payouts and the partner is notified.
- The default for new portals is No limit.
- This cap applies regardless of the commission duration set on your tiers. If your tiers pay recurring commissions for longer than this, or forever, leave it at No limit. Commission duration on your tiers is the right place to control how long a won deal pays.
- Raising the value later does not re-open leads that have already expired. Lowering it expires every won lead already past the new value on the next nightly run, and the app asks you to confirm how many before saving.
- The nightly run only applies this cap while automatic generation is on.
This is separate from expiring leads that never close. For that, see Automatic Lead Expiration.
Disable Payments Interface
Section titled “Disable Payments Interface”Use this only if your portal does not run on partner commissions.
Disabling the payments interface hides Revenue, Commissions, and other payment-related sections across the portal, and stops scheduled commission generation.
Before you can disable payments, your portal must have:
- Partner Tiers disabled
- Commission Generation disabled
- no Accounting integration enabled
- no Payments integration enabled
Once those prerequisites are satisfied, you can turn off the payments interface from the same Payment Settings screen.
If you want the operational steps that go with these settings, see How to Track Revenue, How to Manage Commissions, and How to Pay Commissions.