
How to Manage Your Account
Your PartnerPortal account holds your personal profile and sign-in settings. This page covers how to update your details, reset your password, and turn on two-step verification.
Update Your Profile
Section titled “Update Your Profile”The Profile card on the Account page lets you update your personal contact details.
You can currently edit:
- first name
- last name
- phone number
- email address
Open Account.
In Profile, click Edit.
Update your personal details.
Click Save.
These changes affect your own login and contact information, not the portal-wide company settings.
Reset Your Password
Section titled “Reset Your Password”PartnerPortal supports both an in-app password reset for logged-in users and a login-screen reset flow if you cannot sign in.
Reset your password from the Account page
Section titled “Reset your password from the Account page”If you are already logged in:
Open Account.
In Security, click Reset next to Reset Password.
Follow the password-reset flow and sign in again with the new password.
Reset your password from the login screen
Section titled “Reset your password from the login screen”Use this flow if you cannot sign in or if you were invited to the portal but have not created your password yet.
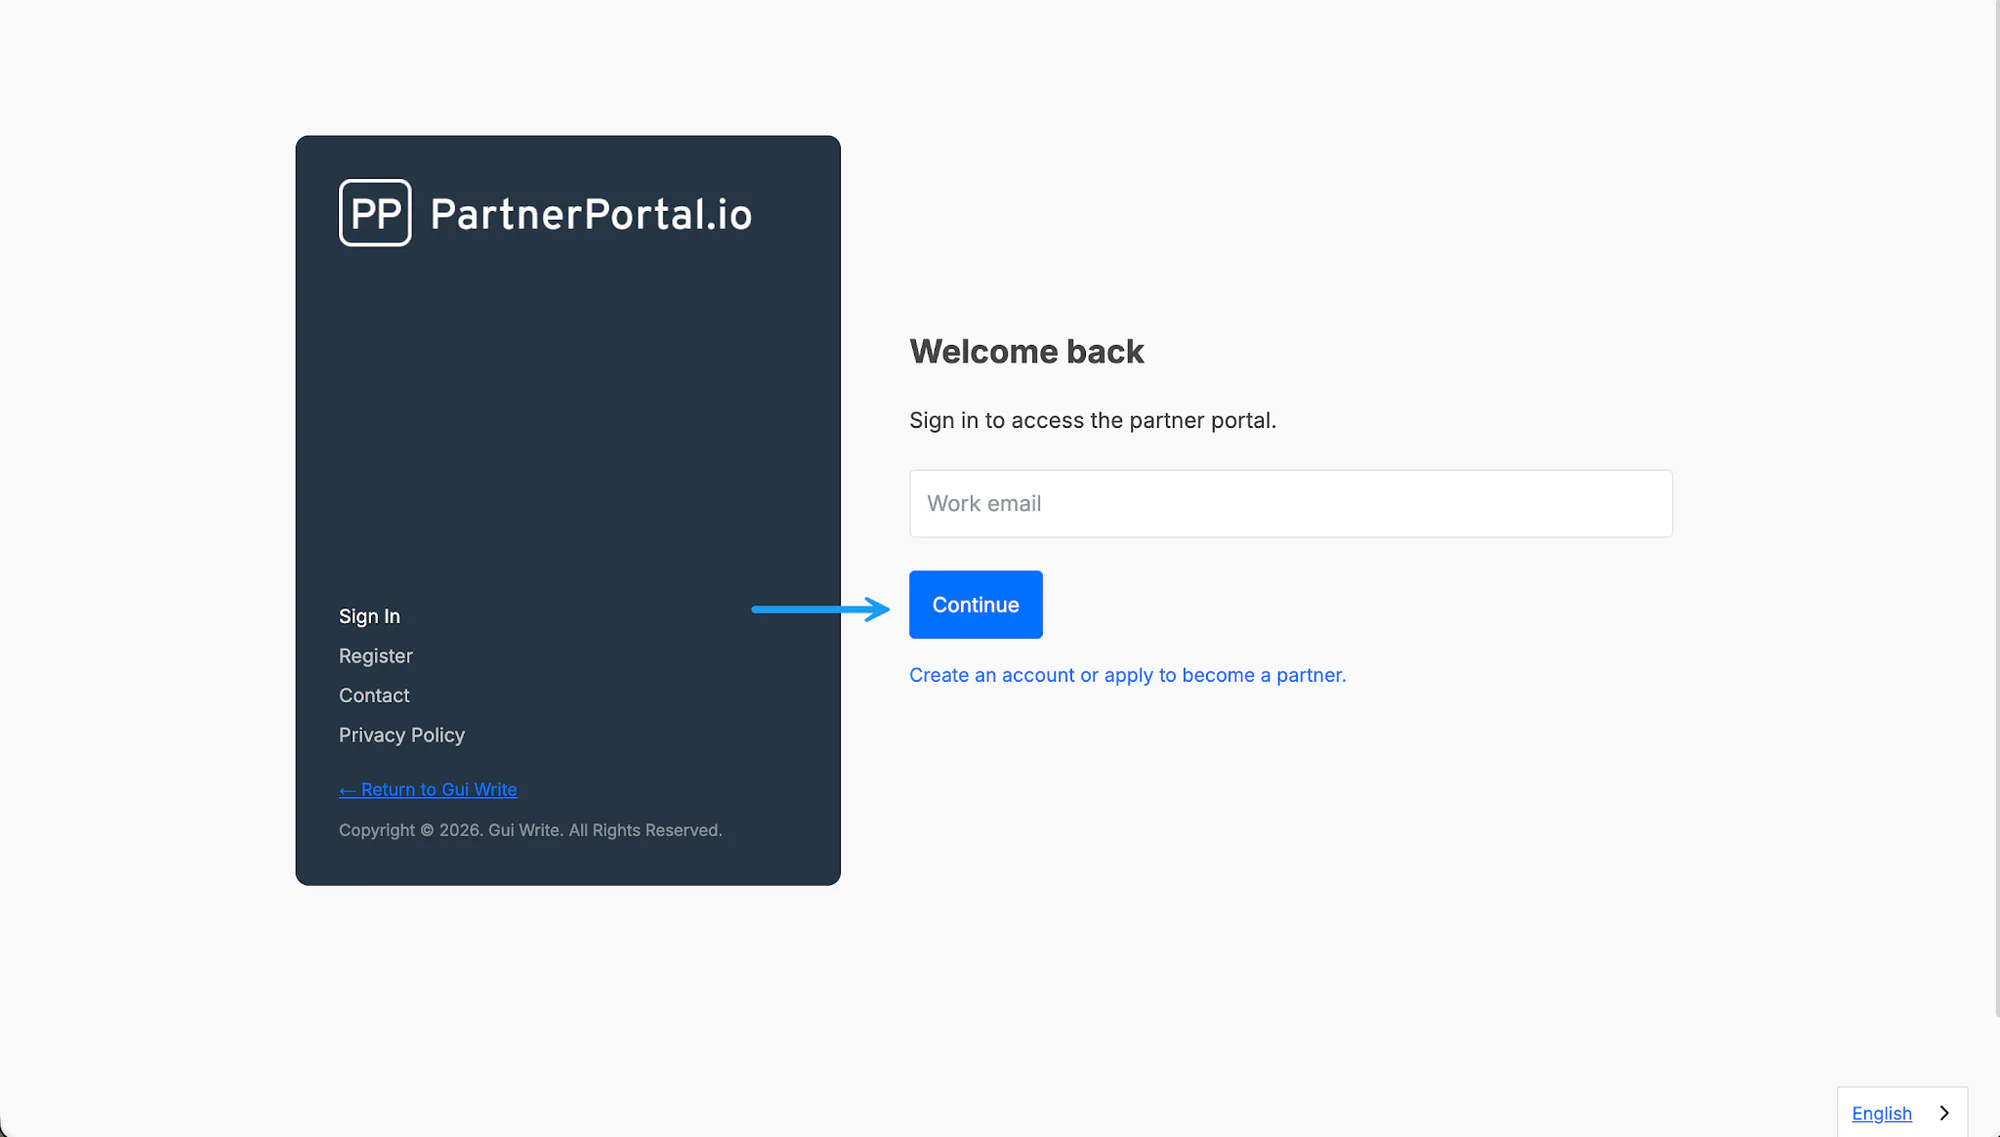
Open your portal login page.
Enter your email address and click Next.
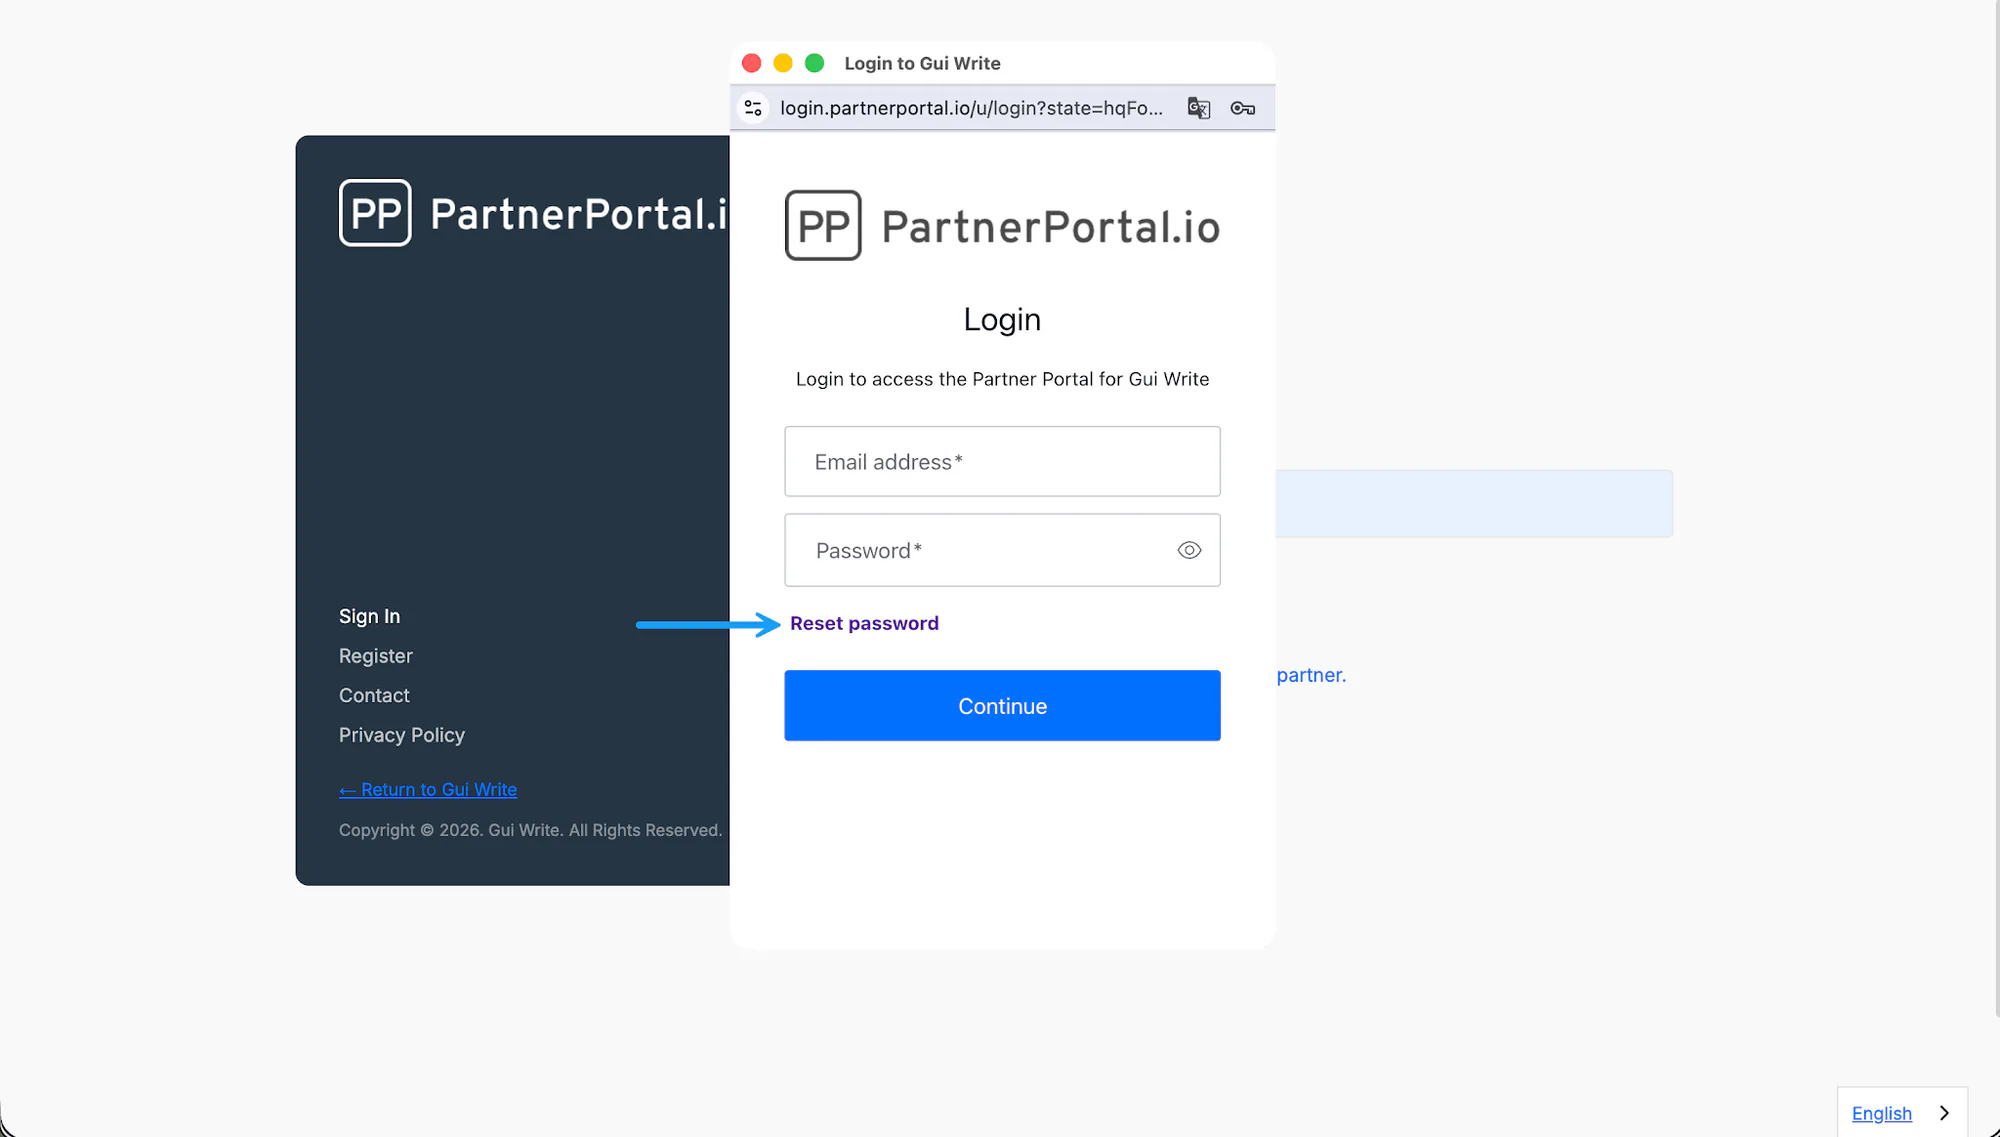
In the popup window, choose Reset Password.
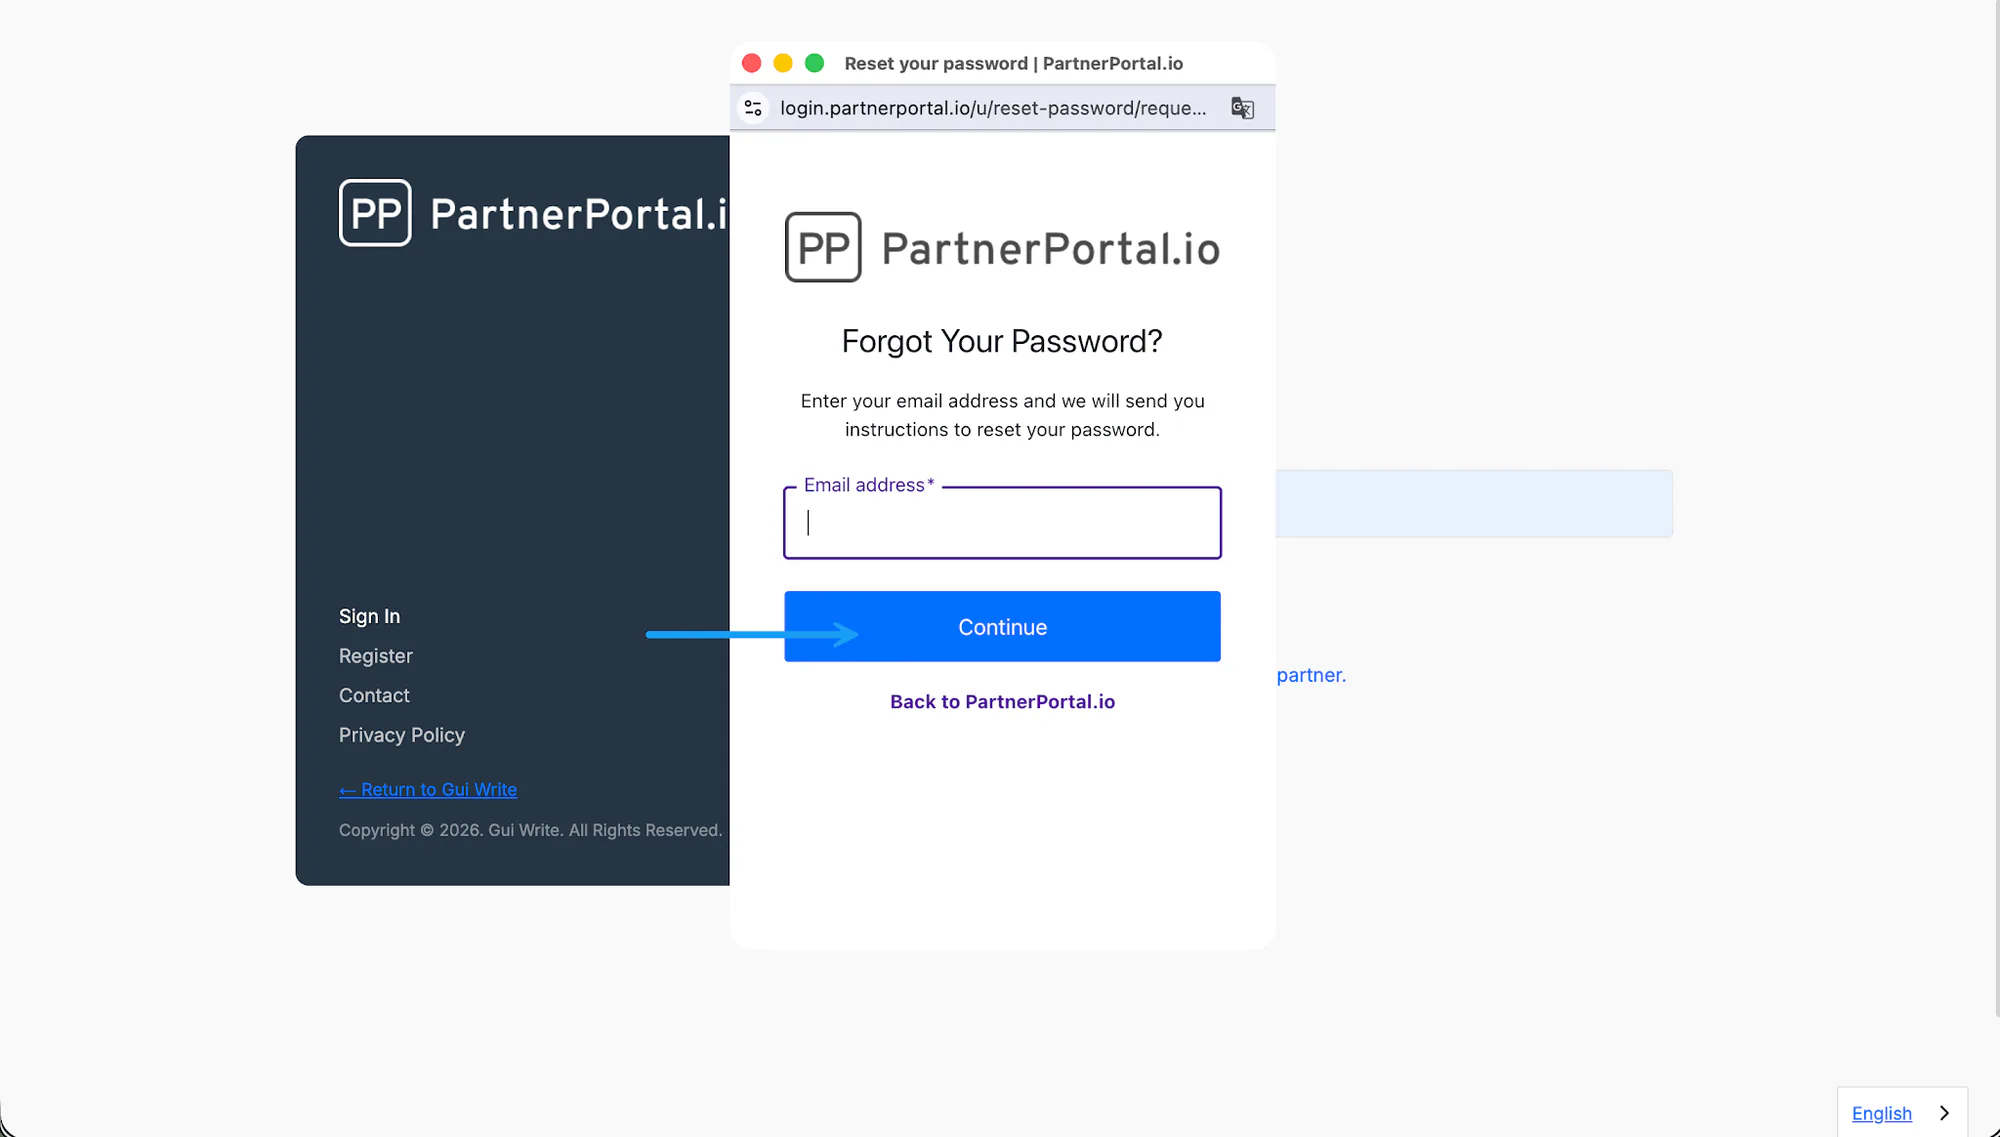
Click Continue to send the reset email.
Open the email and follow the link to create a new password.
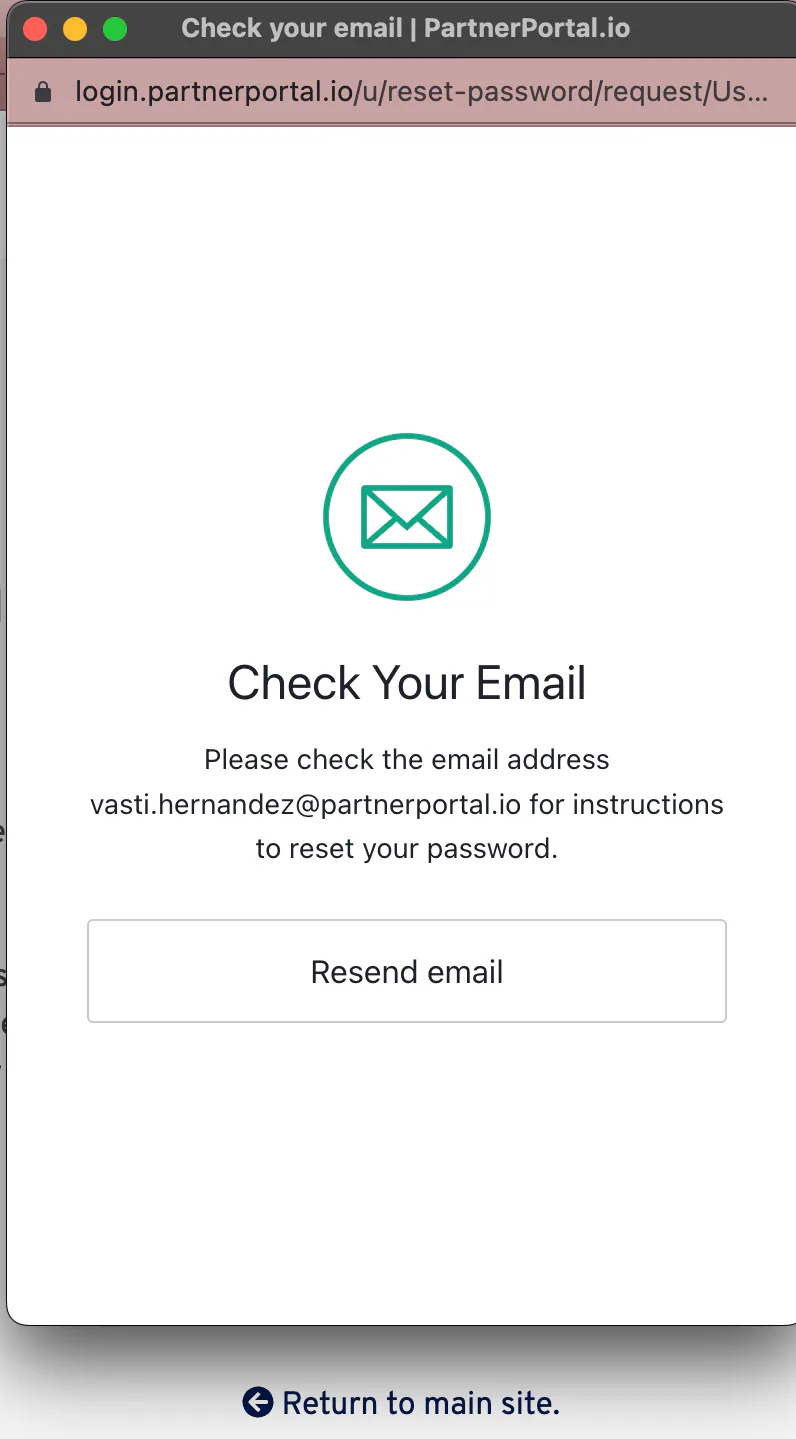
If you do not receive the reset email, check your spam or junk folder first. If the link has expired, repeat the reset flow and request a fresh email.
Set Up Two-Step Verification
Section titled “Set Up Two-Step Verification”PartnerPortal supports two-step verification from the Security card on the Account page.
Open Account.
In Security, click Enable or Change next to Two-Step Verification.
Complete the verification flow you are prompted to set up.
After setup, the page shows whether MFA is enabled and which factor type is currently active.
Manage Notification Settings
Section titled “Manage Notification Settings”PartnerPortal lets each user manage their own notification preferences from the Account page.
These settings are personal to your account. One user cannot turn notifications on or off for another user from this screen.
Open Account.
Find the Notification Settings card.
Turn individual notifications on or off based on what you want to receive.
This applies to both internal users and partner-side users who have access to notification settings on their account page.
These toggles control emails only. The in-app notifications behind the bell in the top-right corner of the portal always show your activity, so you can turn off the email types you do not need without missing anything. See How notifications work in PartnerPortal.
The list includes the two scheduled monthly emails: the Monthly Program Digest for admins and staff, and the Monthly Activity Summary for partners and their users. Turning one off here stops it for you only. The portal-wide switches are under Portal Setup → Other → Partner Notifications. See Monthly emails for what each contains.
Review PartnerPortal’s Legal Terms
Section titled “Review PartnerPortal’s Legal Terms”If you are a portal administrator or staff member, your Account page includes a Legal card with PartnerPortal’s terms, privacy policy, and data processing agreement. Use it to review the documents at any time and to accept the Terms of Service.
The card links to:
- Terms of Service
- Privacy Policy
- Data Processing Agreement
If you haven’t yet accepted the current Terms of Service, the card shows an Accept button, and a notice also appears on your dashboard.
Open Account.
In the Legal card, open any document you want to review.
Click Accept to record your acceptance.
Acceptance is recorded per person, so each administrator and staff member accepts for their own account. After you accept, the card shows the date you accepted, and the dashboard notice goes away. If PartnerPortal updates its Terms of Service, the Accept button and dashboard notice reappear until you accept the new version.
Zapier
Section titled “Zapier”If your portal has API access, the Account page includes an Integrations → Zapier card. It shows the Organization Name you use to connect PartnerPortal inside Zapier — your portal subdomain plus your company ID (for example, acme-1a2b3c4d5e6f).
Copy this value whenever Zapier asks for your Organization while connecting your PartnerPortal account, so Zapier knows which portal to link to.
For the full walkthrough — creating and updating leads, adding comments, finding leads, and triggering Zaps from lead events — see How to Integrate Zapier with PartnerPortal.
Add Your Payment Details as a Partner
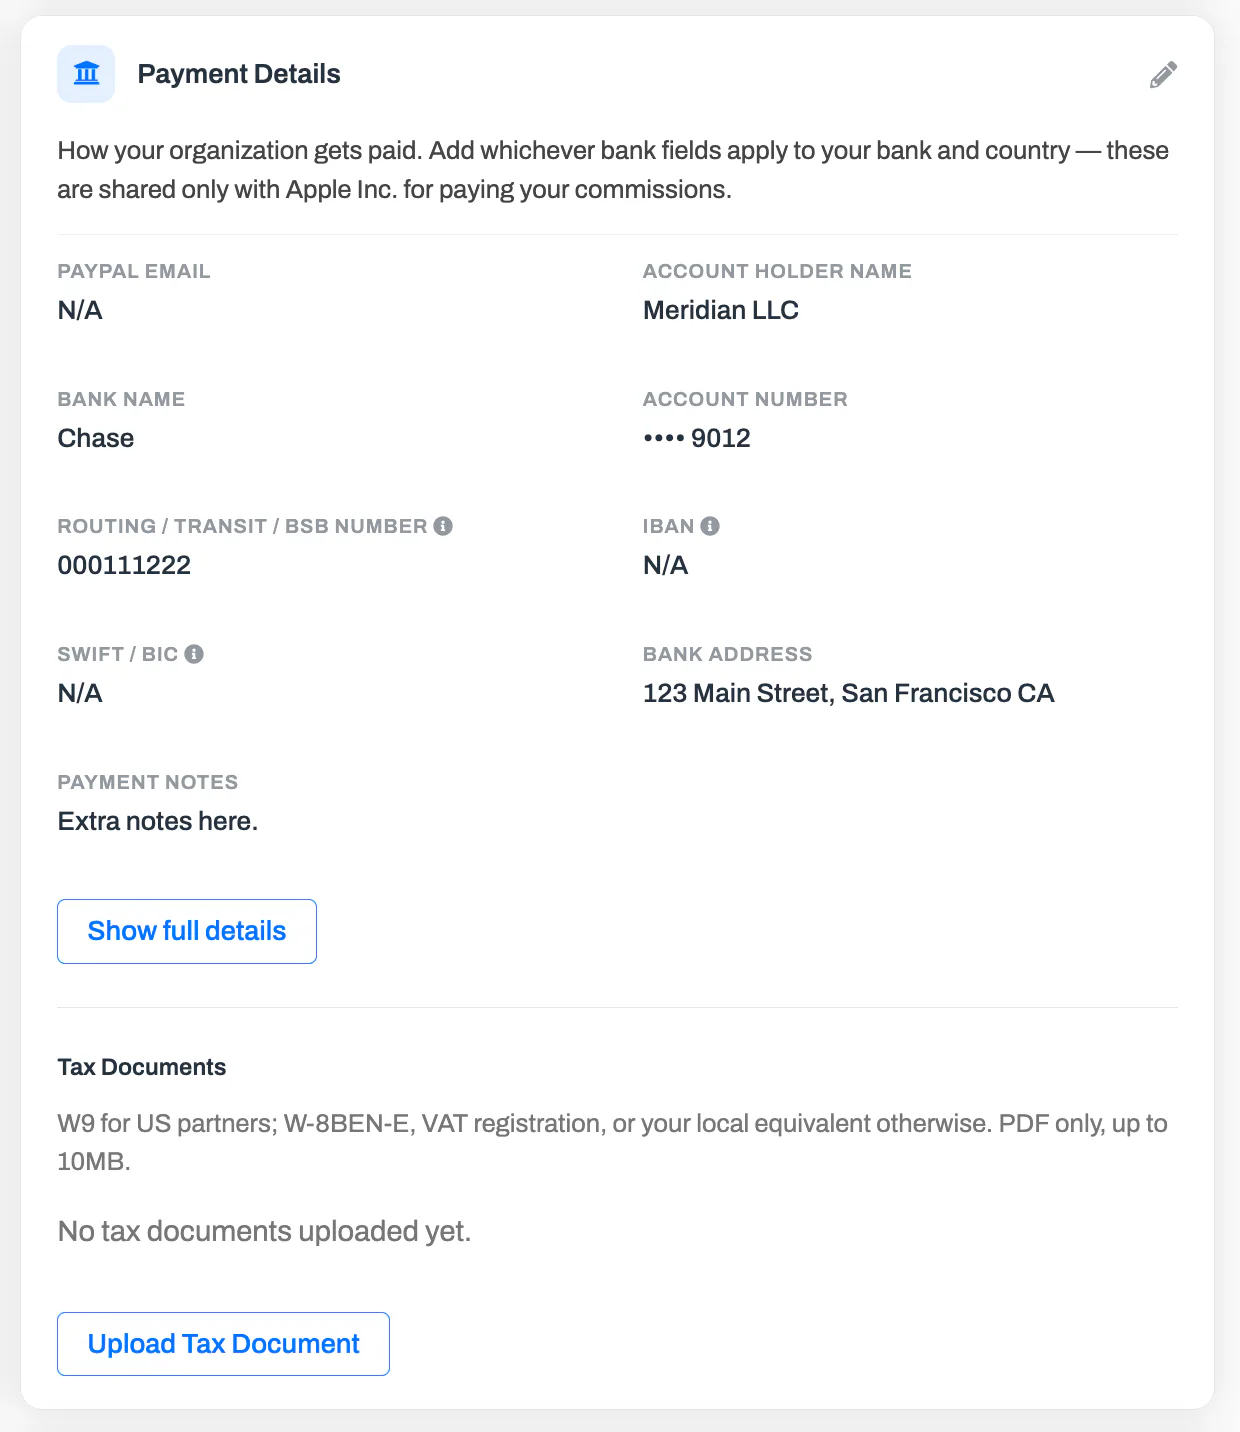
Section titled “Add Your Payment Details as a Partner”If you are a partner owner on a portal with payments enabled, your Account page includes a Payment Details card. This is where you tell the company how to pay your commissions — PartnerPortal shares these details only with the portal that runs your program, and never uses them to move money itself.
You can provide:
- a PayPal Email, if the program pays through PayPal
- bank details: Account Holder Name, Bank Name, Account Number, Routing / Transit / BSB Number, IBAN, SWIFT / BIC, and Bank Address
- Payment Notes for anything else needed to pay you, such as an intermediary bank or a payment reference
Every field is optional — fill in whichever apply to your bank and country. A US bank account typically needs the routing and account number; a European account typically needs the IBAN.
Open Account.
In Payment Details, click the pencil icon to edit.
Fill in the fields that apply to your bank.
Click Save.
After saving, your account number and IBAN display masked, showing only the last four characters. Click Show full details to view the full values again.
Upload a tax document
Section titled “Upload a tax document”The same card includes a Tax Documents section for the tax paperwork programs commonly require — a W9 for US partners, or a W-8BEN-E, VAT registration, or your local equivalent otherwise.
In the Payment Details card, find Tax Documents.
Click Upload Tax Document and choose your file. Uploads are PDF only, up to 10MB.
The document appears in the list immediately — there is no separate save step.
You can open an uploaded document by clicking its name, or remove it with the delete icon.
Additional Account Settings for Partner-Side Users
Section titled “Additional Account Settings for Partner-Side Users”Some partner-side users, especially partner owners or partner admins, may see extra cards on the Account page beyond Profile and Security.
Depending on your permissions, you may also be able to:
- update your partner organization’s company name and mailing address
- add payment details and tax documents (see Add Your Payment Details as a Partner)
- review your notification settings
- view the Zapier organization name used for the portal’s Zapier integration