
How to Add Partners
There are several ways to add partners to PartnerPortal, depending on how hands-on you want the onboarding process to be.
| Approach | Best for | Who starts the process | Approval required |
|---|---|---|---|
| Public registration | Larger programs where partners should apply on their own | The partner | Yes by default, unless you approve applications automatically |
| Direct invite | Controlled onboarding, VIP partners, or one-off additions | You | No, the partner is added as soon as they accept the invite |
| Bulk invite | Adding many partner companies at once | You | No, invited partners are added as they accept |
If your partners are people rather than companies — consultants, freelancers, or affiliates working under their own name — see Add Individuals as Partners.
Let Partners Apply Through the Registration Screen
Section titled “Let Partners Apply Through the Registration Screen”Use the public registration flow when you want partners to apply to join your program themselves.
Share your partner registration link. The URL follows this format:
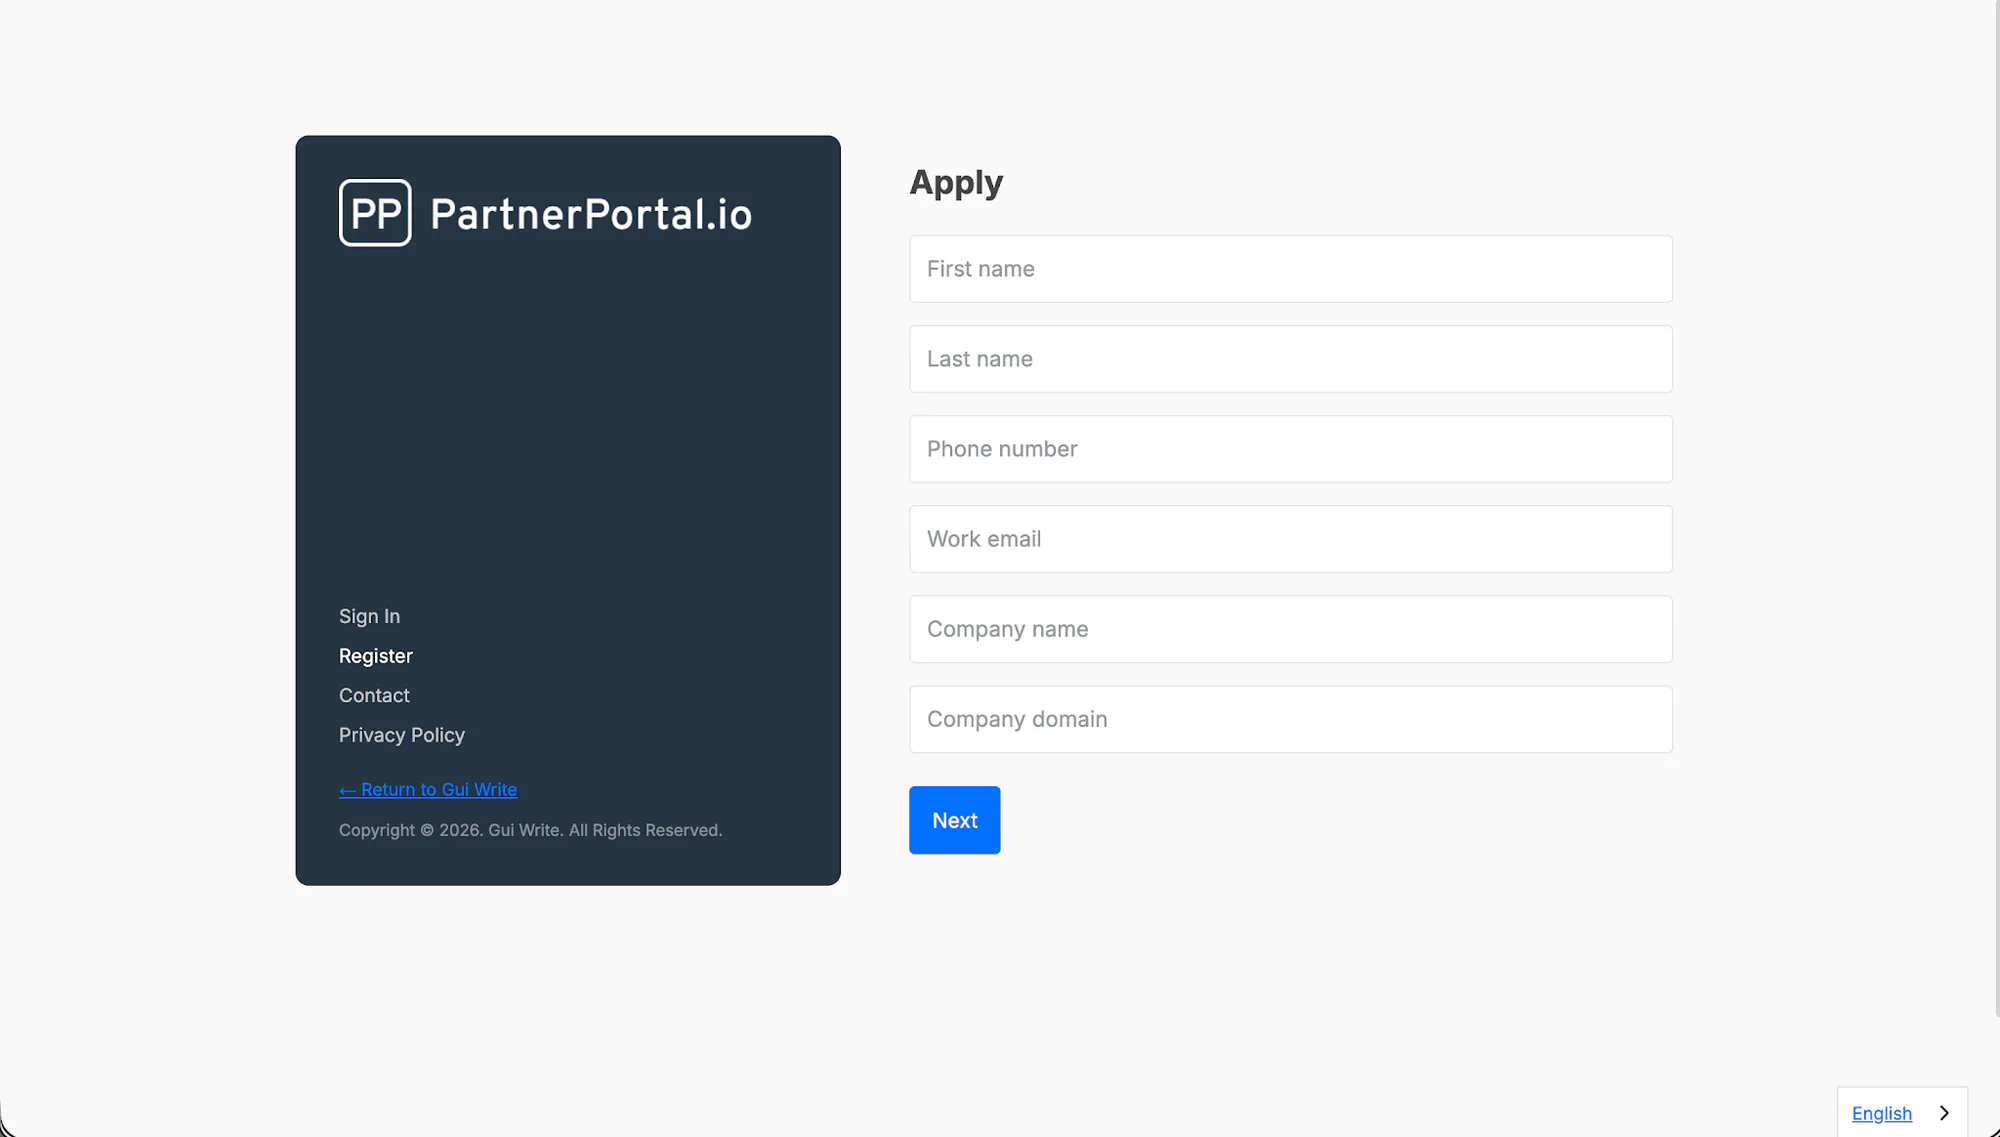
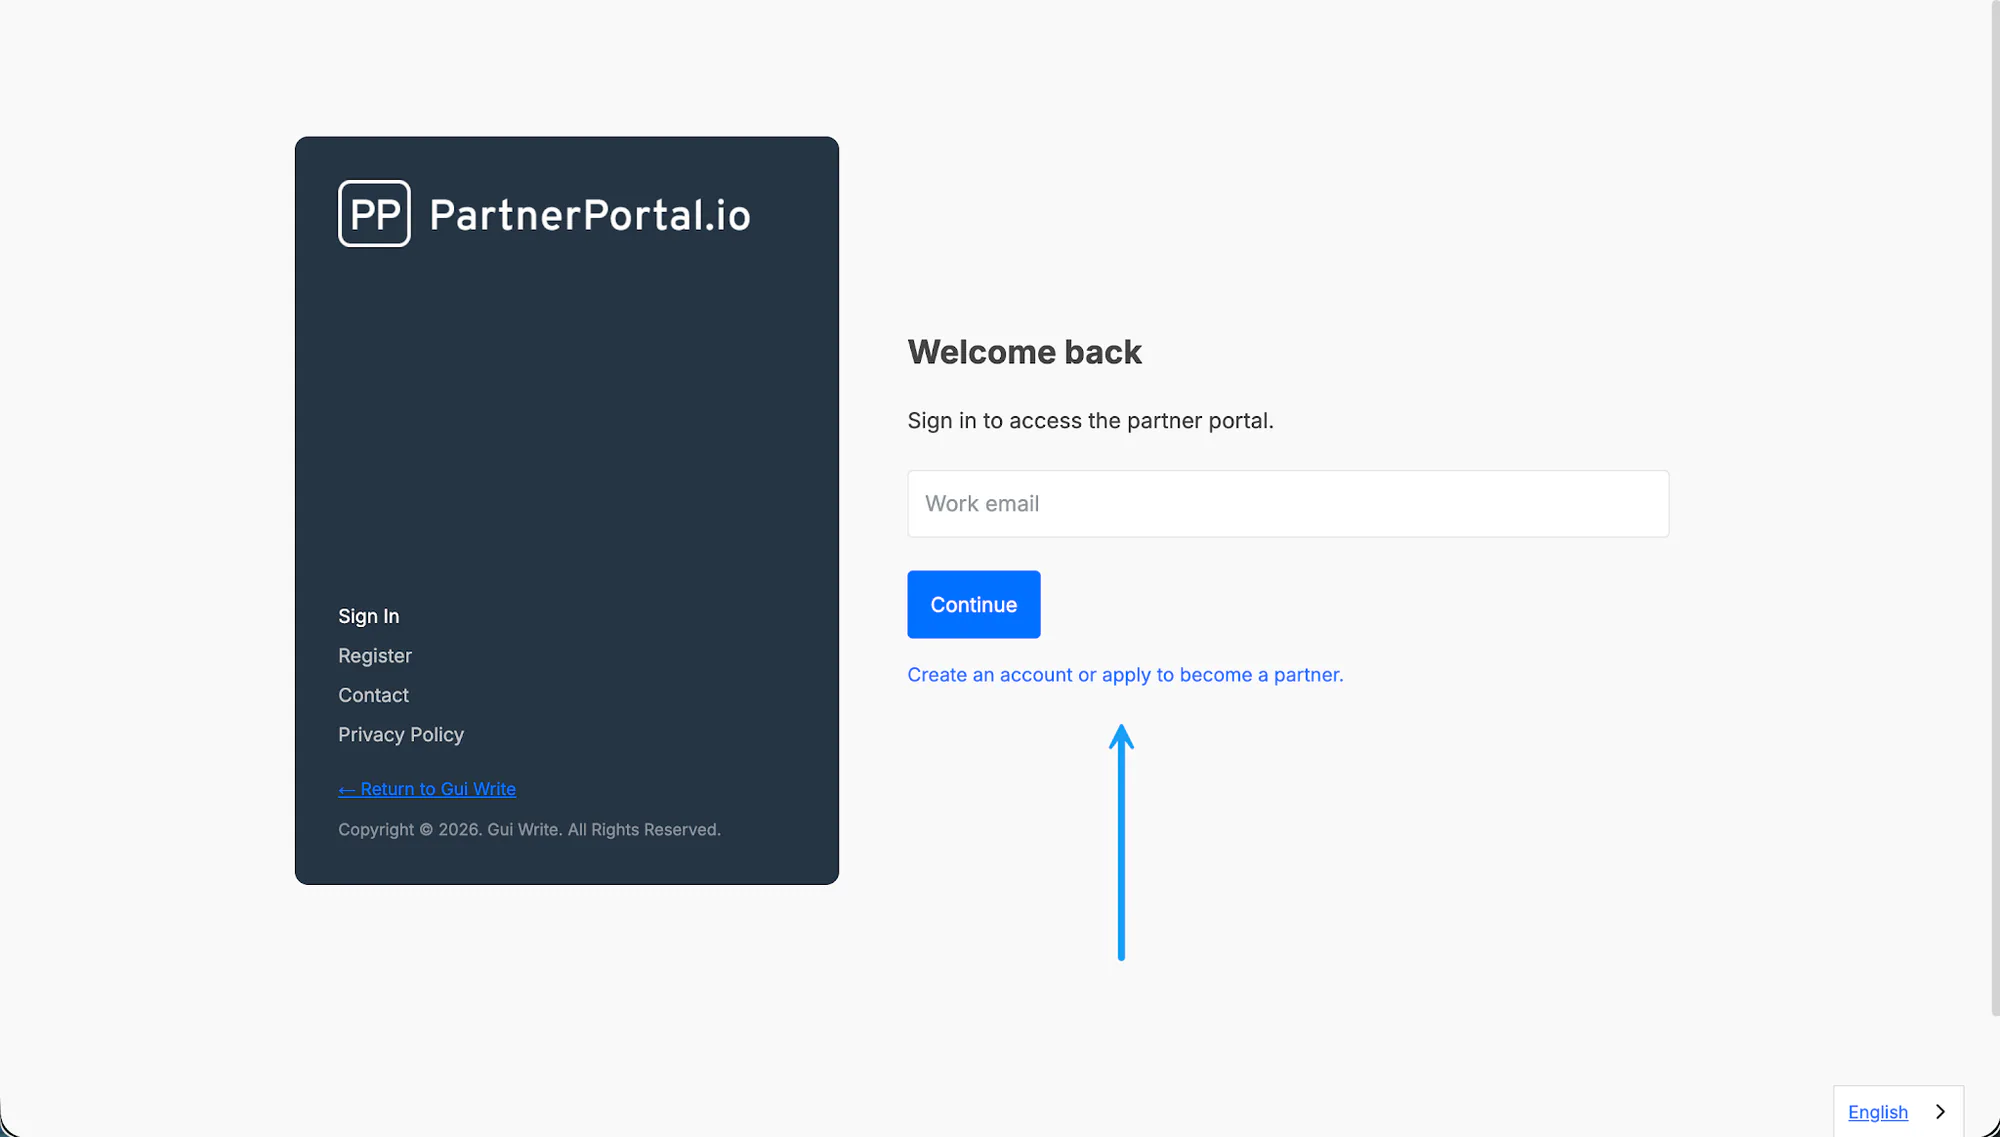
yourcompanyname.partnerportal.io/registerPartners can also reach the same flow from your portal sign-in page by clicking the Create an account or apply to become a partner link.
The partner completes the registration form and submits it.
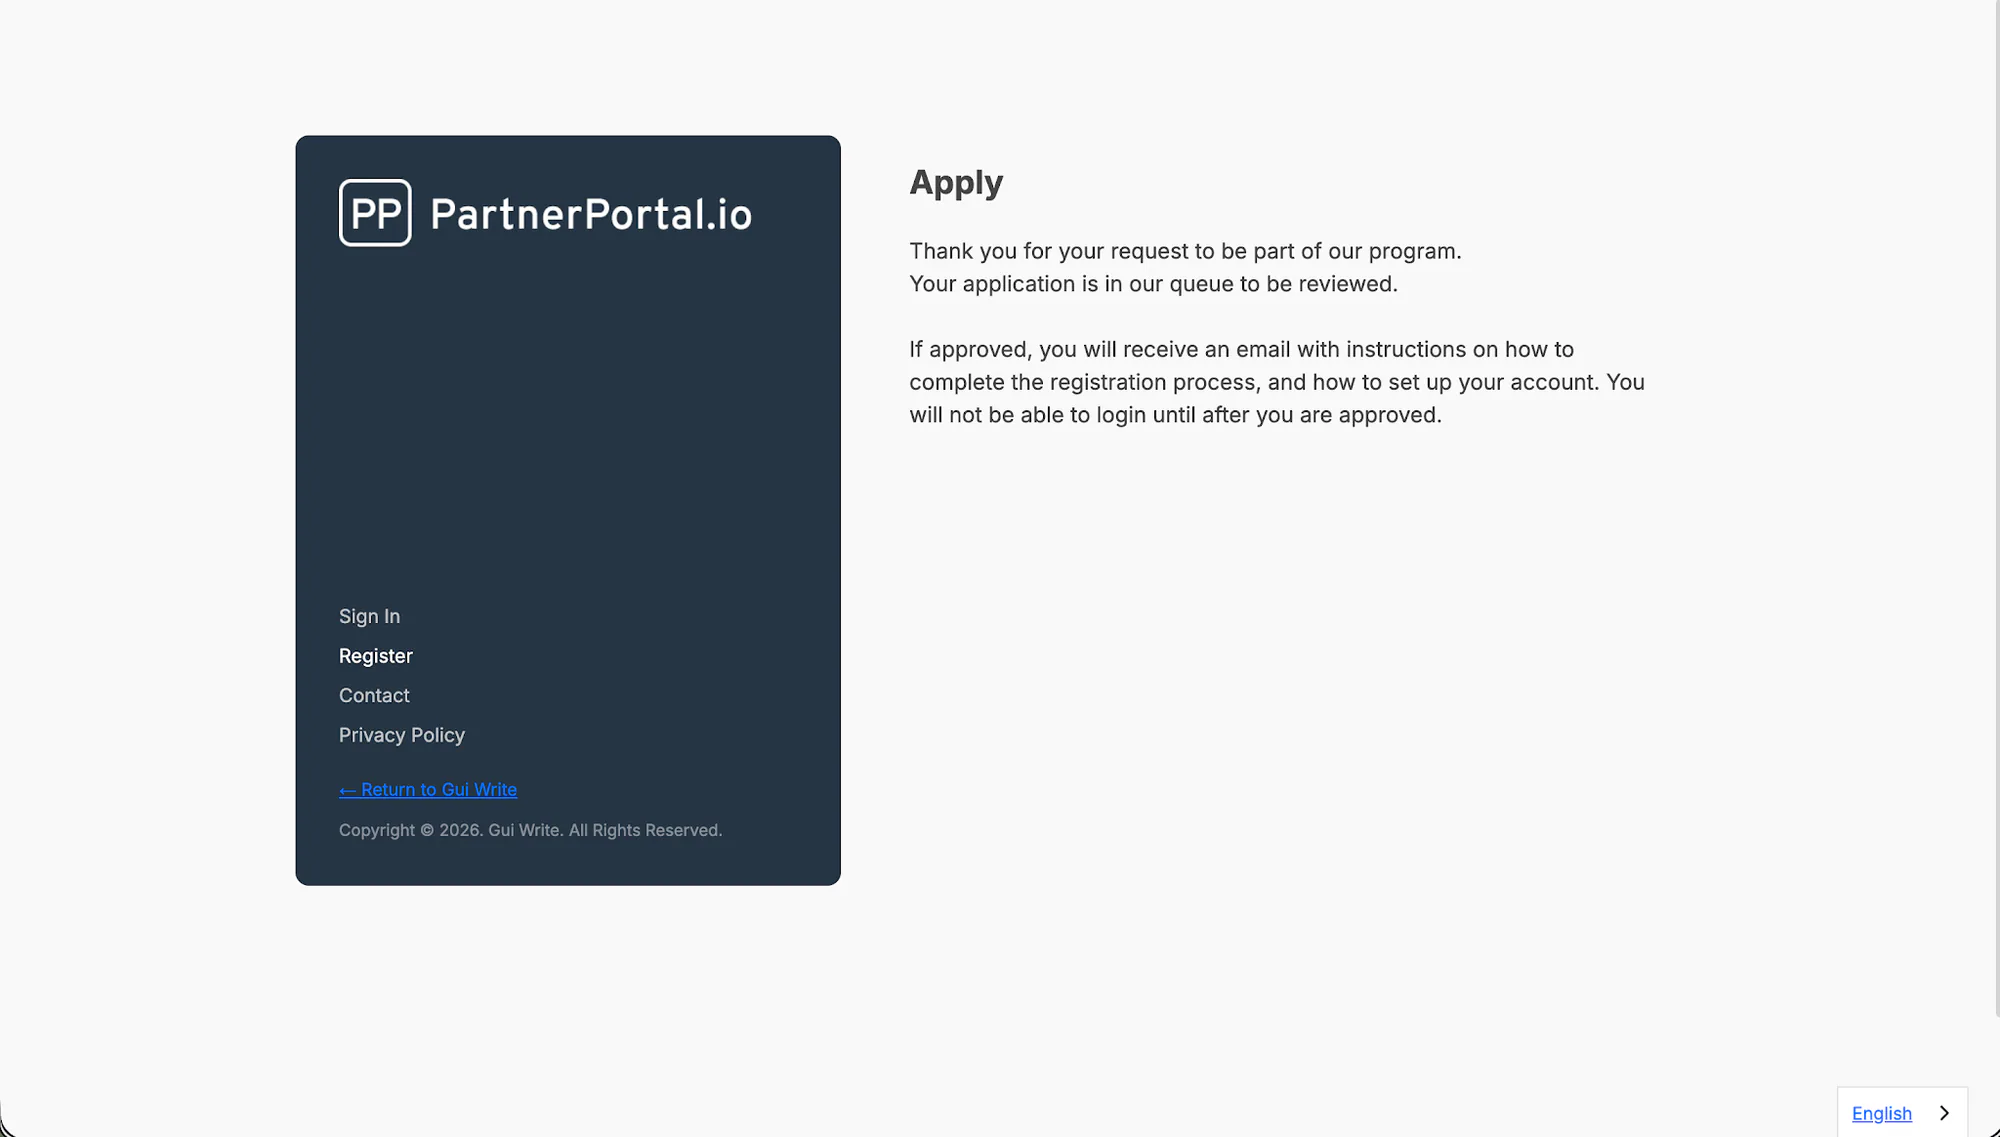
Review the pending application in your portal and approve or decline it. If your portal approves applications automatically, this step is skipped and the partner gets access as soon as they submit.
Send a Group-Specific Registration Link
Section titled “Send a Group-Specific Registration Link”If you use partner groups, you can share a registration link that drops applicants straight into a specific group. It’s the same public application form — applicants simply land in the group you chose instead of arriving ungrouped, so you don’t have to sort them by hand after they apply.
For example, a program with separate Resellers and Referral Partners groups can share a different link for each, and every applicant is filed into the right group automatically.
Open Partners → Partner Groups and select the custom group you want applicants to join.
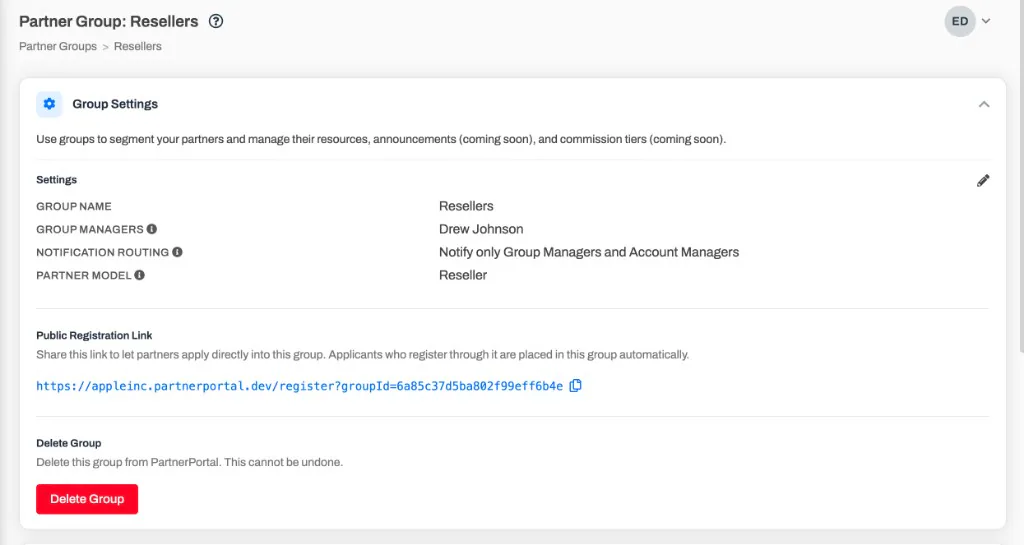
In the group’s settings, find the Public Registration Link section and copy the link.
Share that link wherever you recruit partners for this group.
The link is your normal registration URL with the group already built in:
yourcompanyname.partnerportal.io/register?groupId=...
Applicants who use it complete the usual registration form and follow the same approval flow as any other public application — they wait for your review unless you approve applications automatically. Once approved, they are placed in that group.
If the link is ever broken — for example, the group was deleted after you shared it — the applicant can still register. They are simply added without a group, and you can assign one afterward, so no application is lost.
Invite Partners Directly
Section titled “Invite Partners Directly”Use direct invites when you want to create the partner company yourself instead of asking them to apply through the public form.
Open Partners and choose Invite Partner.
Fill in the required company and contact details.
Optionally, choose a partner group to add the partner to. If the group has its own program terms, the invited partner is asked to agree to those instead of your portal-wide terms.
Send the invite. The partner receives an email with instructions to finish account setup.
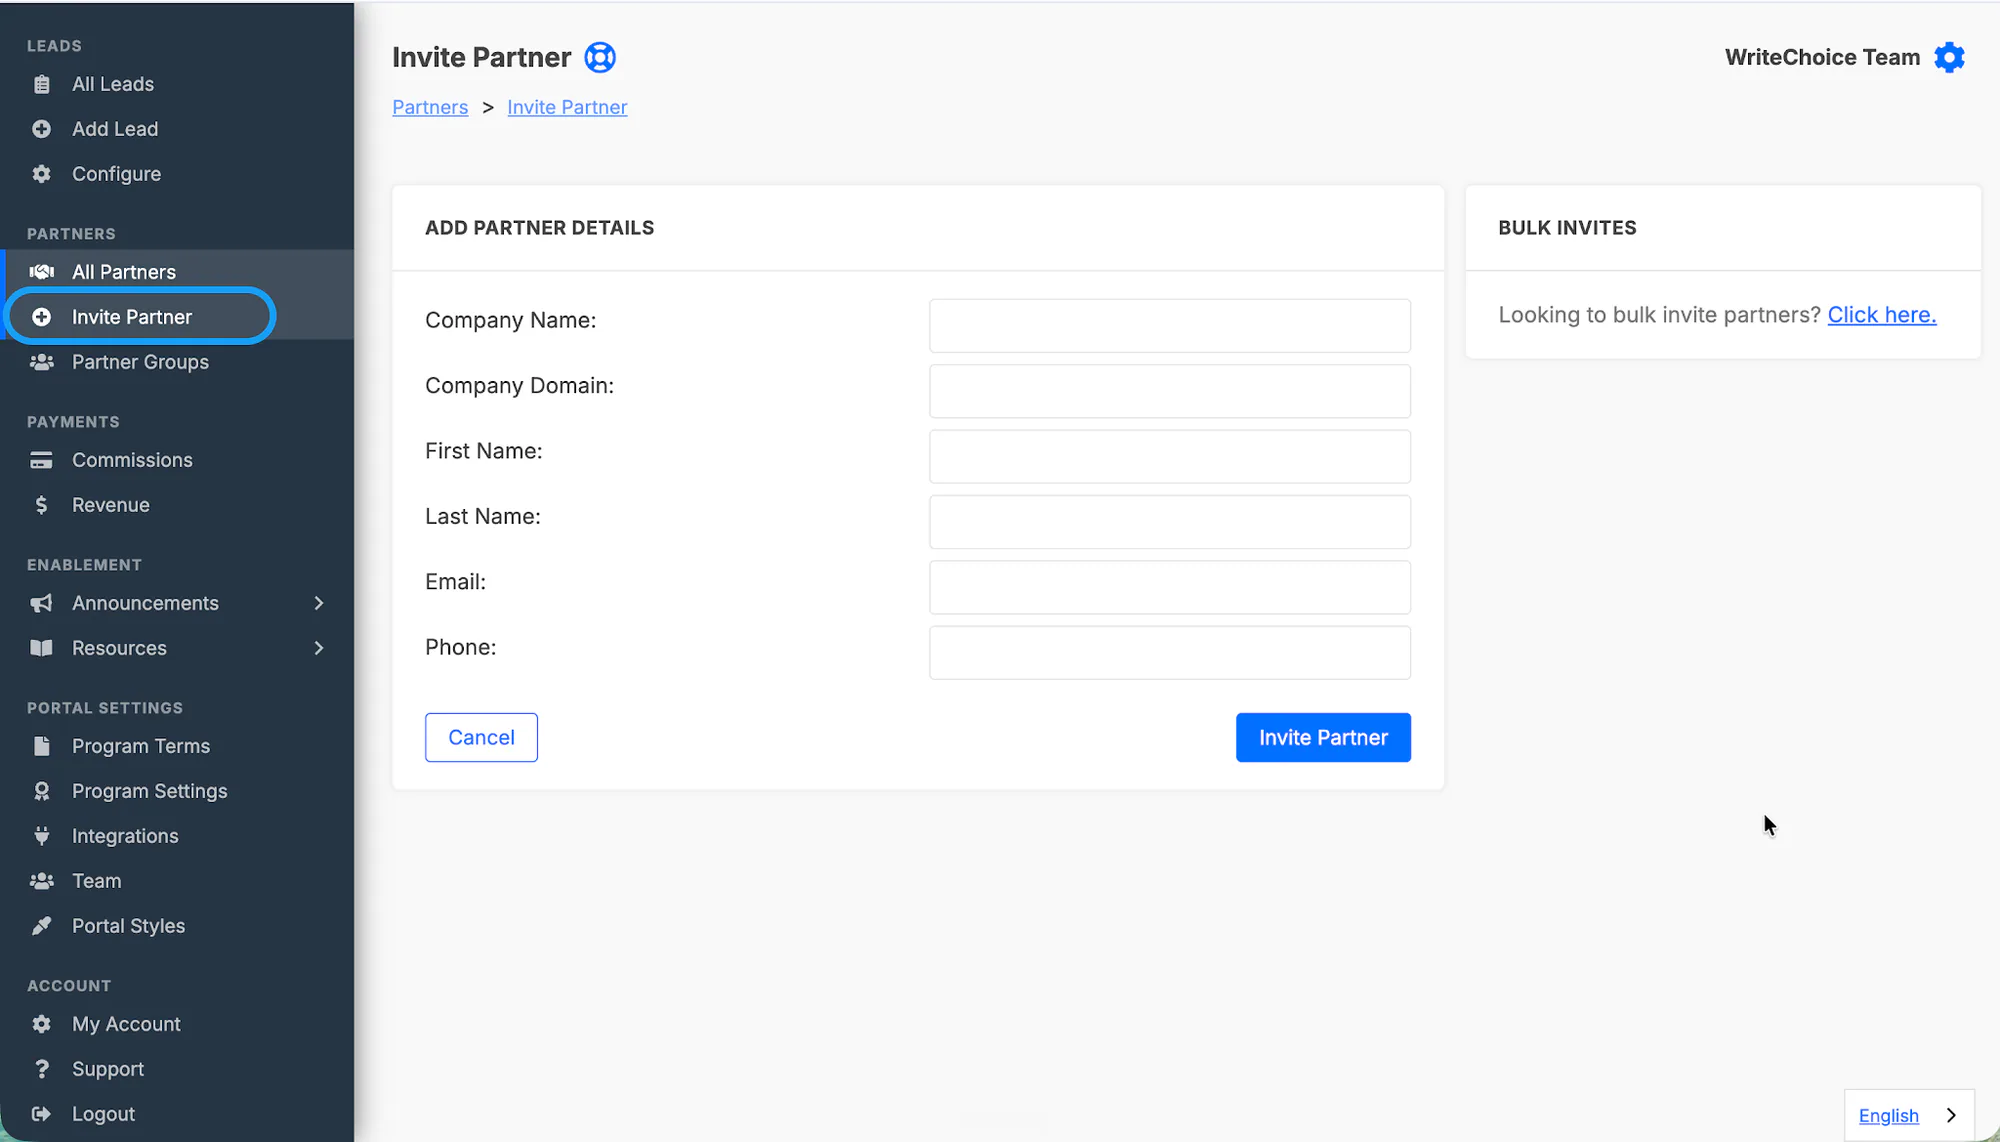
Direct invites skip the manual approval step. Once the invited contact opens the invitation and finishes setup, the partner is added to your portal.
Bulk Invite Multiple Partners
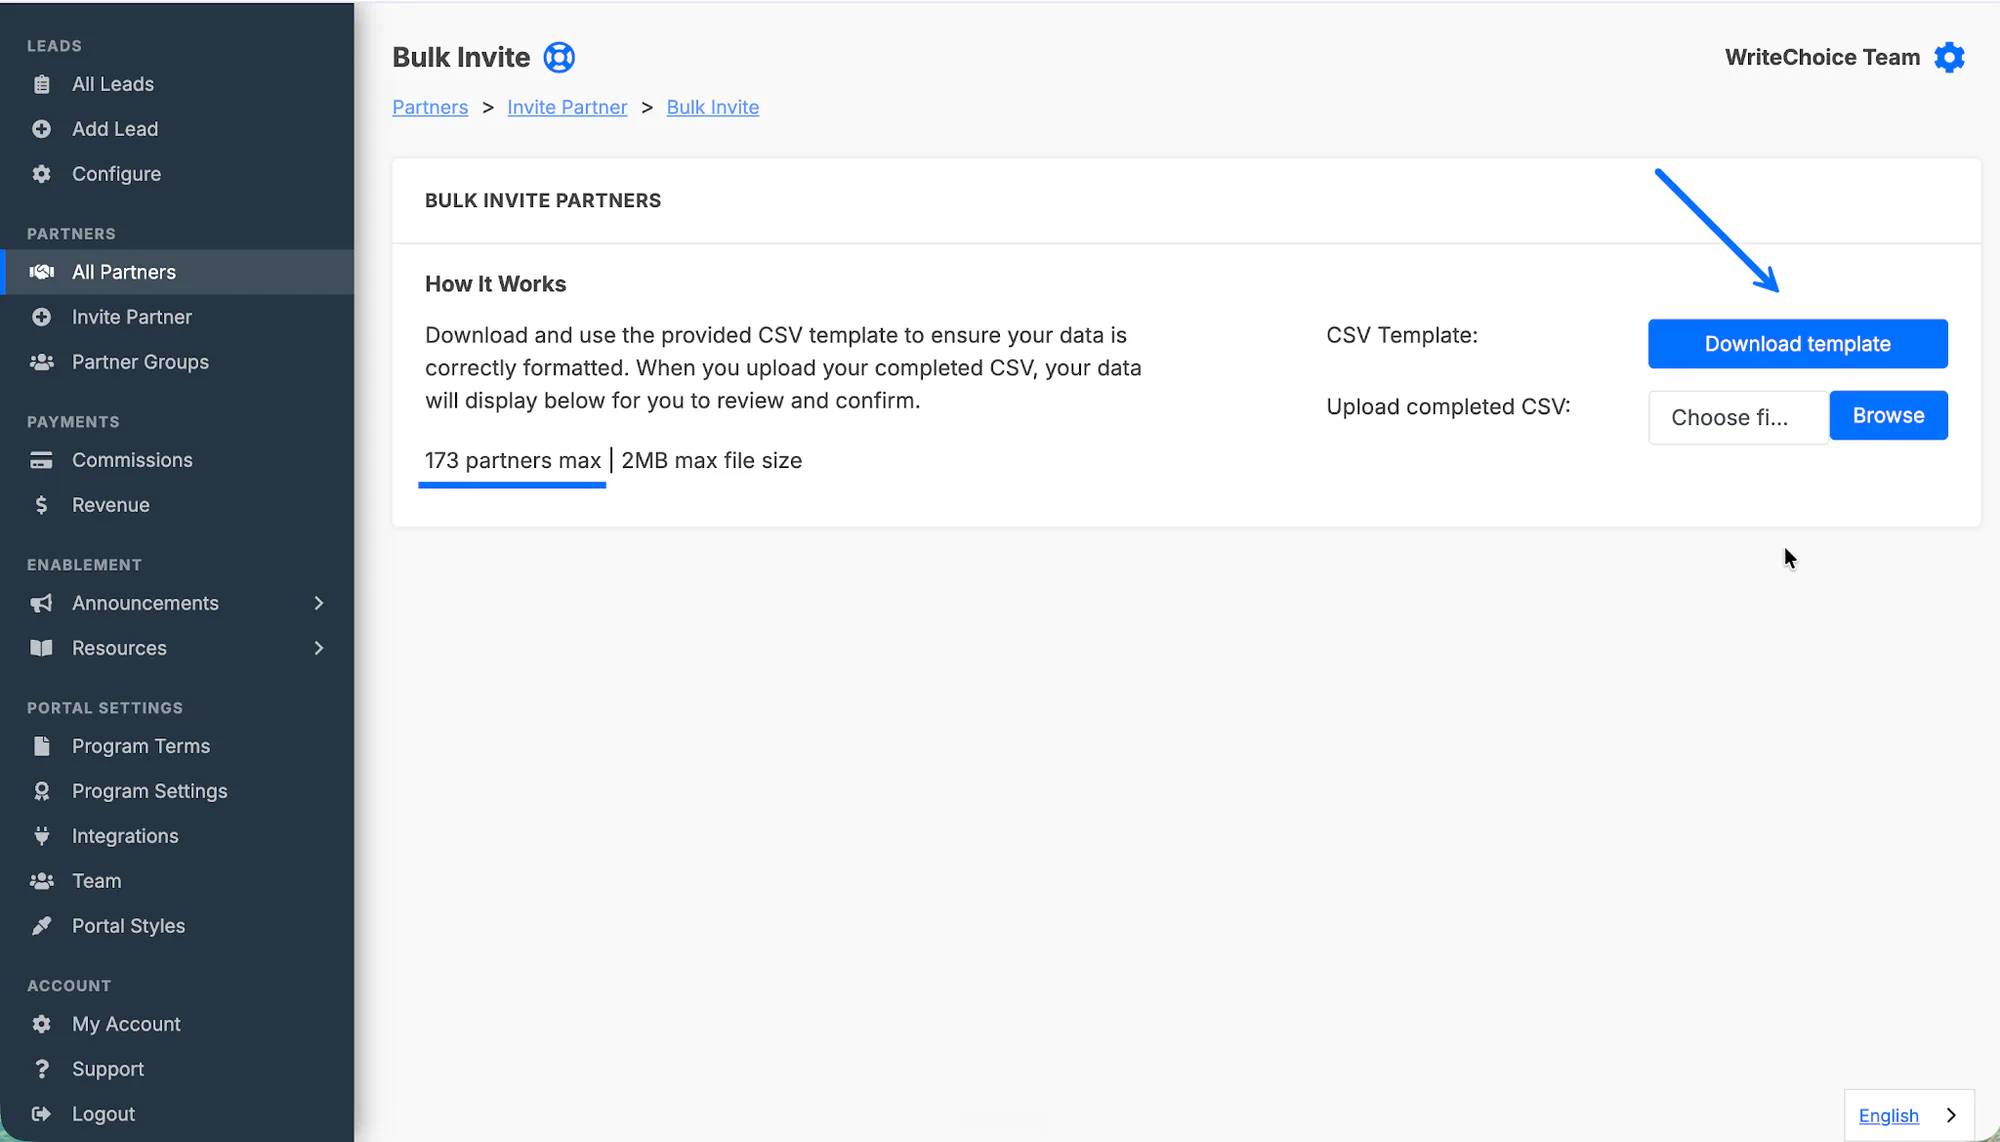
Section titled “Bulk Invite Multiple Partners”If you need to add many partner companies at once, use the CSV bulk invite flow instead of sending one invite at a time.
Open the bulk invite flow from the Invite Partner area.
Download the CSV template.
Fill in your partner information using the template’s columns exactly as provided.
Upload the CSV and review any validation errors before completing the import.
Add Individuals as Partners
Section titled “Add Individuals as Partners”Some partner programs are built around people rather than companies. PartnerPortal can accept an individual partner — a consultant, freelancer, or affiliate working under their own name — without the company name and company domain that partners normally have to supply.
This is turned off until you turn it on, under Portal Setup -> Other in the Partner Applications card. It is off by default because the company domain does useful work — it is what stops several people from one company each creating their own duplicate partner account. Read the warning below before you enable it.
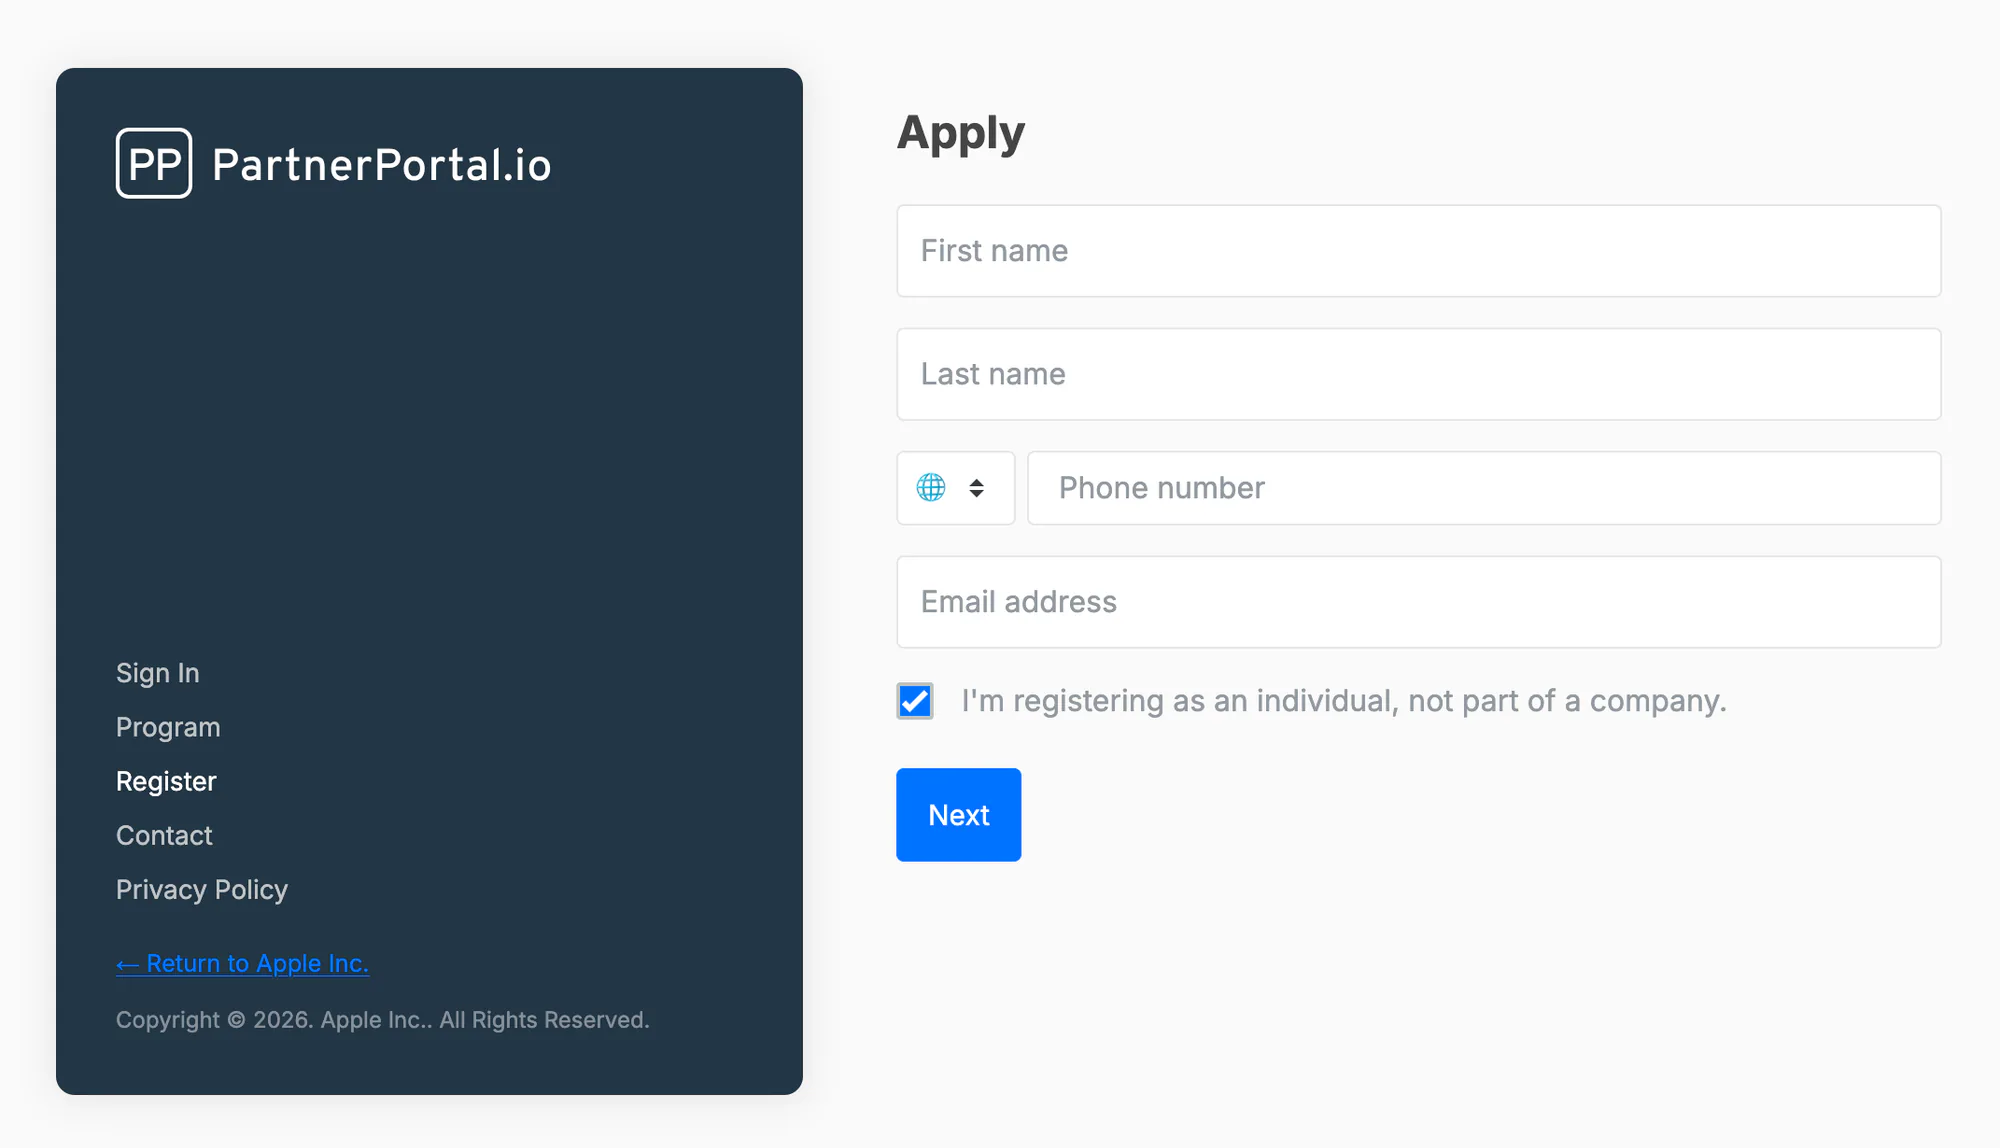
With the setting on, your application form gains a checkbox: I’m registering as an individual, not part of a company. Ticking it hides the company name and company domain fields and leaves the rest of the form unchanged. Applications from individuals follow the same path as any other — they wait for your approval unless you approve applications automatically.
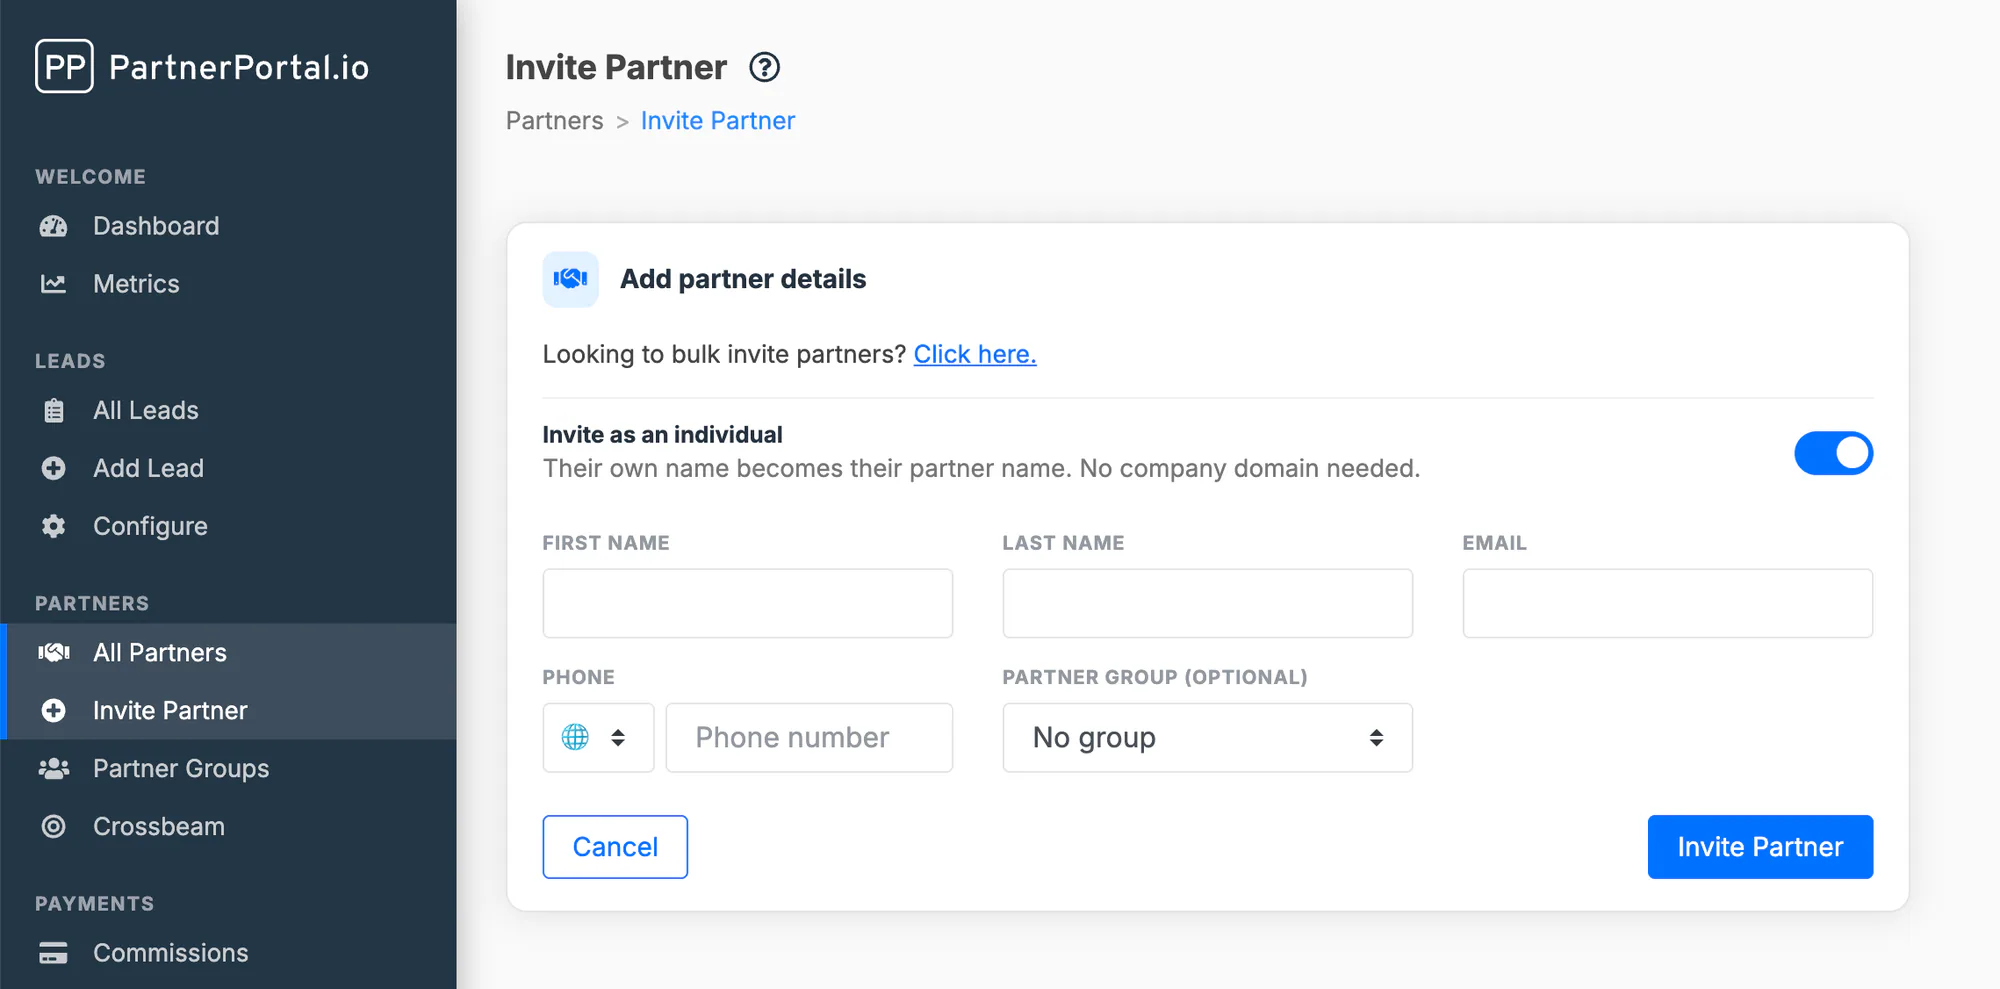
To add one yourself, open Invite Partner and turn on Invite as an individual, then fill in their name and email address as usual (phone number is optional).
An individual partner behaves like any other partner everywhere it matters: they register leads, earn commissions, get paid, accept your program terms, join partner groups, and can add people to their own account. The differences are cosmetic. Their own name is used wherever a partner company name would appear — the partner list, search, sorting, your CSV export, and partner pickers — and their domain reads N/A. On their own profile that field is labelled Display Name, and they can edit it.
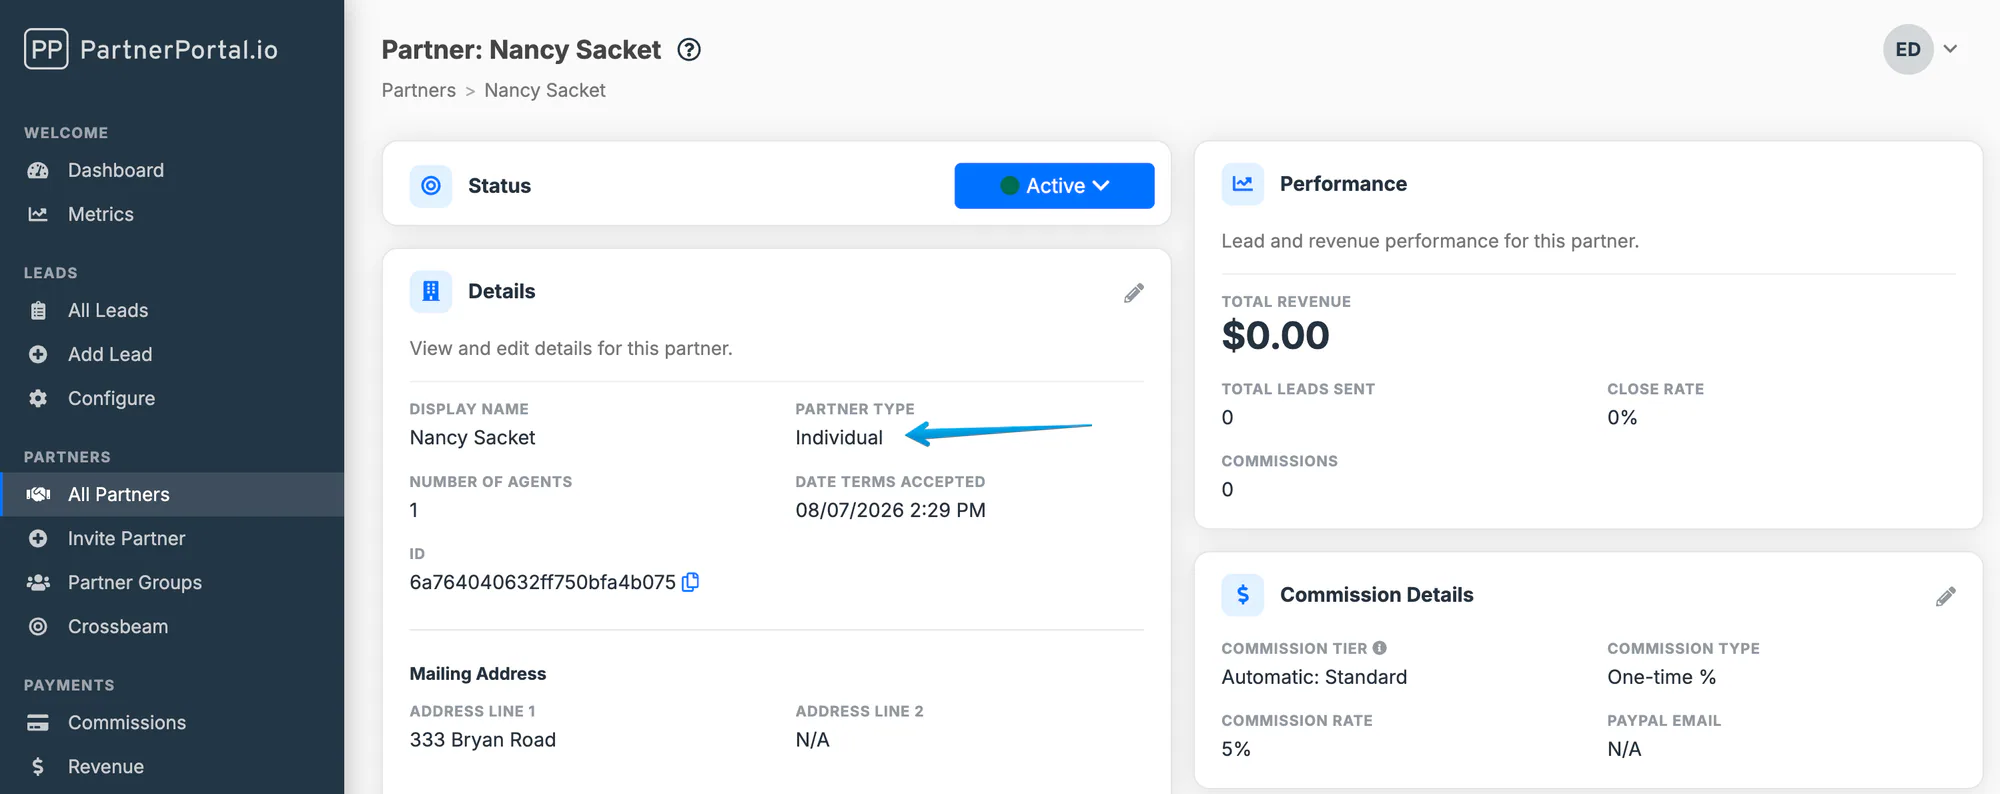
A consultant who later incorporates does not need a new account. Change Partner Type on the partner’s detail screen: switching to a company asks for a domain no other partner holds, and switching to an individual needs nothing. Only your team can do this — partners cannot reclassify themselves.
Turning Allow individual partners back off stops new individual partners being added. It changes nothing for the ones you already have — they keep signing in, registering leads, and getting paid, and you can still edit them. Note that bulk invite by CSV cannot create individuals: every row is treated as a company, so add them through your application page or one at a time from Invite Partner.
Have Partners Agree to Your Legal Terms
Section titled “Have Partners Agree to Your Legal Terms”You don’t need a separate e-signature tool like DocuSign to get partners on the record. PartnerPortal can collect agreement to your legal terms as part of joining your portal:
- Partners agree to your terms when they register, or, if you invited them directly, at their first sign-in before they can reach the portal.
- You can require partners to re-agree whenever you update your terms.
- You can set custom legal terms for a partner group that replace your portal-wide terms for that group’s members.
For setup, versioning, and how the agreement gate works, see Program Description & Terms. For group-specific terms, see Partner Groups.
Create a Test Partner
Section titled “Create a Test Partner”Creating a test partner is the fastest way to experience your own partner onboarding flow from the partner’s side.
Use the public registration flow, but enter account details that are not already associated with your portal:
- Use a unique email address. To keep the test messages arriving in your own inbox, plus-addressing works well — for example,
[email protected]. - Use a unique company name and company domain.
- Complete the registration, then approve the partner from the admin side just as you would a real application.
After approval, open the invitation or approval email as that test user and complete the password setup flow so you can see the portal exactly as a partner would.
Add a Partner User for a Partner
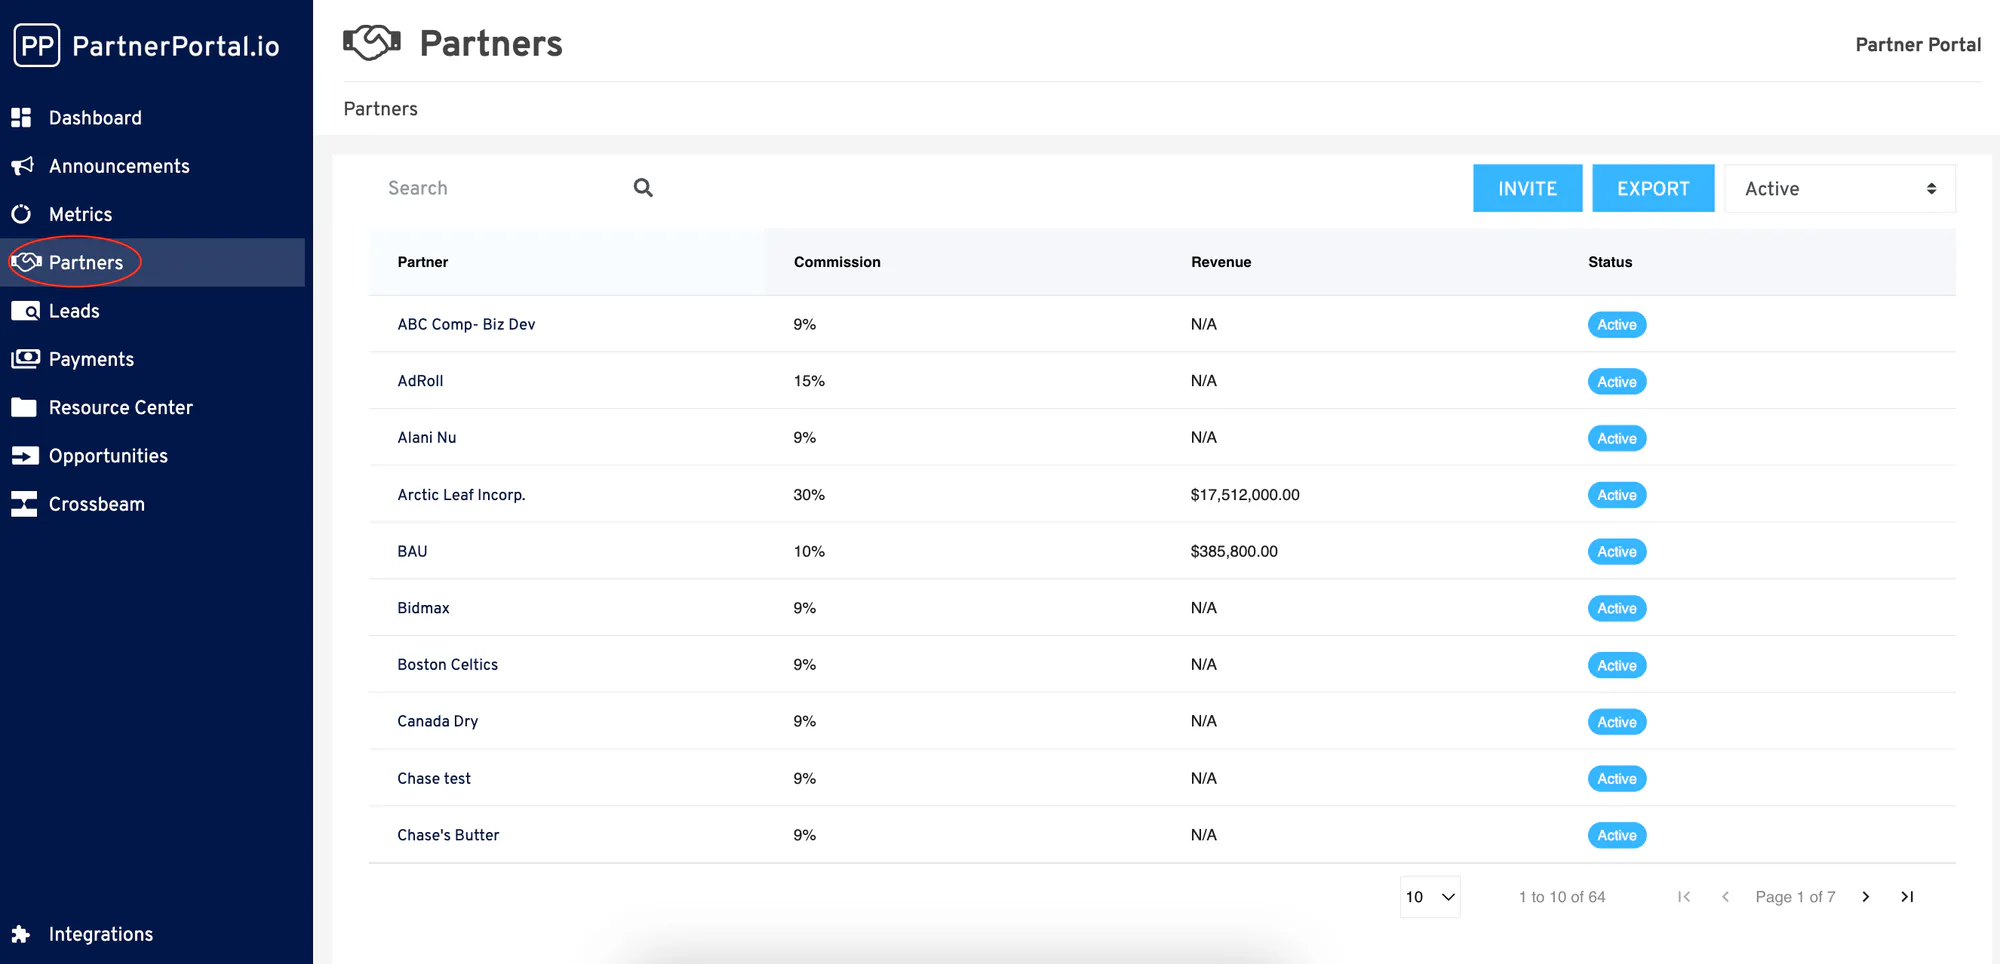
Section titled “Add a Partner User for a Partner”As an admin, you can add a user on behalf of an existing partner company instead of asking that partner to do it themselves.
Open Partners and select the partner company.
Scroll to the Partner Users section.
Click Add Partner User.
Enter the user’s name and email address, then submit the invitation.
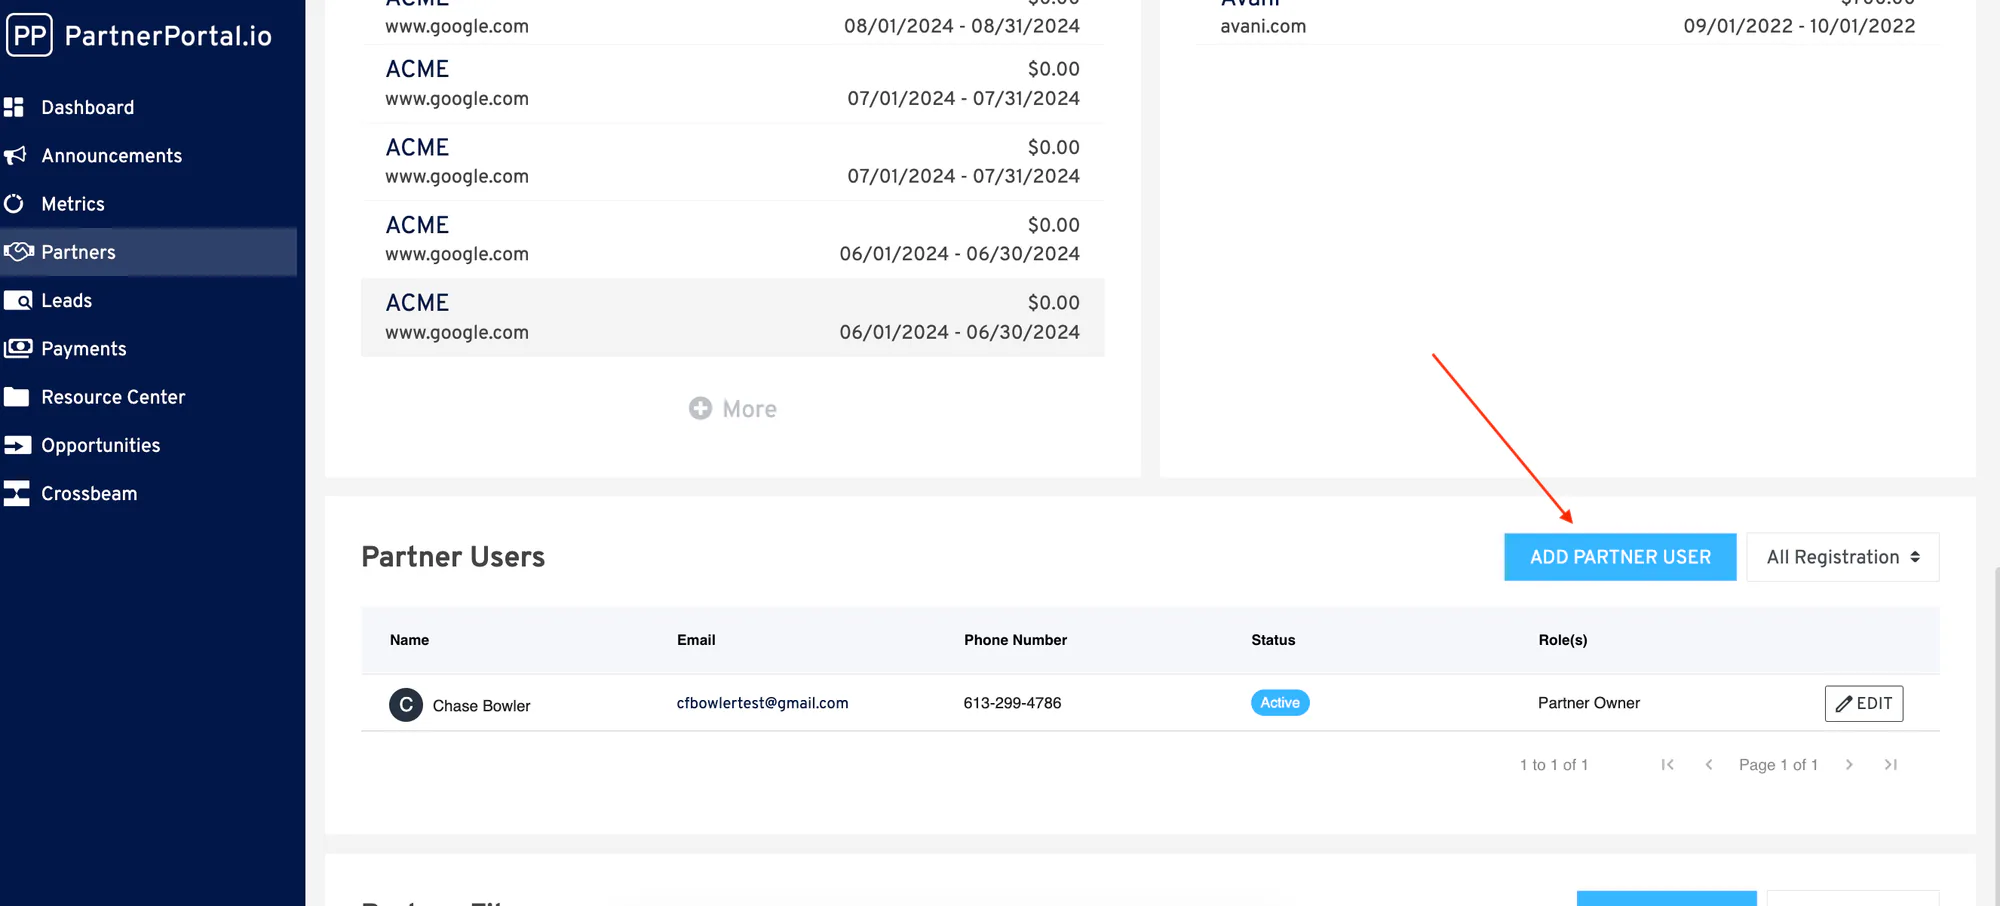
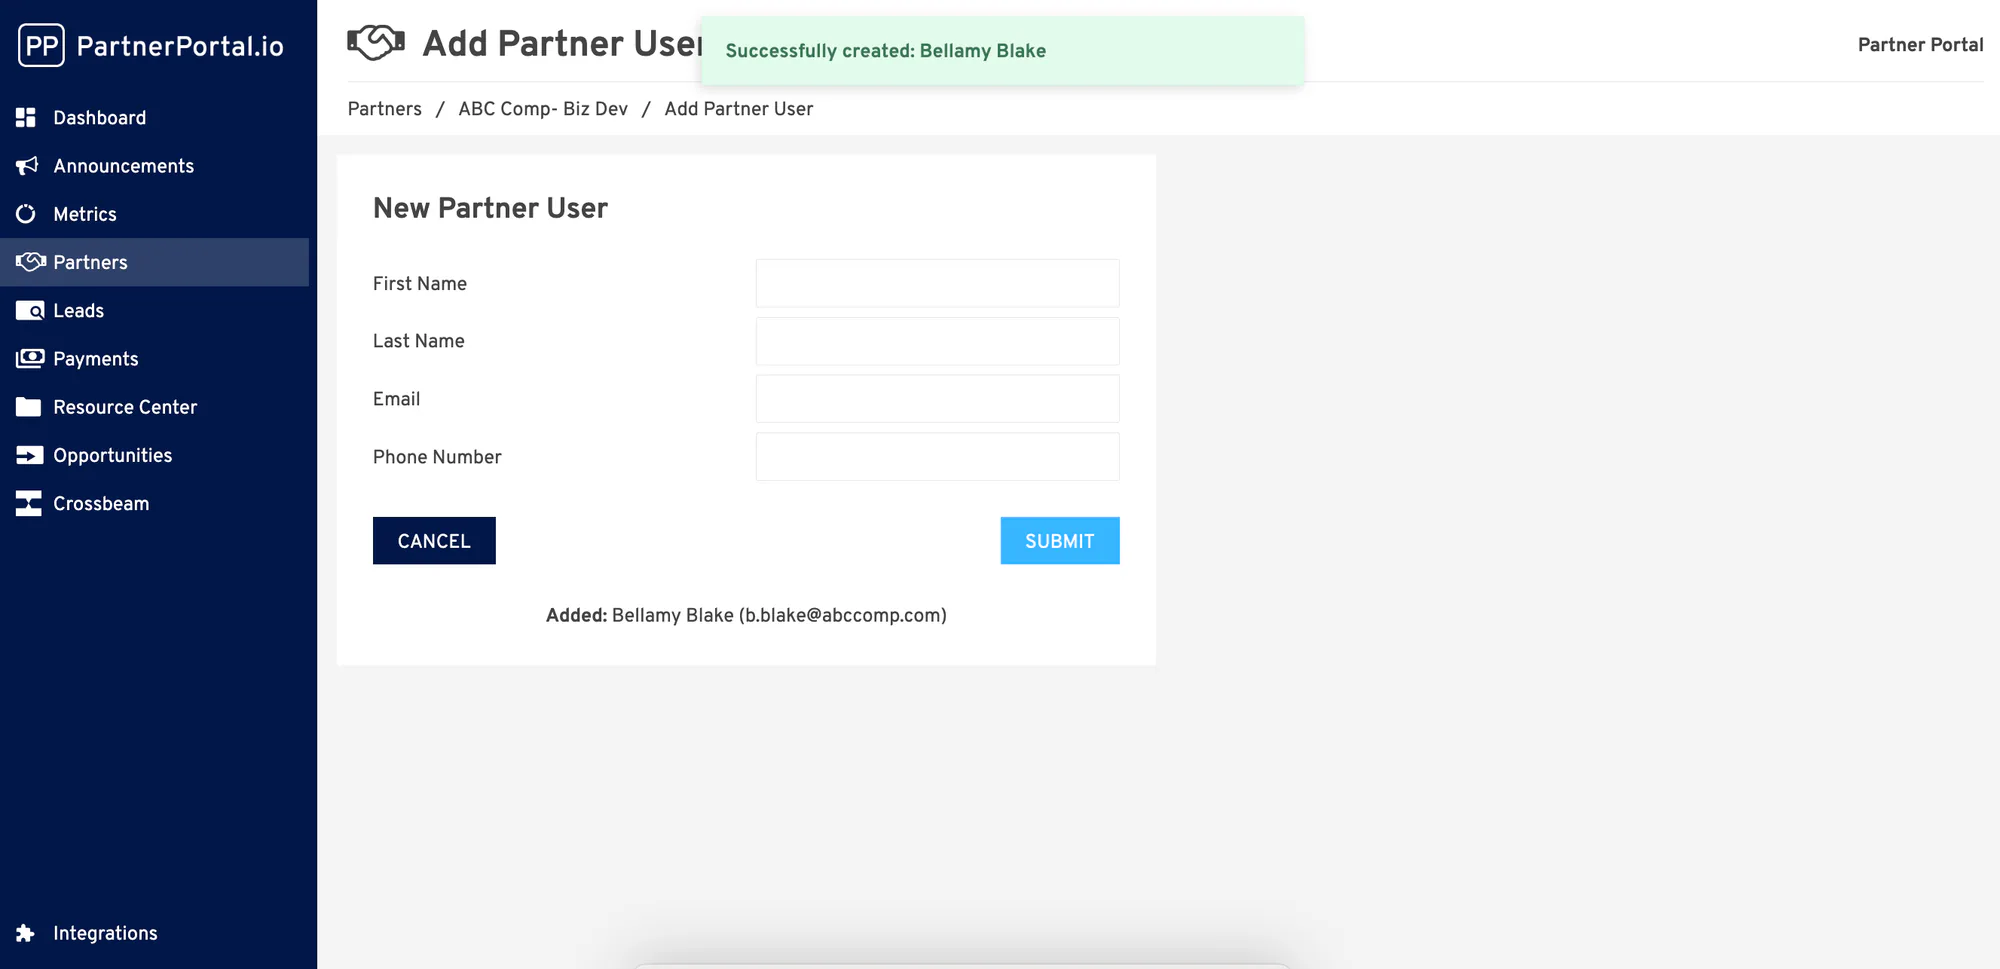
Each invited partner user gets their own login and receives an email to create a password and finish account setup.
If the partner company should manage its own users instead, see How to Manage Your Team as a Partner.
Phone Number Guidelines
Section titled “Phone Number Guidelines”Phone numbers are optional. The Invite Partner form and the public application form include a phone field; the Add Partner User form does not, because the new user can add their own number on My Account (or you can edit it from their profile). Wherever a phone field appears, it has a built-in country selector, so numbers are captured correctly for any country.
- Pick the country from the selector. The most common countries — United States, Canada, United Kingdom, and Australia — are pinned to the top under Popular, followed by every other country.
- Type the local number and PartnerPortal formats it as you go. If you enter or paste a number that already starts with a
+and its country code, the selector updates to match automatically. - The number is checked to make sure it’s a valid phone number for the chosen country. If it isn’t, you’ll see a prompt to enter a valid number (for example,
+61 400 000 000). - Valid numbers are saved in international E.164 format (like
+14155551234), which keeps them unambiguous everywhere and ready for CRM sync.
Partners and users added before this update keep their original number as-is — you only need to update it if you edit the phone field.