
How to Add Leads
There are three ways a lead can get into your portal:
- You add it on behalf of a partner from the Add Lead screen.
- A partner registers it themselves from the Register Lead screen in their portal.
- You bulk import many leads at once from a CSV file.
All three use the same lead registration form, which you can tailor to your program — see How to Customize the Lead Registration Form.
Add a Lead on Behalf of a Partner
Section titled “Add a Lead on Behalf of a Partner”As a portal owner, you can add a lead for a partner directly from the Add Lead screen (open Leads in the sidebar, or use Add New Lead on the All Leads tab). Fill out the lead registration form, then assign the lead using the Partner dropdown.
The dropdown lists every partner company currently in Active status. After selecting a partner company, choose the specific team member to associate with the lead.
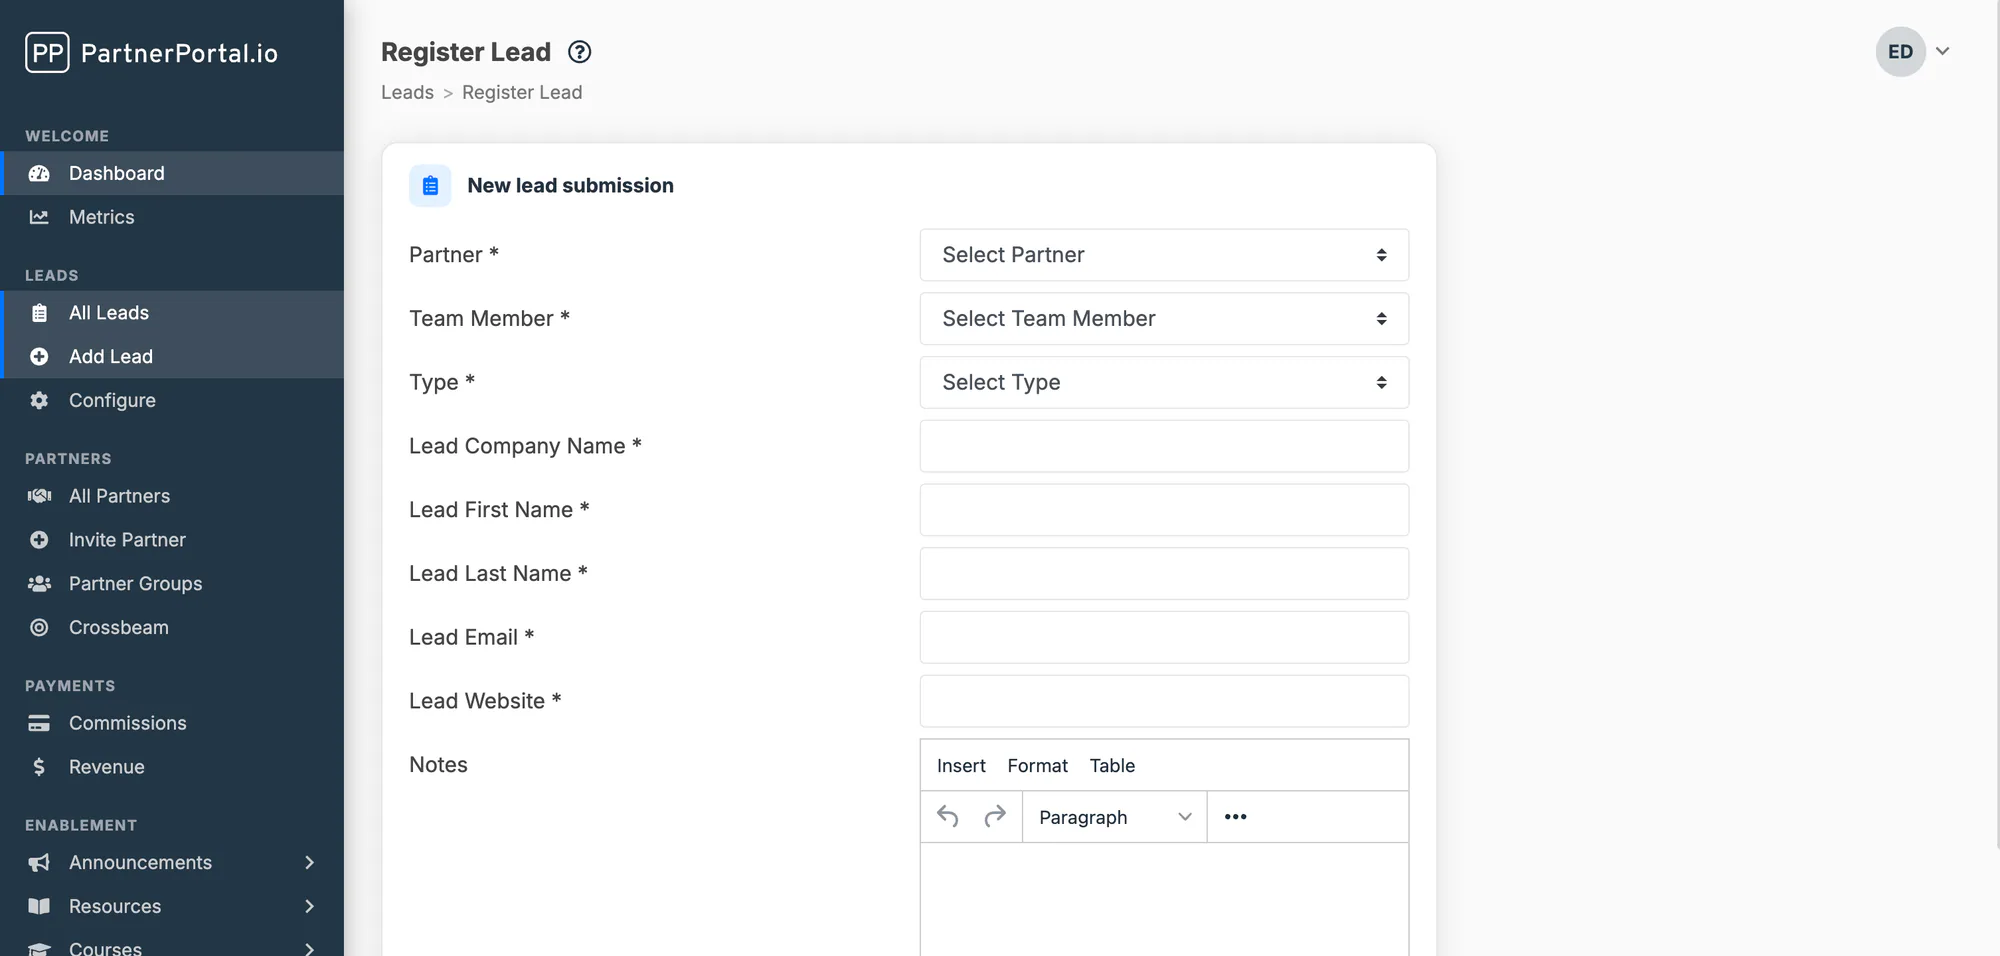
If a partner doesn’t appear in the dropdown, their account isn’t Active — typically because they:
- Haven’t completed registration
- Are still in Pending status
- Have been Declined
- Have been Suspended
How Partners Register Their Own Leads
Section titled “How Partners Register Their Own Leads”Partners submit their own leads from the Register Lead screen in their portal (via Leads → Register Lead, or the Register Lead quick action on their dashboard). They complete the same lead registration form you’ve set up, then submit.
Every lead a partner submits also appears in their own portal, so partners can see all the leads they’ve registered along with each lead’s current status (Pending, Approved, Active, Declined, or Expired).
Bulk Import Leads
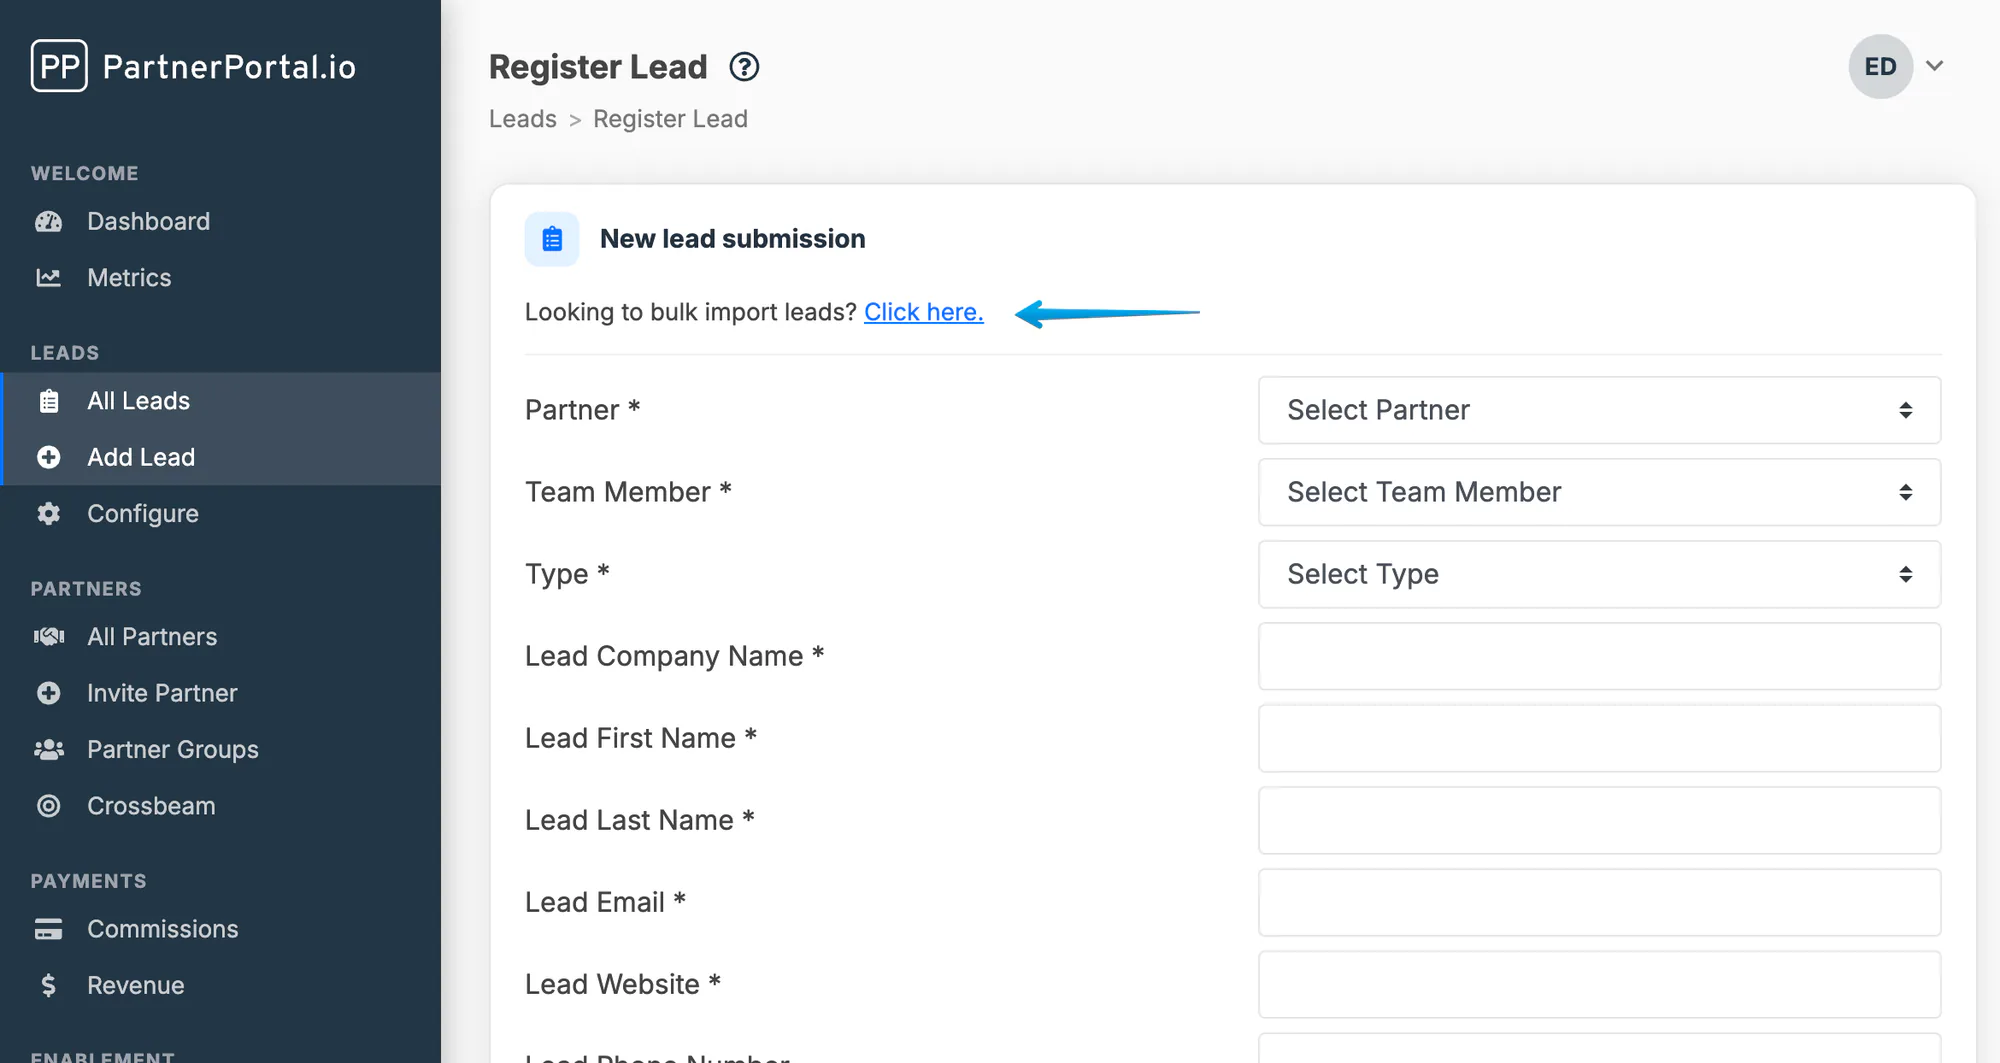
Section titled “Bulk Import Leads”On the Add Lead screen (Leads in the sidebar), use the Looking to bulk import leads? link at the top of the form.
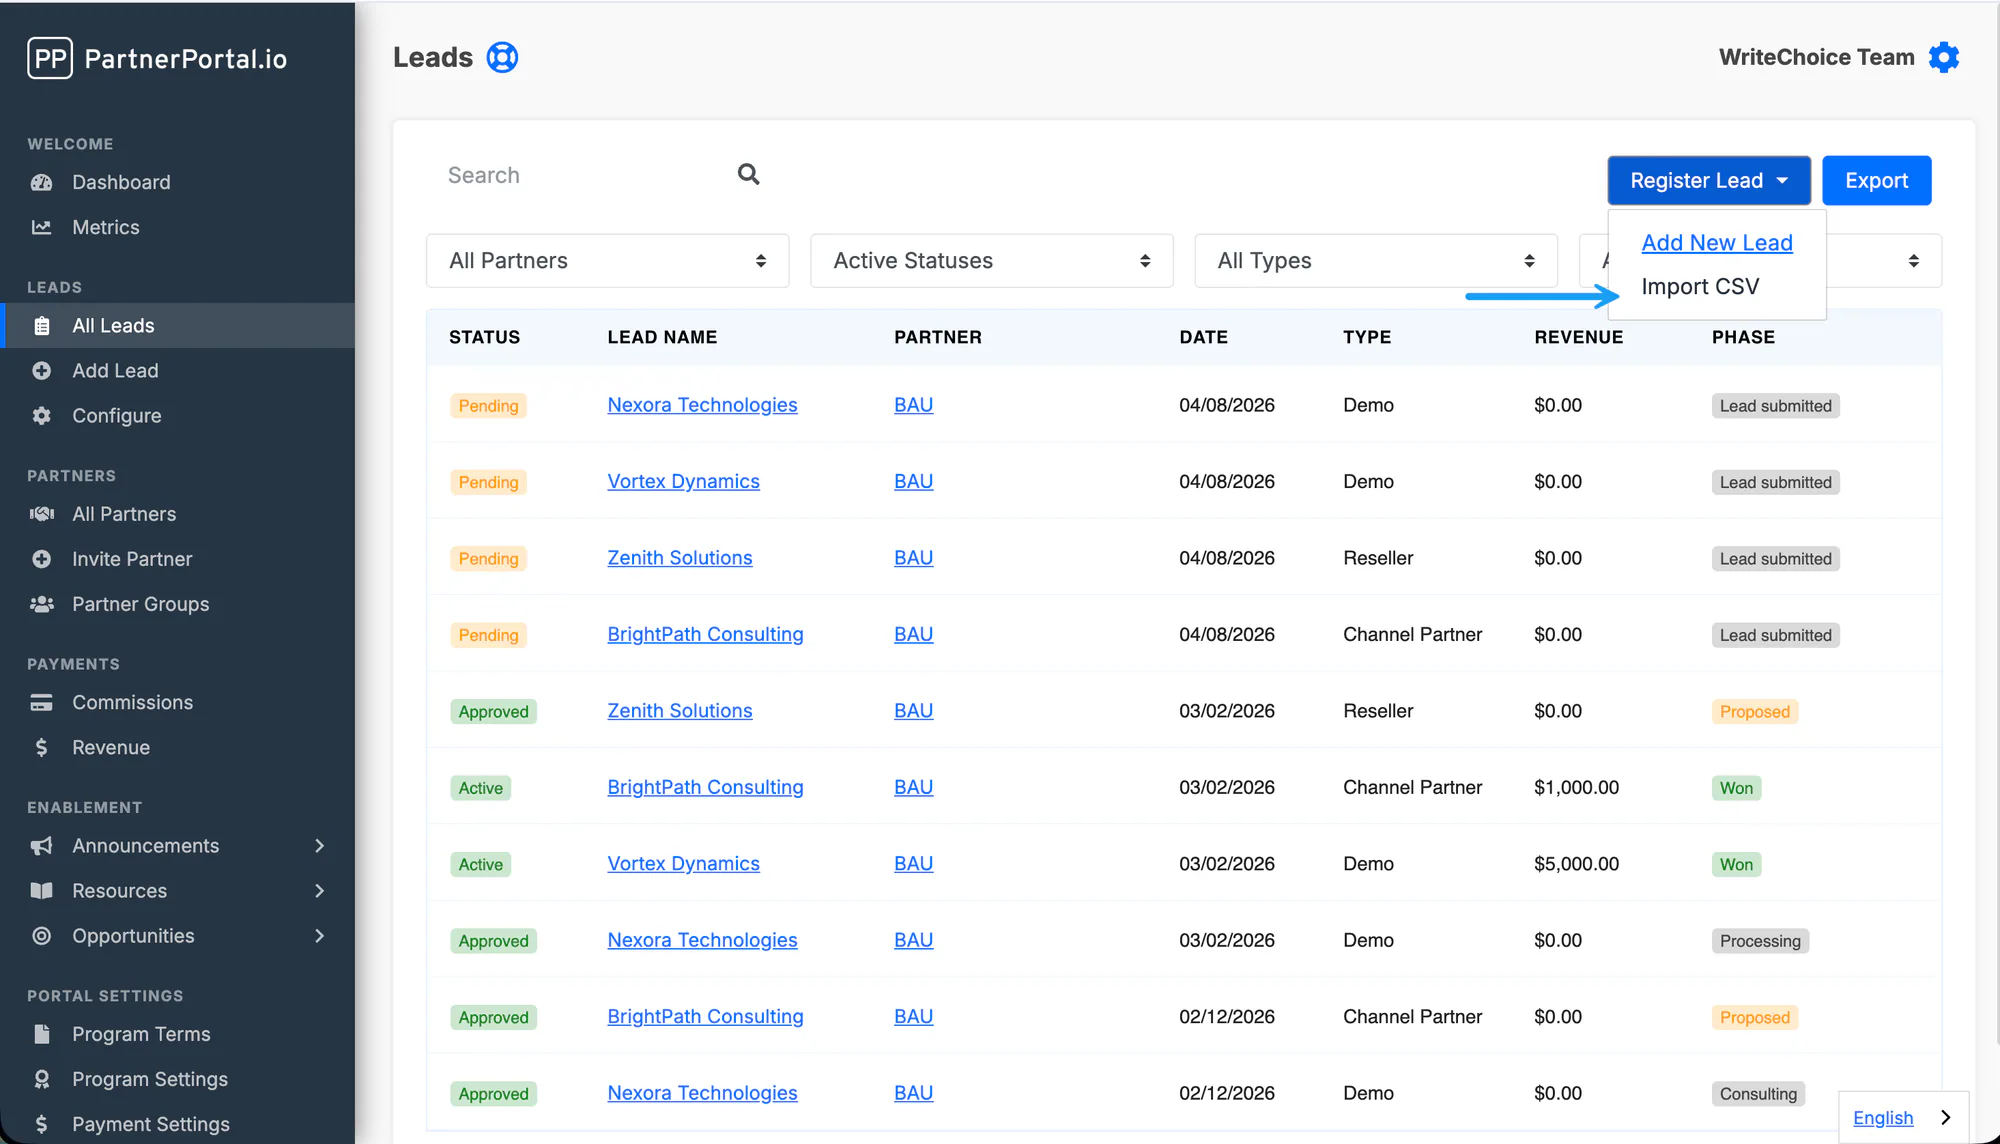
You can also start an import from the All Leads tab — click Register Lead and select Import CSV.
In the import window, use Download the template to get our CSV template, or prepare your own. We only support CSV (comma-separated values) files, and your CSV must contain all of the required fields on your lead registration form.
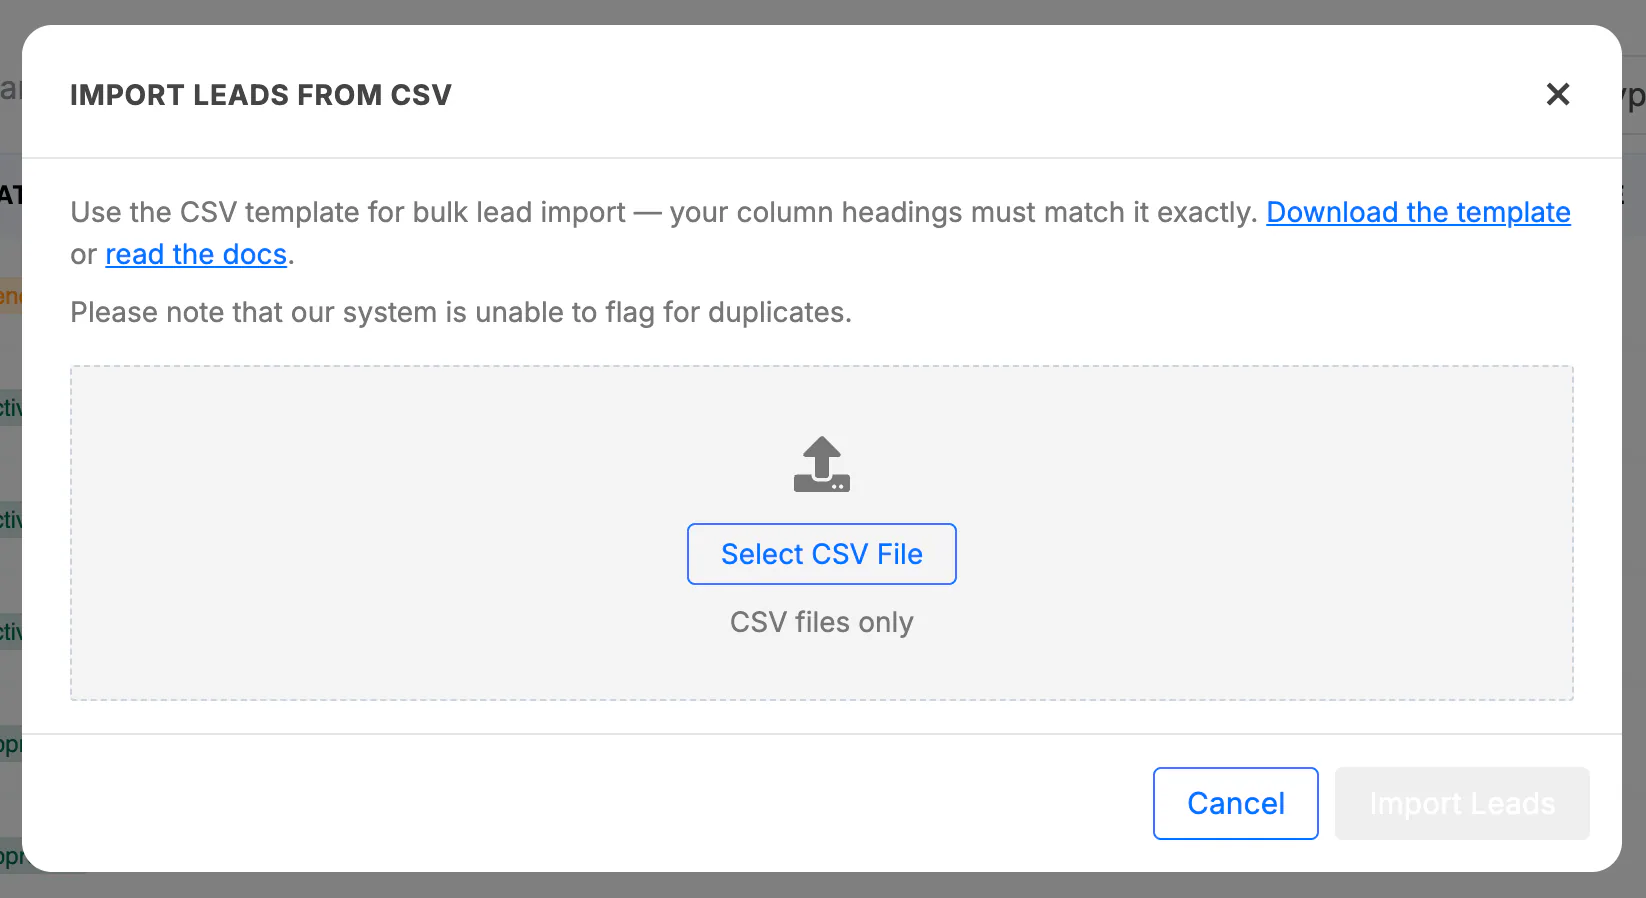
Click Select CSV File, choose your file, and click Import Leads. The system uploads the file and checks for missing information in required fields, marking any it finds as errors (optional fields won’t flag errors). If errors are found, the file won’t import any leads until they’re corrected.
Once the file is clean, import it again. If no errors are found, you’ll see a success message. All imported leads are placed in Pending and require admin approval. Refresh your portal to see the new leads.
Finding Partner and Partner User IDs
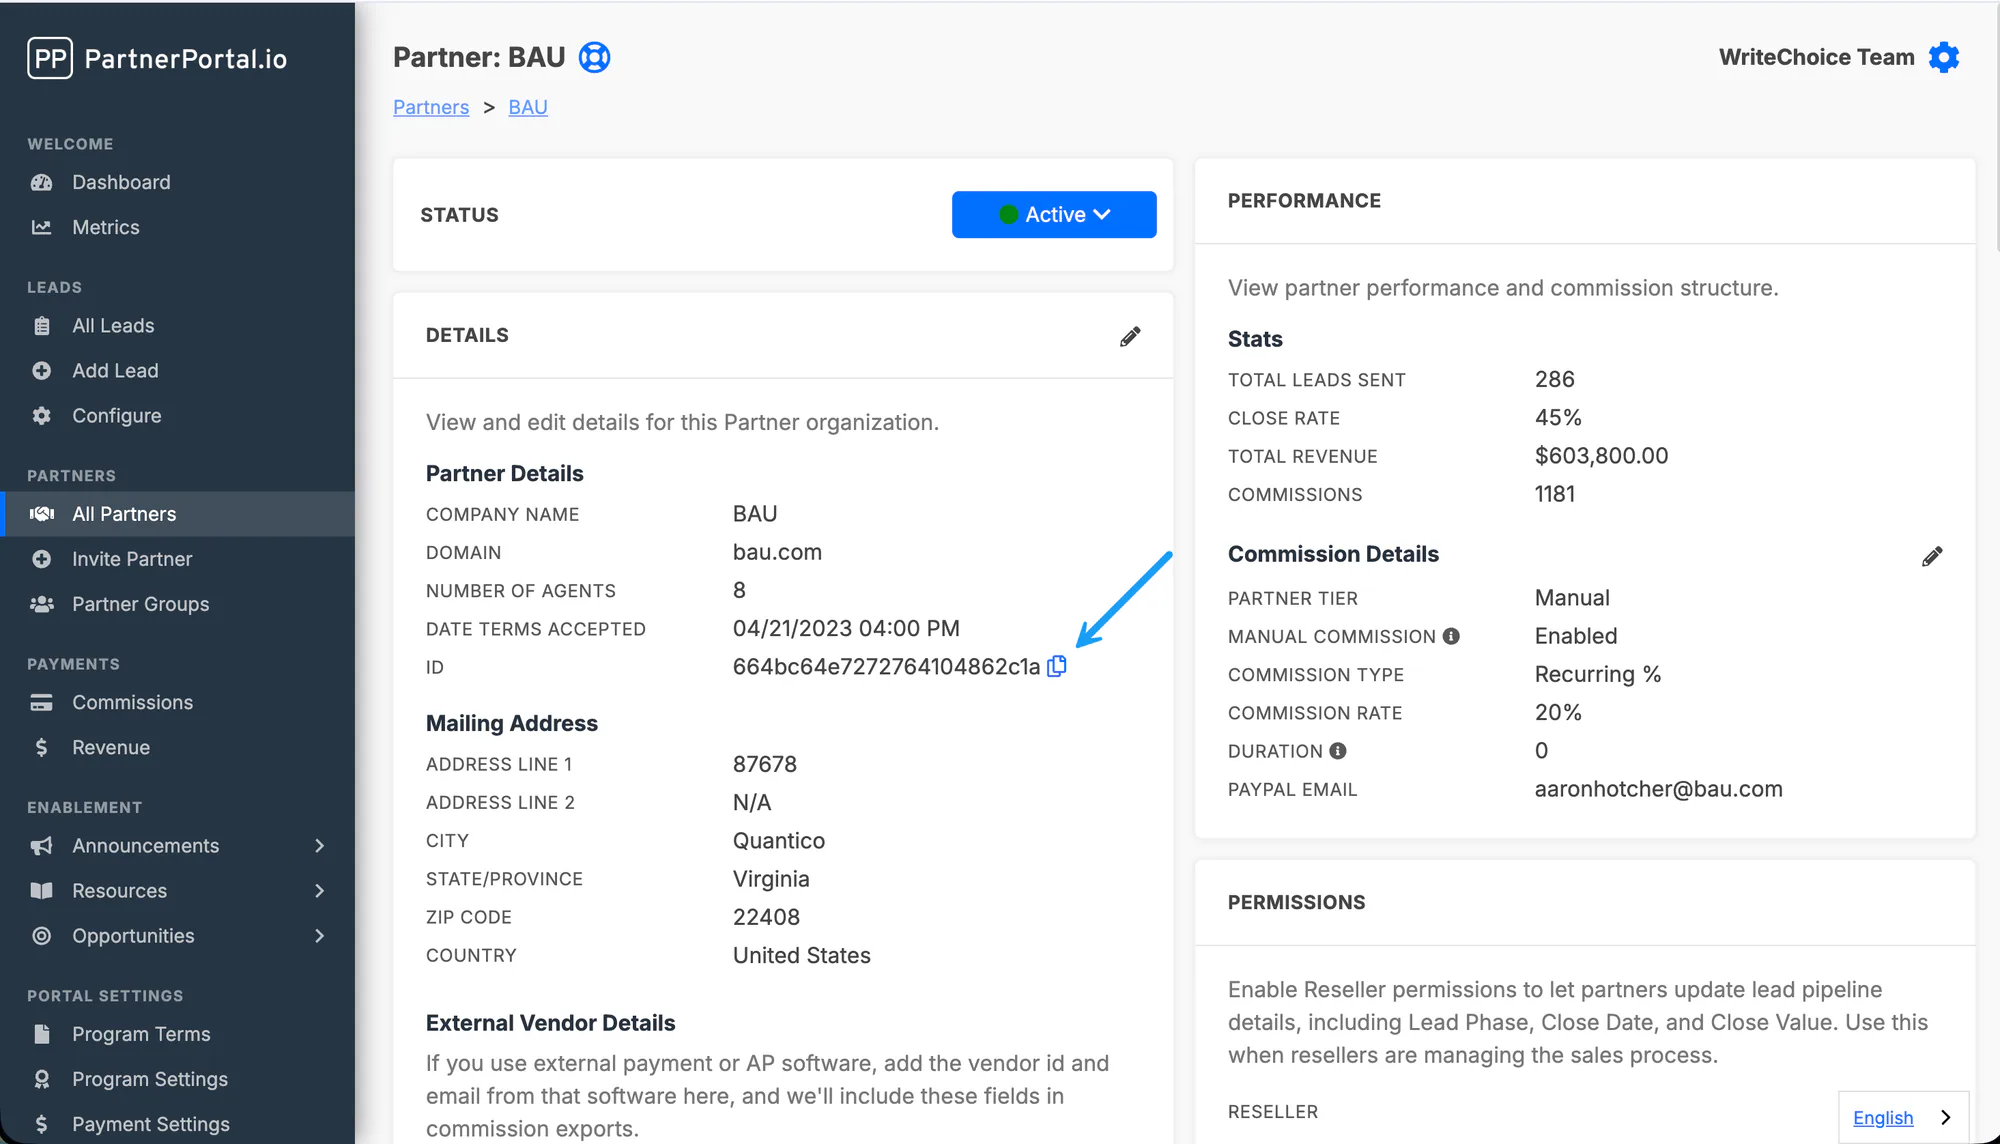
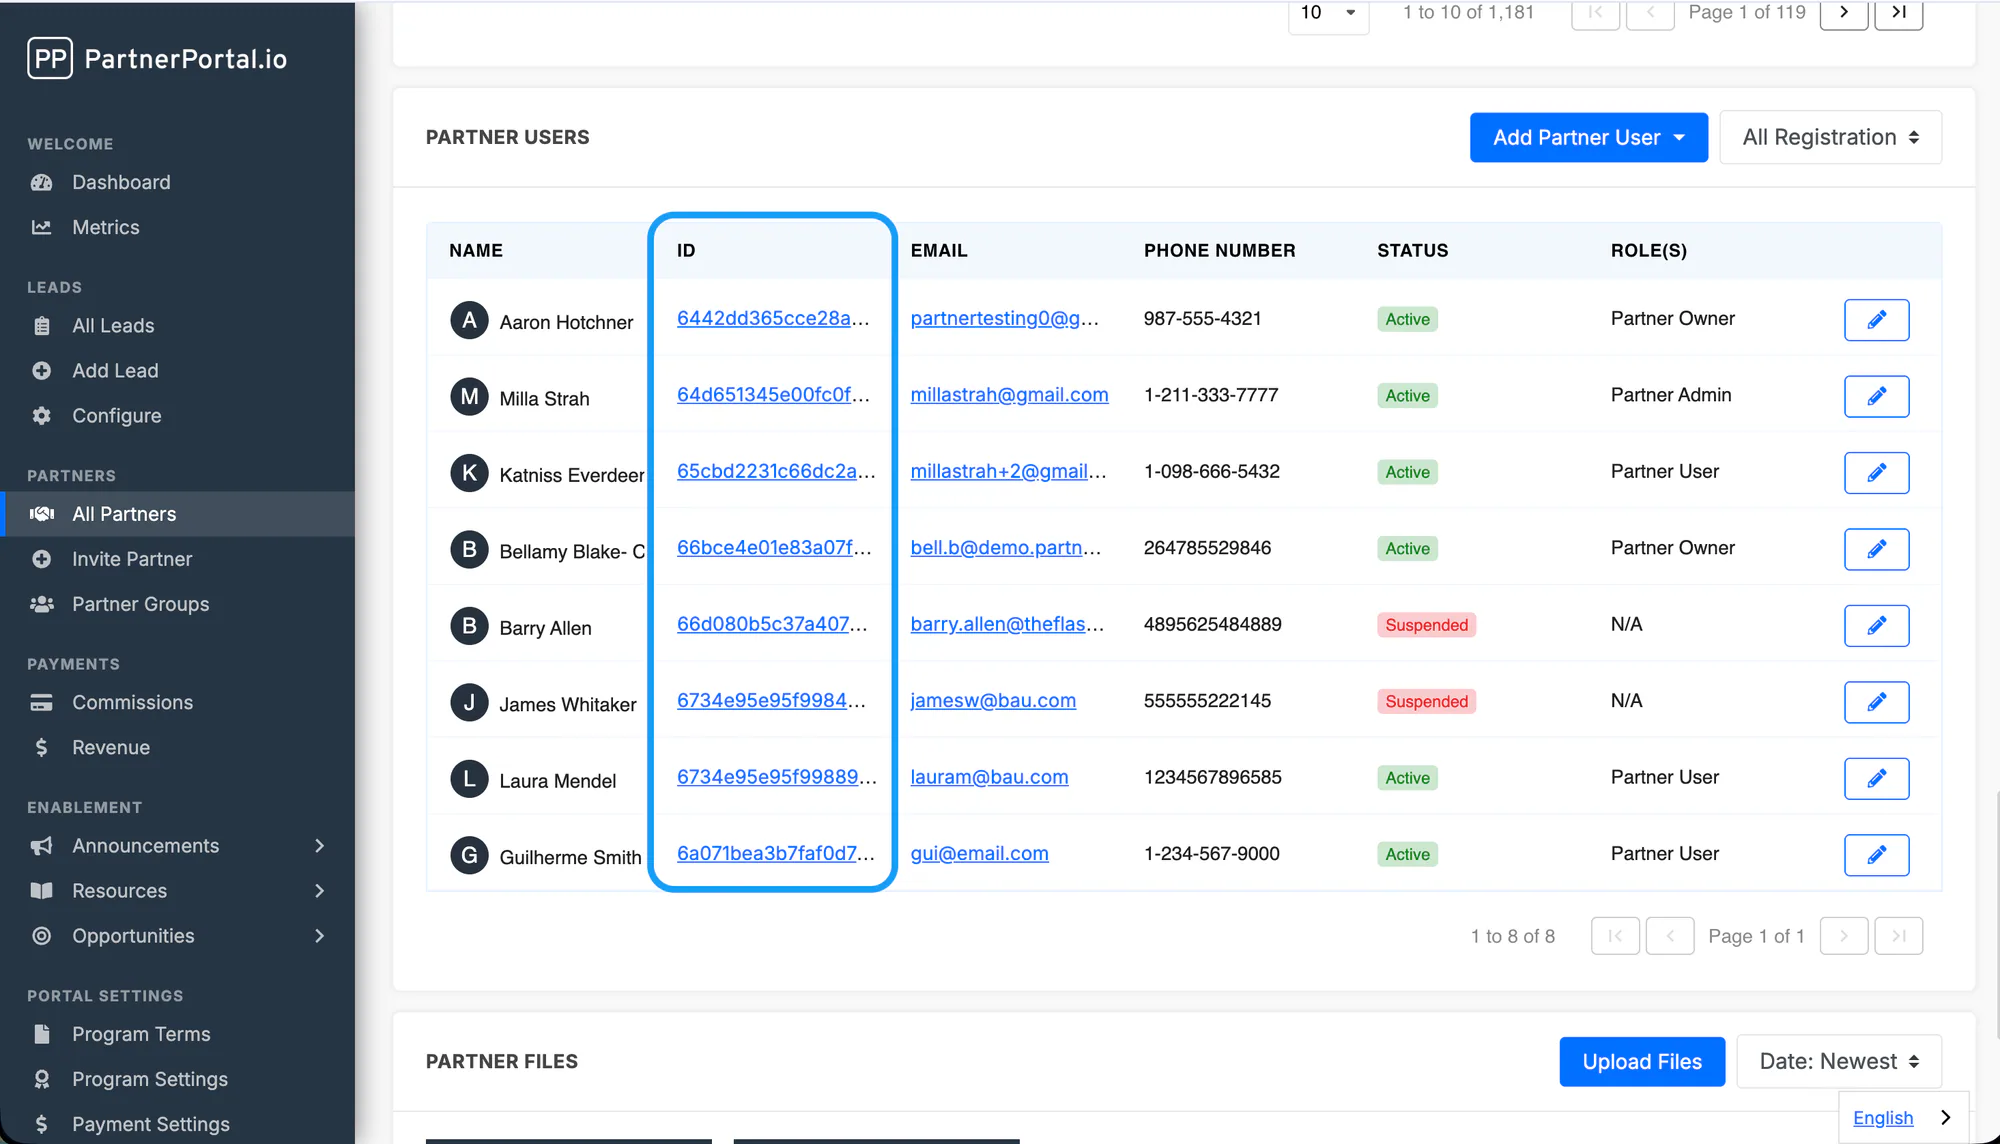
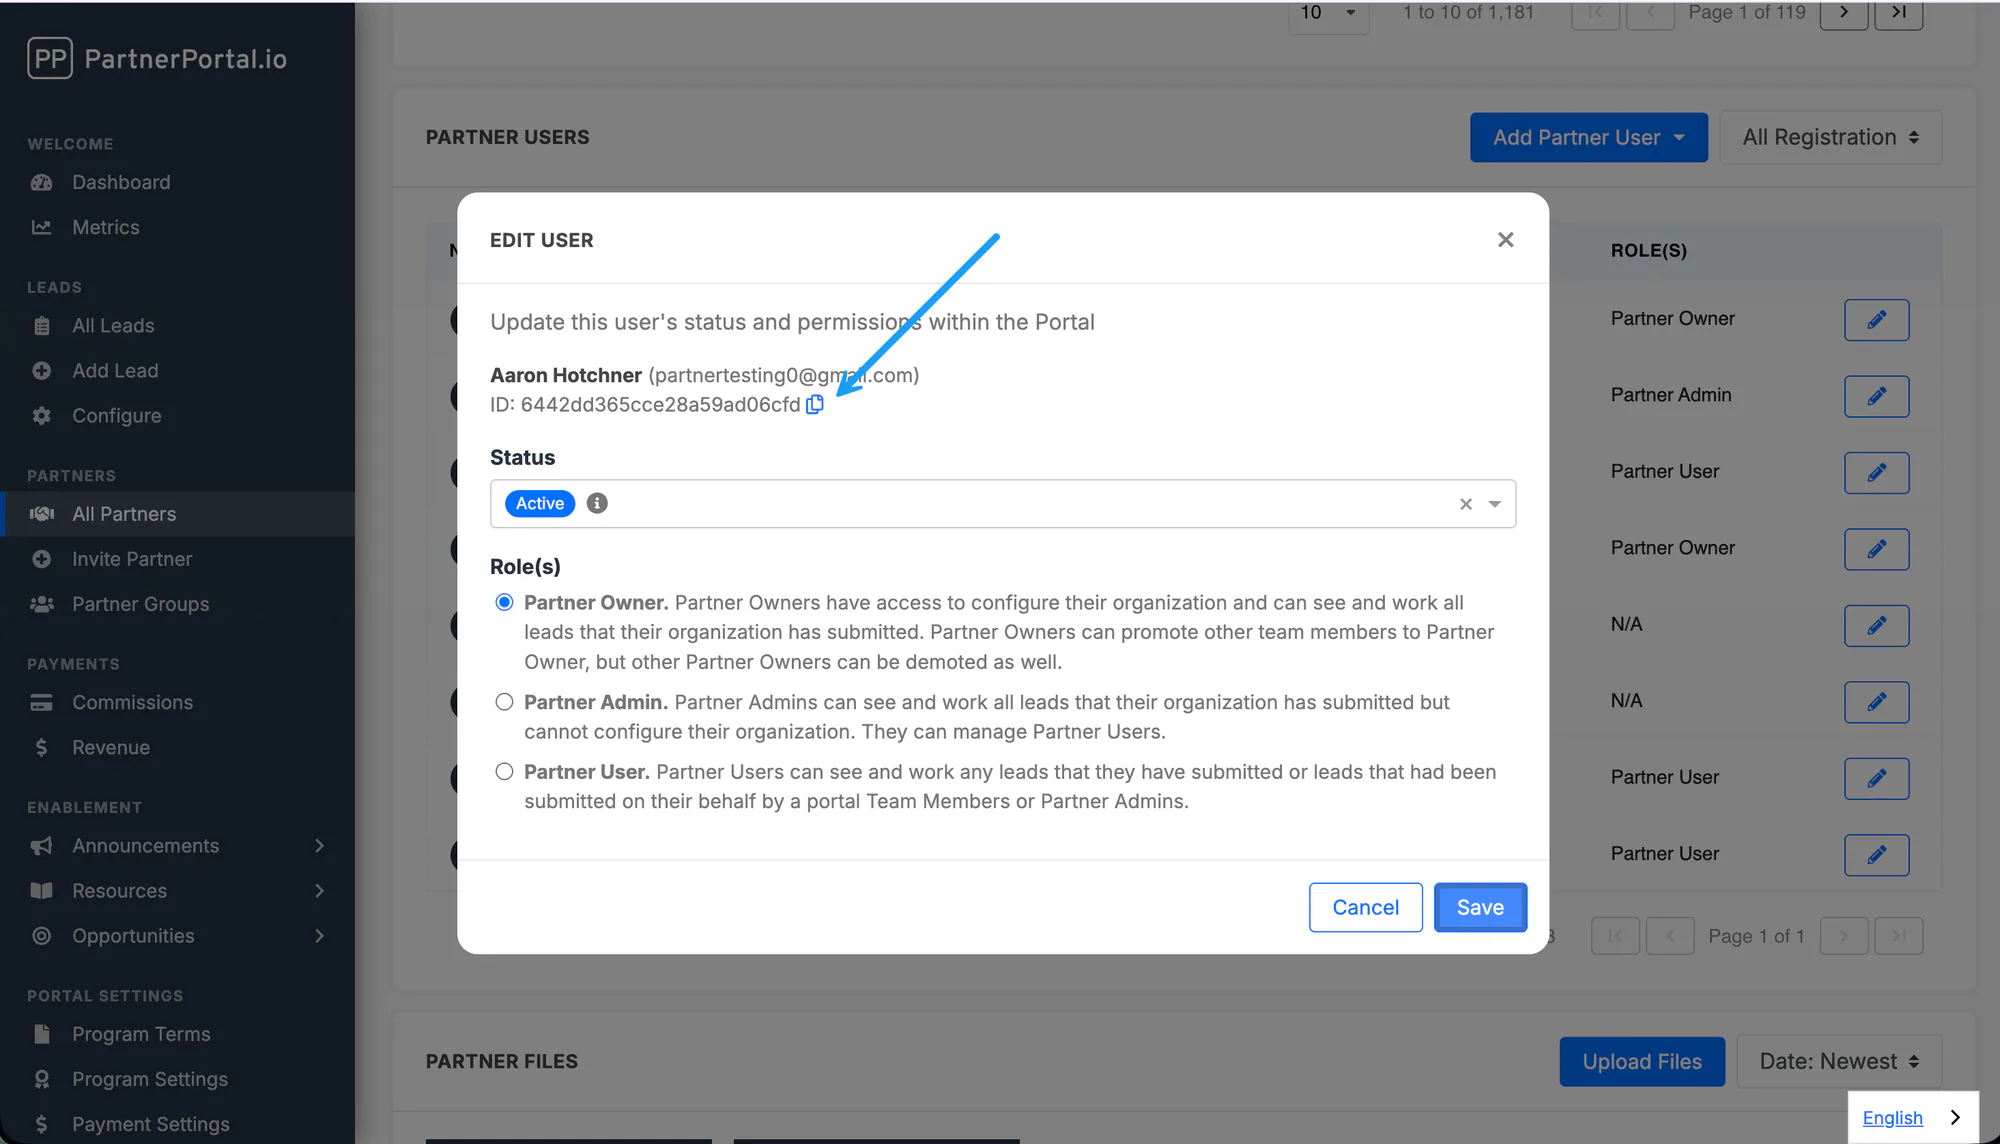
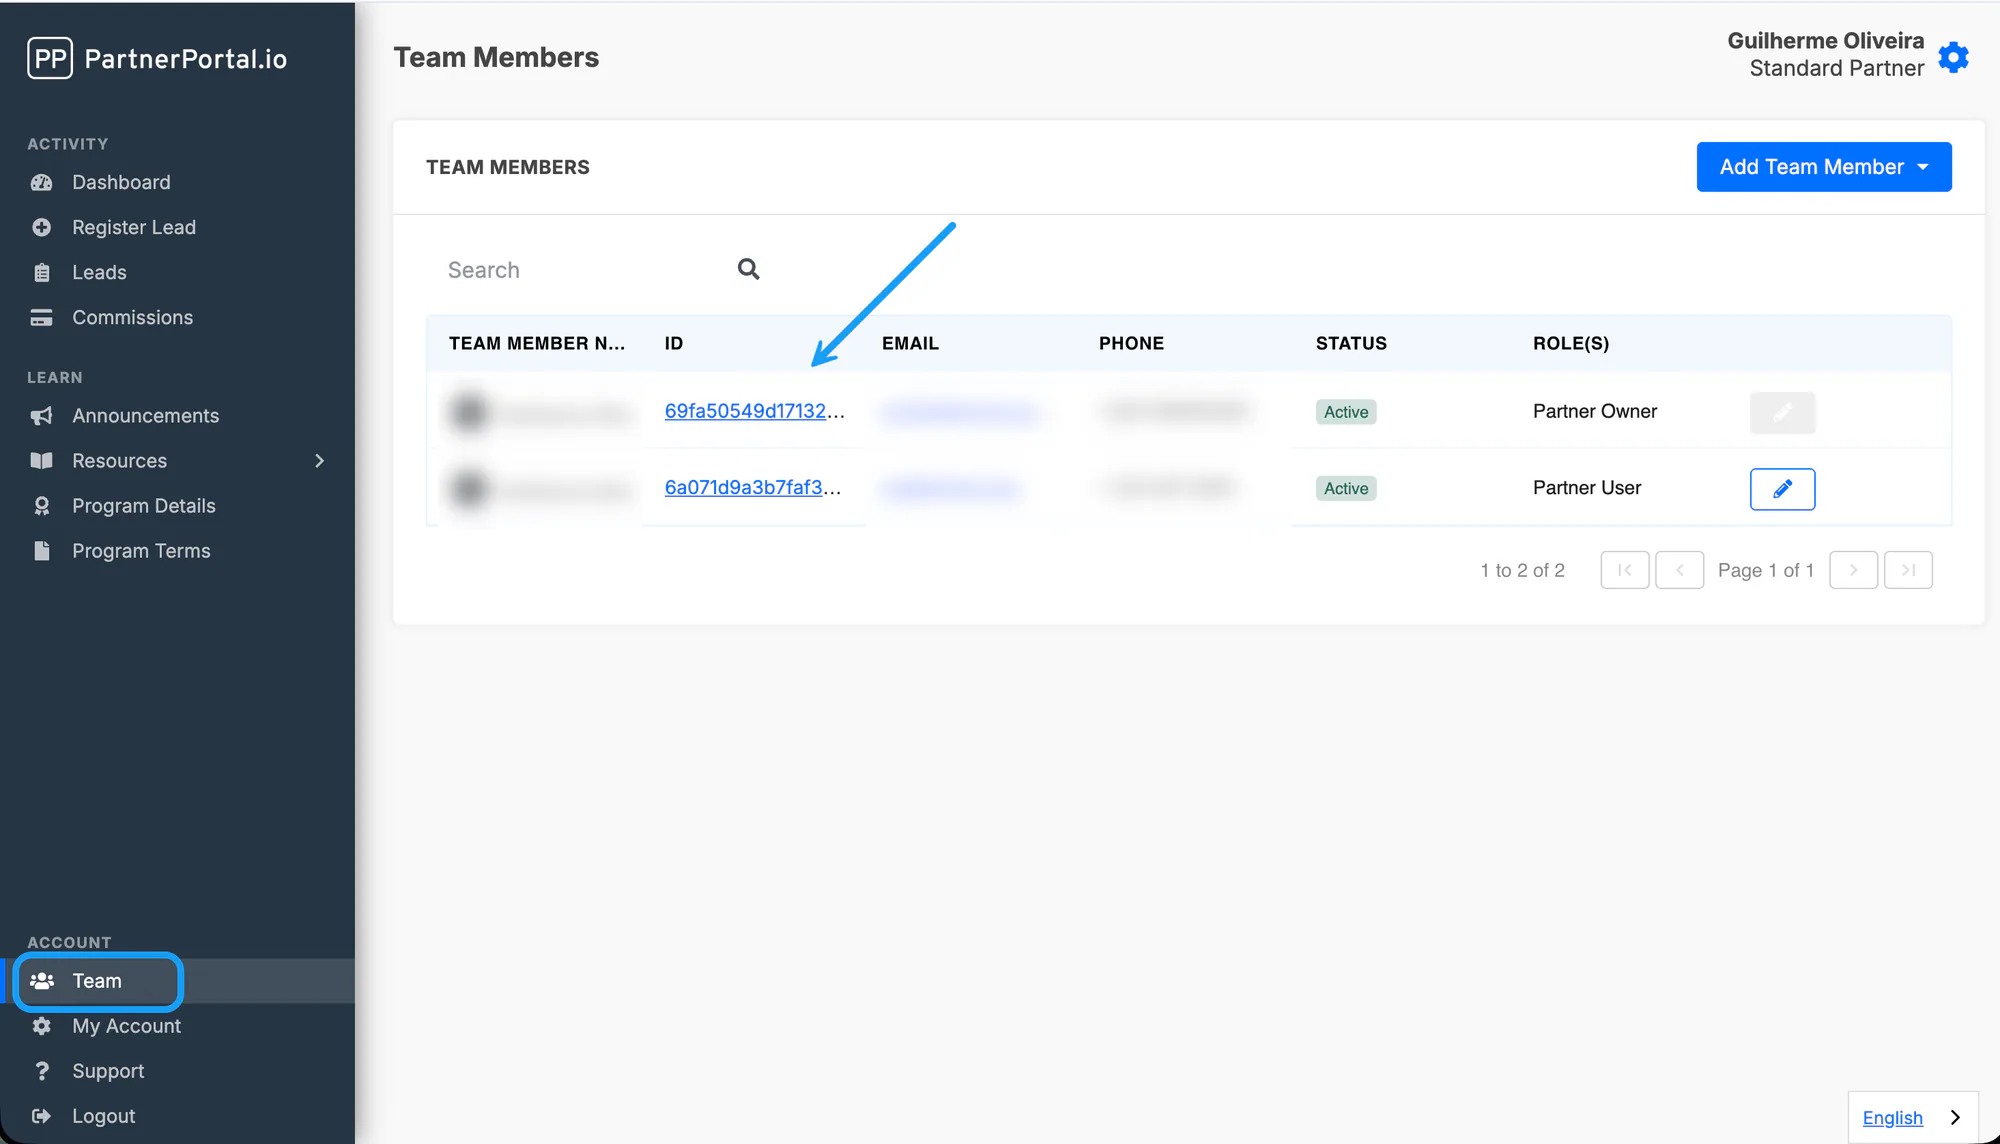
Section titled “Finding Partner and Partner User IDs”Bulk import requires the Partner and Partner User IDs so each lead is linked to the correct partner.
As an admin: go to the All Partners tab and select the partner. Their unique ID appears in the partner details.
To associate a lead with a specific person on the partner’s team, scroll to the Partner Users section at the bottom of the partner’s page and copy the individual user’s ID.
You can also find a user’s ID by clicking the pencil icon to edit that Partner User.
As a partner: go to the Team tab under Account. Each user’s unique ID appears next to their name in the ID column. If you’re importing leads for yourself, use your own ID.
International Phone Numbers
Section titled “International Phone Numbers”PartnerPortal does not enforce a specific phone number format. The phone field on the lead registration form is a plain text field — it accepts any characters in any format, with no required country code, digit count, or input mask. International numbers work out of the box: you and your partners can enter numbers in whatever local or international format you use, including + country codes, spaces, parentheses, or dashes.
Because no format is enforced, we recommend agreeing on a consistent convention if your leads feed a CRM or a dialer — for example, storing numbers in E.164 format (like +14155551234) keeps them unambiguous across countries.
Whether the phone field appears, and whether it’s required, is controlled per portal under Settings → Leads. By default the phone field is required; you can make it optional as long as email remains a required field. See How to Customize the Lead Registration Form.