
How to Integrate Zapier with PartnerPortal
Zapier integration overview
Section titled “Zapier integration overview”Zapier connects PartnerPortal to the rest of your stack so your lead and partner data can move automatically instead of being copied by hand.
Today, the PartnerPortal Zapier app supports several patterns:
- Create a lead in PartnerPortal from another app such as HubSpot, Typeform, or another form tool
- Update an existing lead when its details change in another system
- Add a comment to a lead, which notifies the partner and their agent by email just like a comment left in the portal
- Find a lead by email or a custom field value so you can update it or comment on it
- Create a partner (a partner company plus its owner) from another system, just like inviting one from the portal
- Find a partner by domain or owner email so you can avoid creating duplicates
- Find a partner user — the person behind a partner — so you can sync partner owners to your CRM as contacts
- Add a partner user to an existing partner, just like adding one from the partner’s page in the portal
- Trigger Zaps from lead activity when a lead is created or updated
- Trigger Zaps from partner activity when a partner is added, updated, or approved
That makes Zapier useful both when you want data to flow into PartnerPortal and when you want PartnerPortal activity to kick off follow-up automation elsewhere.
Common ways teams use it
Section titled “Common ways teams use it”- Create a PartnerPortal lead automatically when an external form is submitted
- Send new or updated lead activity to internal workflows, routing logic, or notification tools
- Keep partner-program data in sync with systems that do not have a native PartnerPortal integration
Trigger a Zap from PartnerPortal activity
Section titled “Trigger a Zap from PartnerPortal activity”Use a PartnerPortal trigger when you want activity in your portal to start automation somewhere else — for example, posting to Slack when a lead comes in, or creating a CRM record when a partner is approved. The PartnerPortal app offers four trigger events:
- Lead Created — a new lead is registered in your portal
- Lead Updated — an existing lead’s details change
- Partner Created — a partner is added, whether your team invited them or they self-registered
- Partner Updated — a partner’s details change, including when a partner is approved
What you need
Section titled “What you need”- A Zapier account and the PartnerPortal account you want to connect
- Your Organization Name, found on the Integrations → Zapier card of your PartnerPortal Account page
In Zapier, create a new Zap and choose PartnerPortal.io as the trigger app.
Select the trigger event — Lead Created, Lead Updated, Partner Created, or Partner Updated.
Connect your PartnerPortal account if you have not already, entering your Organization Name when prompted.
Run the trigger test. Zapier pulls a recent record so you can confirm the connection and preview the fields available to later steps.
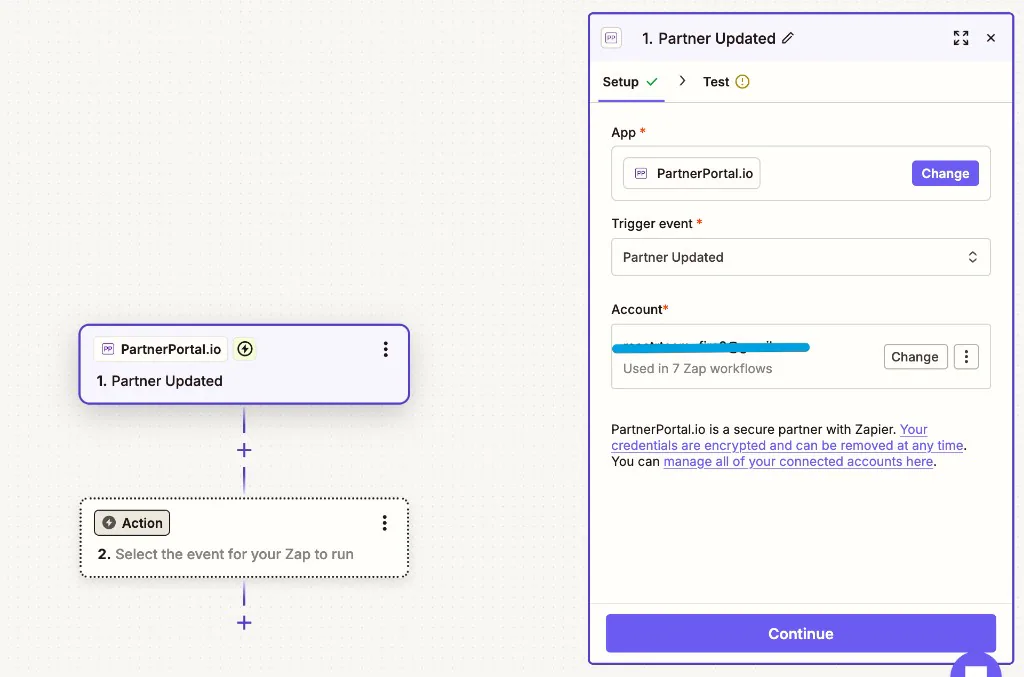
Each trigger hands the full record — including its ID — to the rest of your Zap, so you can map those values into later steps: pass a Lead ID into Update Lead or Add Comment to Lead, or send a partner’s details on to your CRM.
Create a lead using Zapier
Section titled “Create a lead using Zapier”Use this workflow when you want an external form or automation tool to create leads directly in PartnerPortal.
Before you start
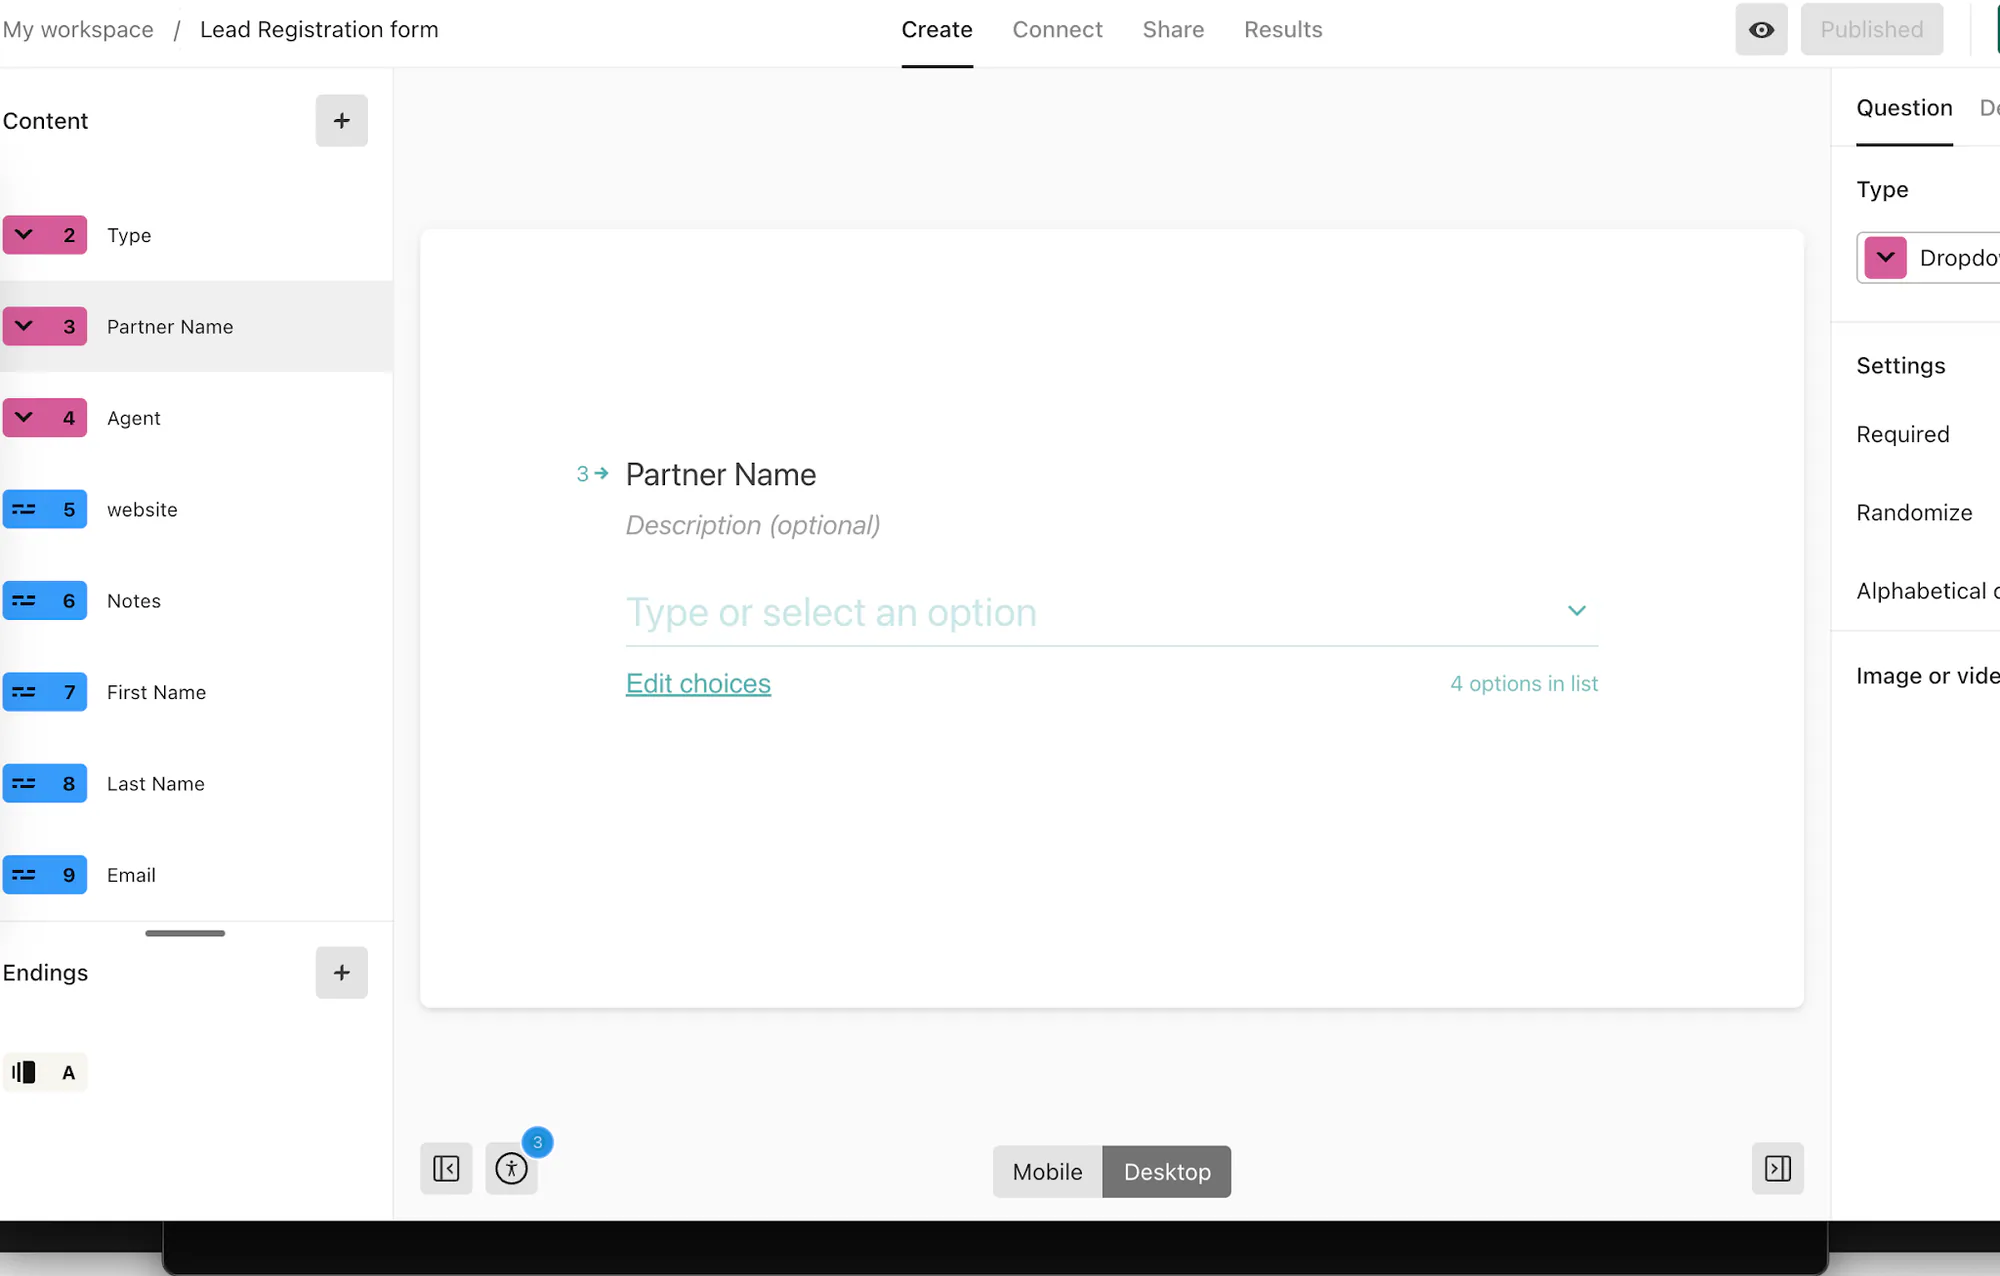
Section titled “Before you start”- Customize your lead registration form in PartnerPortal first
- Make sure your trigger app’s form includes the lead fields you want to send into PartnerPortal
- Have a Zapier account ready
Prepare the trigger form
Section titled “Prepare the trigger form”In your source app, create or update the form so it includes the same information your PartnerPortal lead registration form expects.
Create the Zap
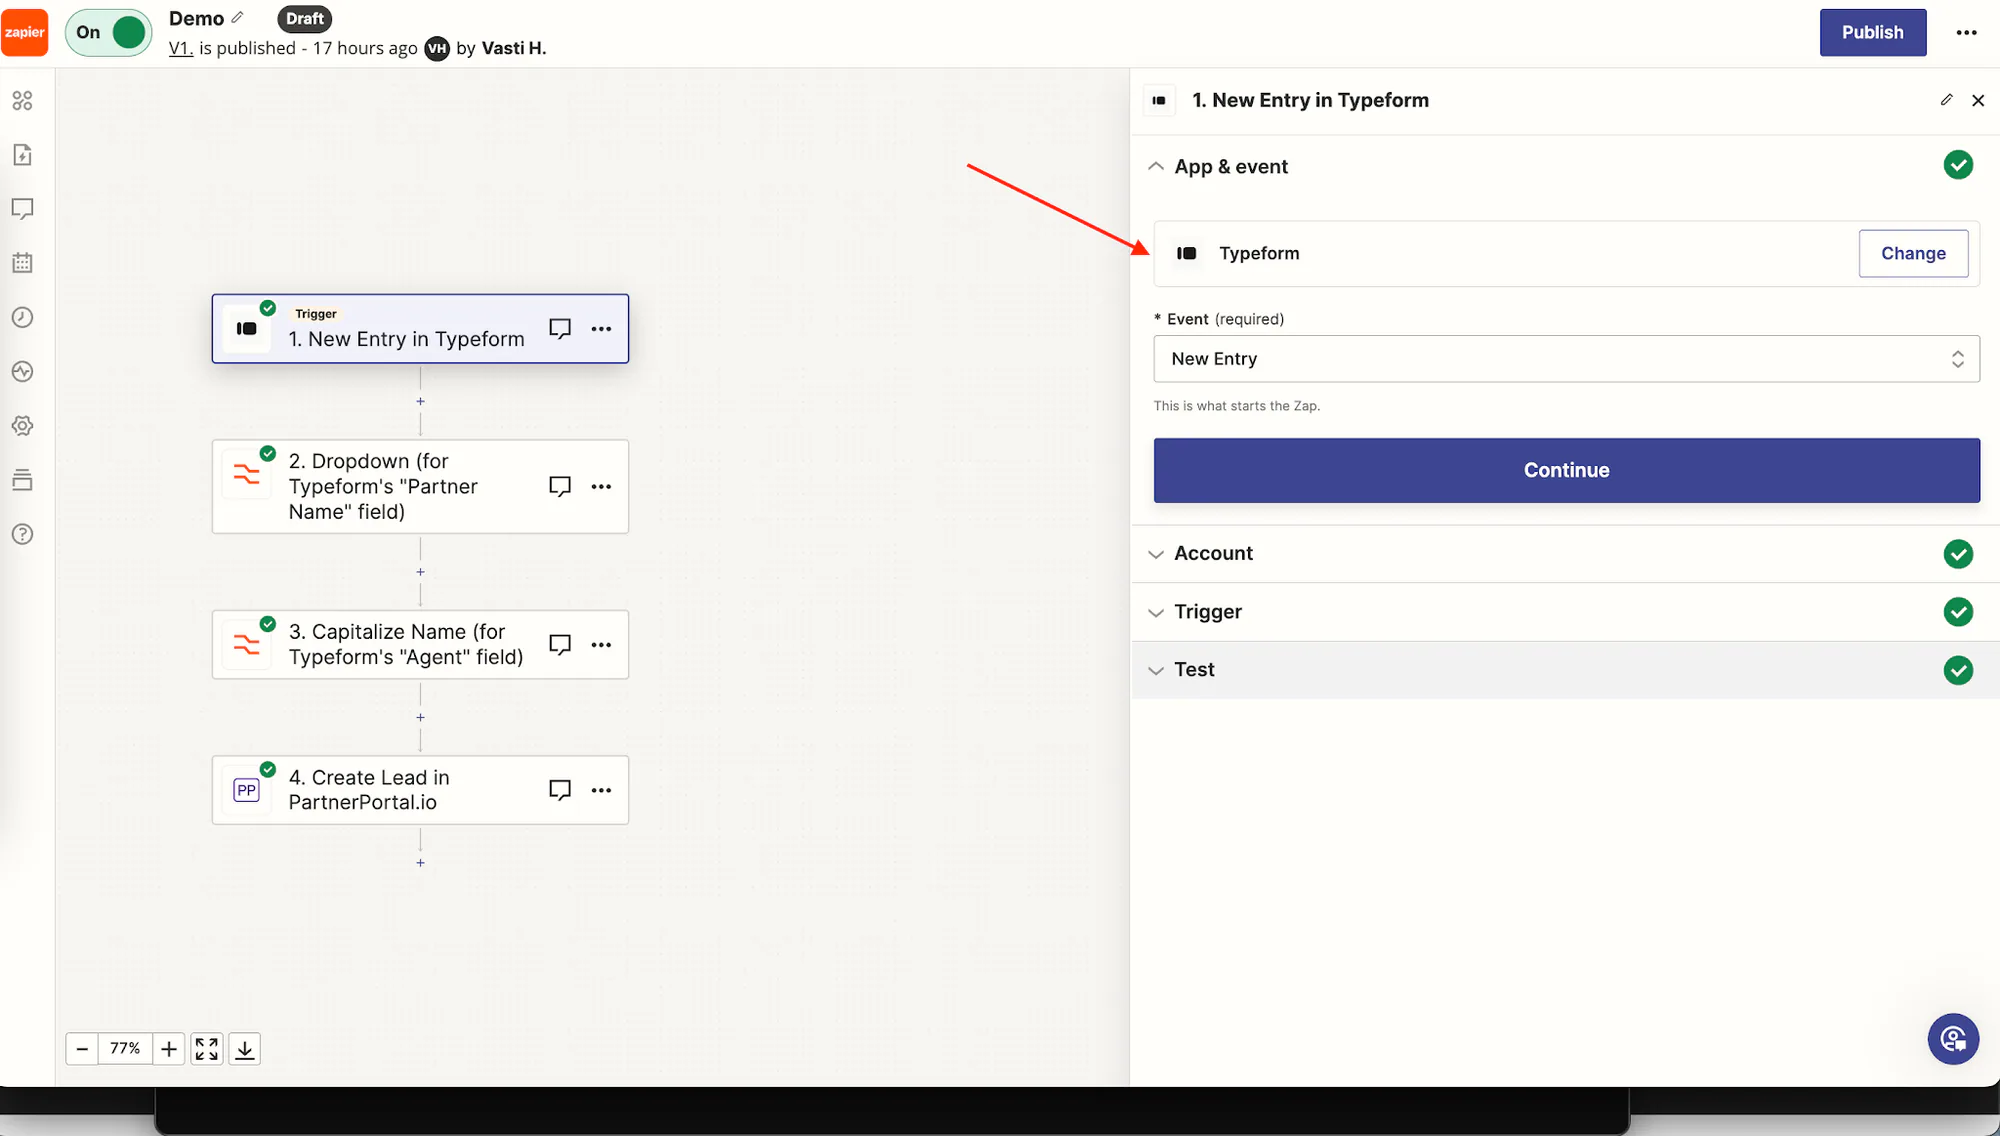
Section titled “Create the Zap”In Zapier, open Zaps.
Click Make a Zap.
Choose your trigger app, such as HubSpot or Typeform.
Configure and test the trigger
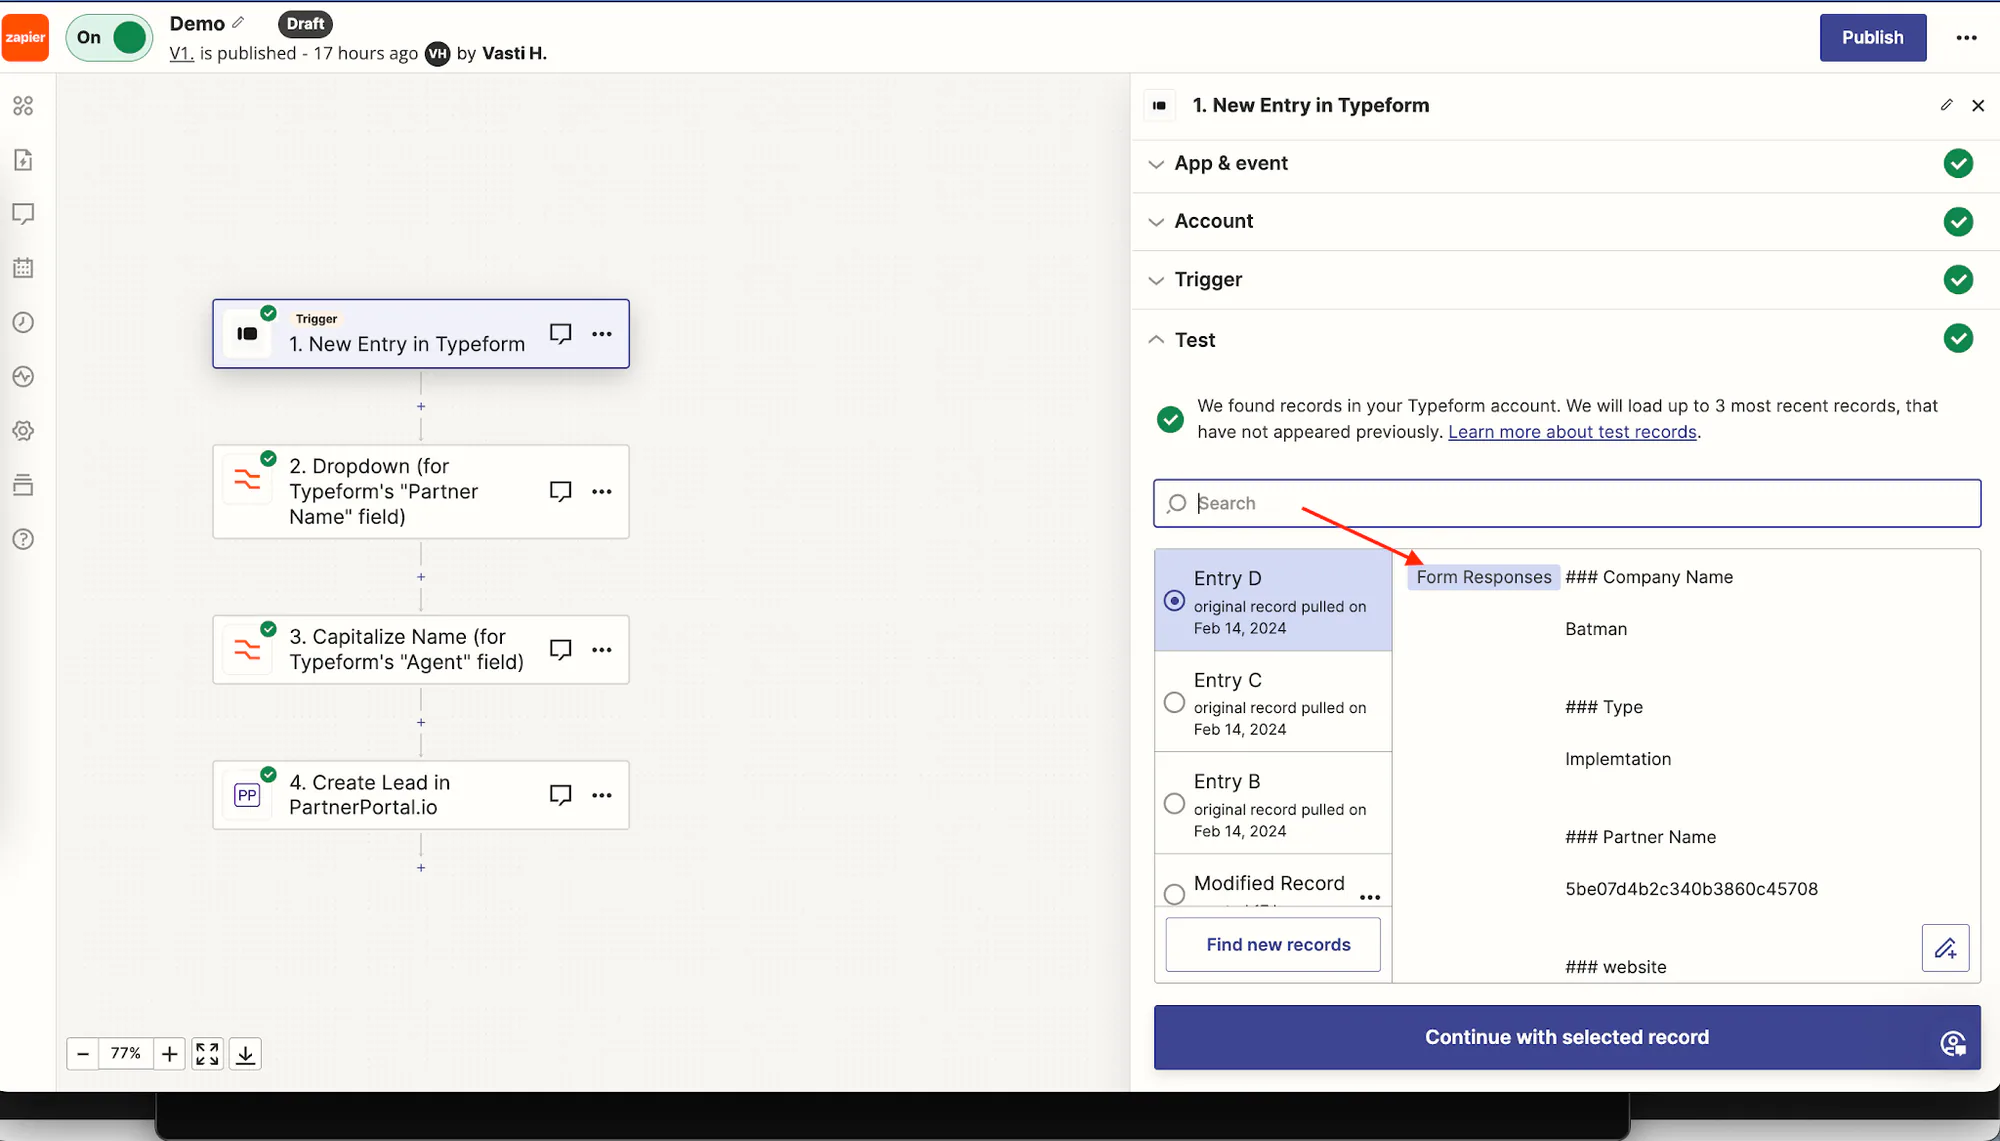
Section titled “Configure and test the trigger”Connect the trigger app to Zapier.
Choose the trigger event, such as a new form submission.
Submit a real test form entry.
Run the trigger test and confirm Zapier can retrieve the submission.
Set PartnerPortal as the action app
Section titled “Set PartnerPortal as the action app”After the trigger is working, choose PartnerPortal.io as the action app and select Create Lead as the action event.
Connect your PartnerPortal account
Section titled “Connect your PartnerPortal account”Follow Zapier’s prompts to connect PartnerPortal, and sign in with the PartnerPortal account that should create leads.
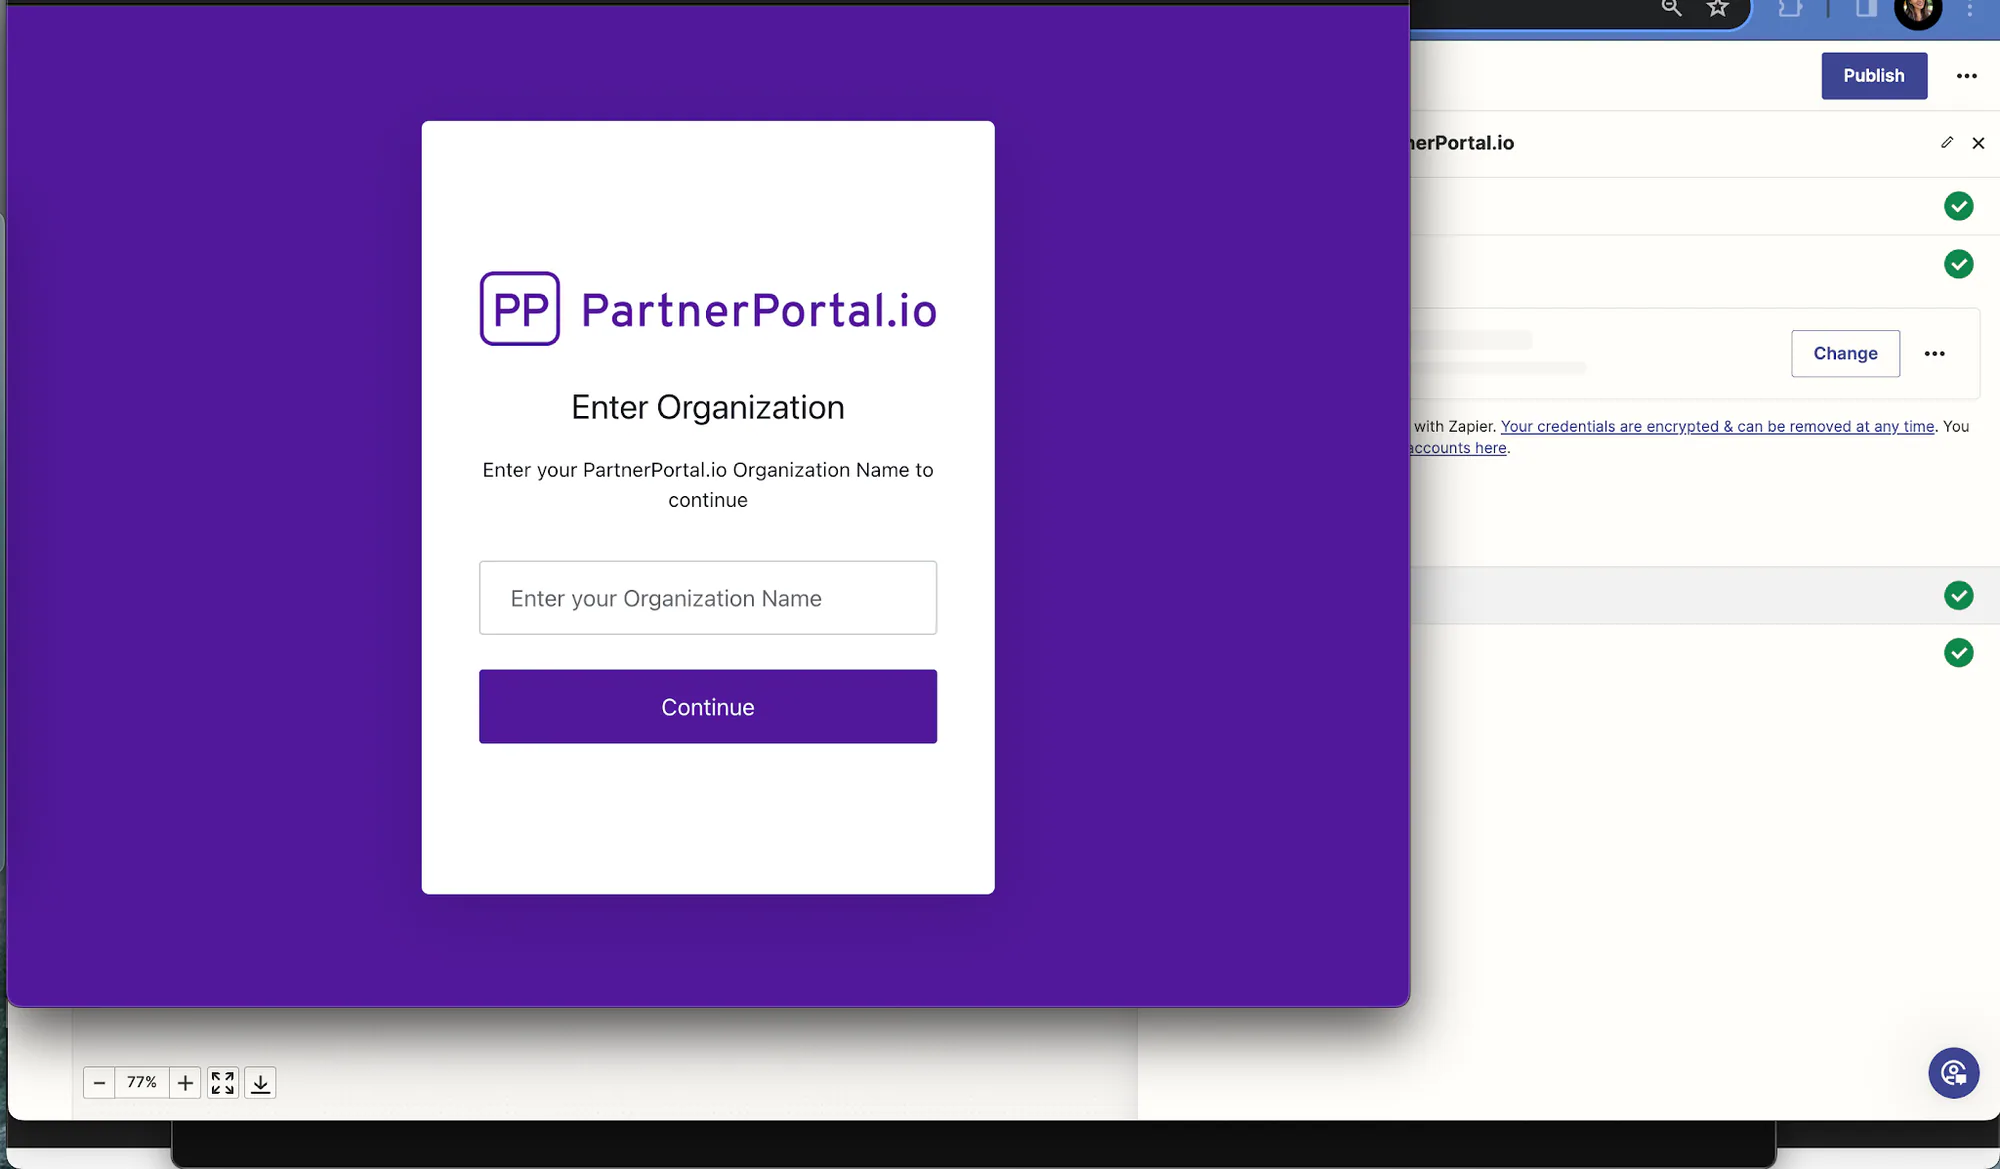
When Zapier asks for your Organization, enter your Organization Name exactly. This is how Zapier knows which portal to connect to. Find it in PartnerPortal on your Account page, under the Integrations → Zapier card — it is your portal subdomain plus your company ID (for example,
acme-1a2b3c4d5e6f).Finish the connection so Zapier can load your portal and field schema.
Map the lead fields
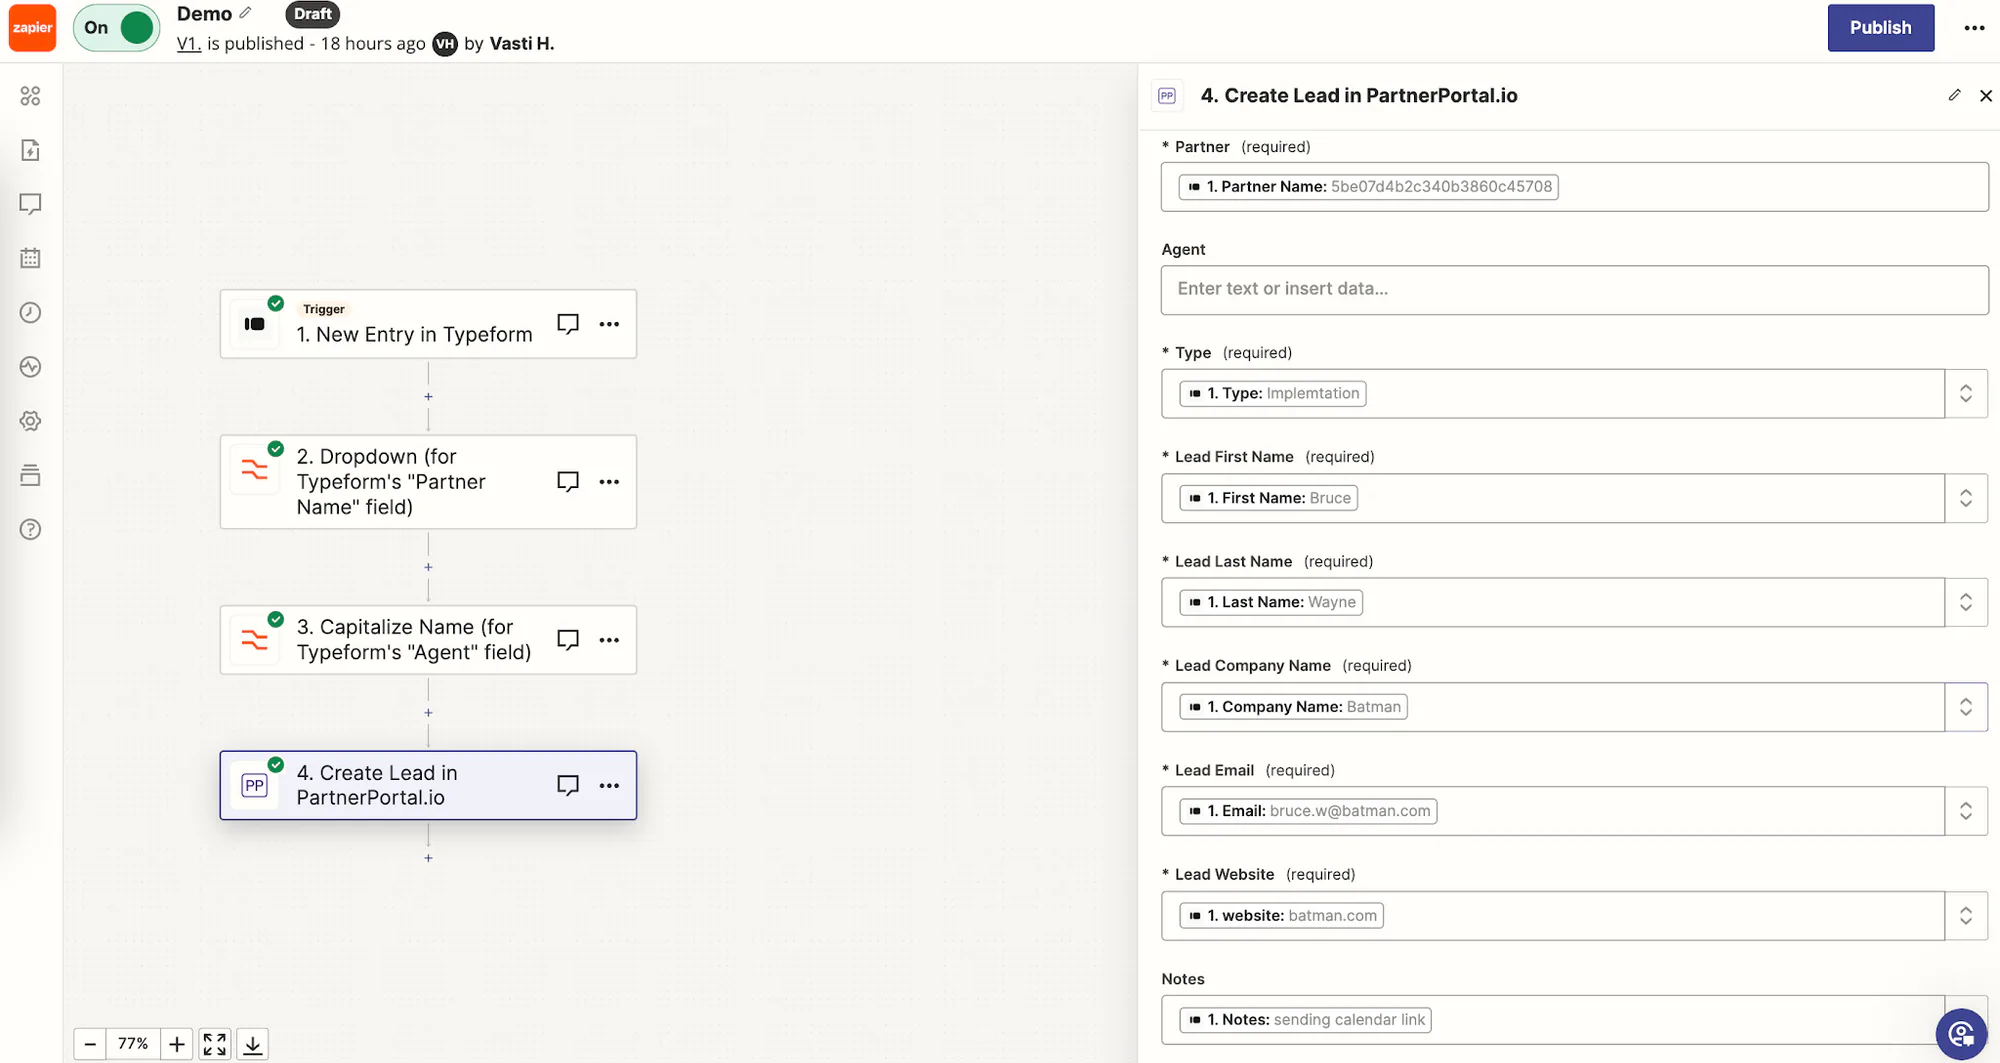
Section titled “Map the lead fields”Map each field from the trigger app to the matching PartnerPortal lead field. Make sure every required PartnerPortal field is covered before you test the action.
If your portal requires a specific partner or partner user assignment, include those values in the Zap as well so the lead lands in the correct place.
Test and publish the Zap
Section titled “Test and publish the Zap”Run the action test and confirm that Zapier creates the lead in PartnerPortal.
Check the new lead inside PartnerPortal to make sure the values were mapped correctly.
Publish the Zap once the test looks right.
Update a lead using Zapier
Section titled “Update a lead using Zapier”Use the Update Lead action to change the details of a lead that already exists in PartnerPortal — for example, to push a status change or a corrected value from another system, or to move the lead to a different portal phase.
What you need
Section titled “What you need”- The Lead ID of the lead to update. You can get this from a Lead Created or Lead Updated trigger, from the Create Lead action’s output, or from the Find Lead search below.
- The fields you want to change. As with Create Lead, the available fields — including the portal phase and your custom fields — come from your portal’s current lead schema.
Add an action step and choose PartnerPortal.io.
Select Update Lead as the action event.
Map the Lead ID field from an earlier step.
Fill in only the fields you want to change. Update Lead only changes the fields you provide — anything you leave blank is left as it was.
Run the action test and confirm the lead updated correctly in PartnerPortal.
Add a comment to a lead using Zapier
Section titled “Add a comment to a lead using Zapier”Use the Add Comment to Lead action to post a comment on a lead. The comment appears on the lead in PartnerPortal, and the partner and their agent are notified by email — exactly as if the comment had been left in the portal.
What you need
Section titled “What you need”- The Lead ID of the lead to comment on (from a trigger, from Create Lead, or from Find Lead).
- The comment text.
Add an action step and choose PartnerPortal.io.
Select Add Comment to Lead as the action event.
Map the Lead ID from an earlier step.
Enter the comment text. You can mix in values from earlier steps.
Run the action test and confirm the comment appears on the lead in PartnerPortal.
Find a lead using Zapier
Section titled “Find a lead using Zapier”Use the Find Lead search to look up an existing lead by email or a custom field value. It returns a single lead, so you can pass its Lead ID into Update Lead or Add Comment to Lead later in the same Zap.
What you need
Section titled “What you need”- An email to match, and/or a custom field and the value to match. Custom fields are pulled live from your portal’s lead schema.
Add a search step and choose PartnerPortal.io.
Select Find Lead.
Enter an email to match, or choose a custom field and enter its value. If you search by a custom field, provide both the field and a value.
Run the test and confirm the correct lead is returned.
In a later action, map the Lead ID from the Find Lead step to update the lead or add a comment.
Create a partner using Zapier
Section titled “Create a partner using Zapier”Use the Create Partner action to add a new partner — a partner company plus its owner login — to PartnerPortal from another system, such as your CRM. It works exactly like inviting a partner from the portal: the partner is activated immediately, and the owner is emailed a set-password invite.
What you need
Section titled “What you need”- The partner’s company name and website domain. The domain must be unique within your portal.
- The owner’s first name, last name, and email — all three are required. An owner phone number is optional.
- Optionally, the partner’s PayPal email, where partner payouts are sent.
Add an action step and choose PartnerPortal.io.
Select Create Partner as the action event.
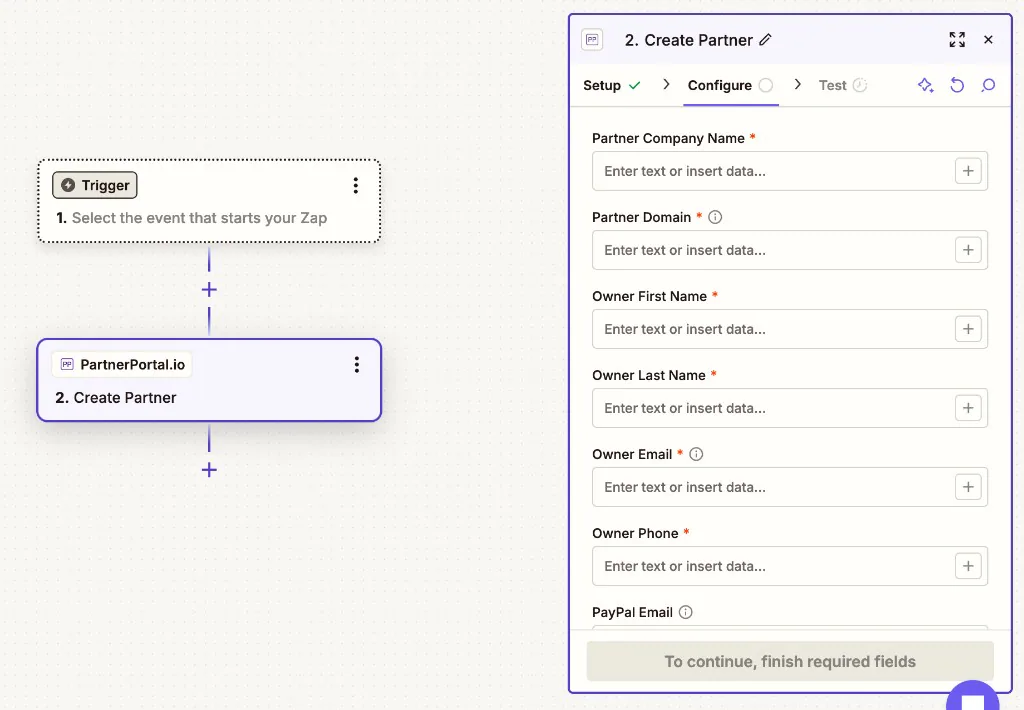
Map Partner Company Name and Partner Domain.
Map the owner’s Owner First Name, Owner Last Name, and Owner Email. Optionally add an Owner Phone and a PayPal Email.
Run the action test and confirm the partner appears in PartnerPortal.
Map the partner fields from your trigger
Section titled “Map the partner fields from your trigger”In a real Zap you don’t type these values — you map them from the step that starts the Zap. Click into each PartnerPortal field and pick the matching field from your trigger app’s output, so the value fills in automatically for every record. You can mix in static text and add Formatter by Zapier steps to reshape data before it reaches PartnerPortal:
- Owner Phone is optional. When you map it, include a country code (for example,
+15555550100). If your source stores phone numbers differently, add a Formatter step to normalize the value. - If your source has a single full-name field, add a Formatter → Text → Split step and map its two halves into Owner First Name and Owner Last Name.
- You can map a full website URL into Partner Domain. PartnerPortal normalizes it — stripping
https://,www., and any path — sohttps://www.acme.com/signupis stored asacme.com.
Example: create a partner from an intake form
Section titled “Example: create a partner from an intake form”Say new partners come in through a form — a Typeform, a Google Form, or a CRM webhook — that collects the partner company’s details and the owner’s contact information. You can turn each submission into a PartnerPortal partner automatically.
Trigger: choose your form or CRM app and its “new submission” (or “new record”) event, then run the test so Zapier loads a sample submission with its fields.
Action: add PartnerPortal.io and select Create Partner.
Map the submitted values to the PartnerPortal fields: the company name to Partner Company Name, the website to Partner Domain, and the owner’s details to Owner First Name, Owner Last Name, Owner Email, and (if you collect one) Owner Phone.
If the submitted data needs reshaping — a single full name to split, or a phone number to reformat — add Formatter by Zapier steps between the trigger and the action, then map their output instead.
Run the action test, confirm the partner is created in PartnerPortal, and publish the Zap. From then on, every submission creates the partner and emails the owner their set-password invite.
Create a partner only when it is new
Section titled “Create a partner only when it is new”Because a trigger can fire more than once for the same partner — and PartnerPortal returns an error rather than creating a duplicate domain — pair Create Partner with Find Partner so you never create a partner twice. On a Find Partner search step, turn on the option to create a partner if one isn’t found: Zapier shows the full Create Partner form on that same step and only runs it when the search comes up empty. See Find a partner using Zapier below for the search setup.
Find a partner using Zapier
Section titled “Find a partner using Zapier”Use the Find Partner search to look up an existing partner by domain or owner email. It returns a single partner, so you can pass its details into later steps — or pair it with Create Partner so a Zap only adds a partner when a matching one does not already exist.
What you need
Section titled “What you need”- A domain to match, and/or an owner email to match. Provide at least one.
Add a search step and choose PartnerPortal.io.
Select Find Partner.
Enter a Domain, an Owner Email, or both.
Run the test and confirm the correct partner is returned.
To create the partner when none is found, turn on Zapier’s option to create a record if the search comes up empty, and choose Create Partner.
Find a partner user using Zapier
Section titled “Find a partner user using Zapier”Use the Find Partner User search to get the person behind a partner — their name, email, phone, and user ID. Partner triggers hand you the partner company, not the people in it, so this is the step that lets you create or update partner owners as contacts in your CRM.
What you need
Section titled “What you need”- The Partner ID. Map it from a Partner Created or Partner Updated trigger, or from Find Partner.
- Optionally, a User Type (Owner or User) and/or an Email to narrow the search.
- Only active users are found unless you turn on Include Inactive Users.
Add a search step and choose PartnerPortal.io.
Select Find Partner User.
Map the Partner ID from an earlier step.
Optionally choose a User Type or enter an Email.
Run the test and confirm the right person is returned.
Example: sync approved partners to your CRM as contacts
Section titled “Example: sync approved partners to your CRM as contacts”Trigger: Partner Updated.
Filter: continue only when the partner’s status is
active.Search: Find Partner User, with the Partner ID mapped from the trigger.
Action: your CRM’s “create or update contact” action. Map the person’s name and email from Find Partner User, and store their user ID and the Partner ID if your CRM has fields for them.
If you track program terms in your CRM, map Terms Accepted At and Accepted Terms Version from the trigger’s partner data. Terms acceptance belongs to the partner as a whole, so these values come from the partner, not the person.
Because Partner Updated can fire more than once for the same partner, use a CRM action that updates an existing contact instead of creating a new one each time.
Add a partner user using Zapier
Section titled “Add a partner user using Zapier”Use the Add Partner User action to add a user to a partner that already exists. It works exactly like adding a user from the partner’s page in the portal: the user is activated immediately and emailed a set-password invite.
What you need
Section titled “What you need”- The Partner ID of the partner to add the user to (from Find Partner, Create Partner, or a partner trigger). The partner must be active.
- The user’s first name, last name, and email. A phone number is optional.
Add an action step and choose PartnerPortal.io.
Select Add Partner User as the action event.
Map the Partner ID, then the user’s First Name, Last Name, and Email. Optionally add a Phone.
Run the action test and confirm the user appears on the partner in PartnerPortal.