
Partner Groups
Partner groups are the main way to segment and categorize partners in PartnerPortal. They help you organize your partner base and control visibility and access across the app, especially for announcements, resources, courses, and lead-form fields.
You can group partners by tier, region, partner type, program track, account coverage, or any other structure that fits how you run your program.
Before You Start
Section titled “Before You Start”- Every portal already has an All Partners group by default.
- Newly approved partners are added to All Partners automatically.
- Custom groups are optional and must be maintained manually.
- Beyond All Partners, each partner can belong to only one custom group at a time.
Create a New Partner Group
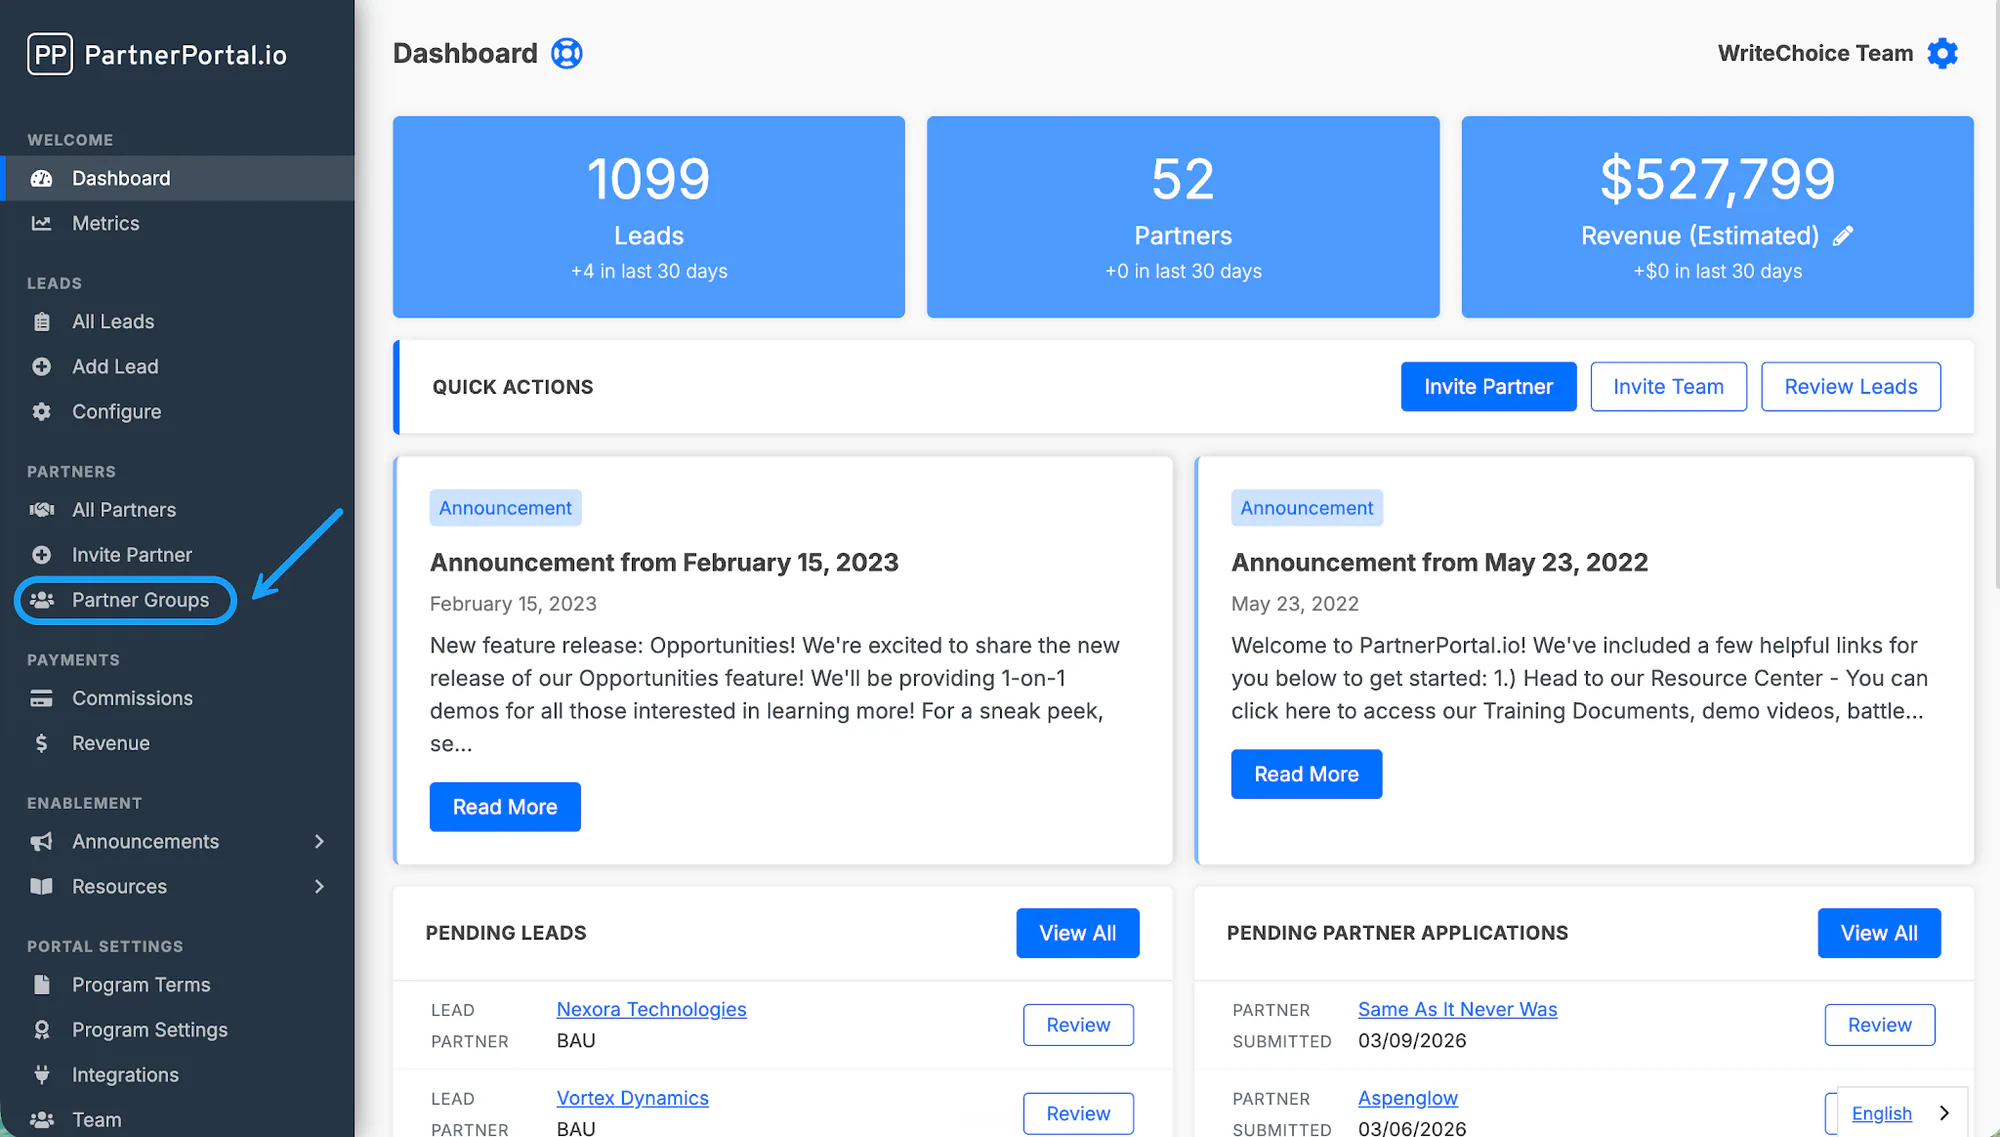
Section titled “Create a New Partner Group”Open Partners → Partner Groups.
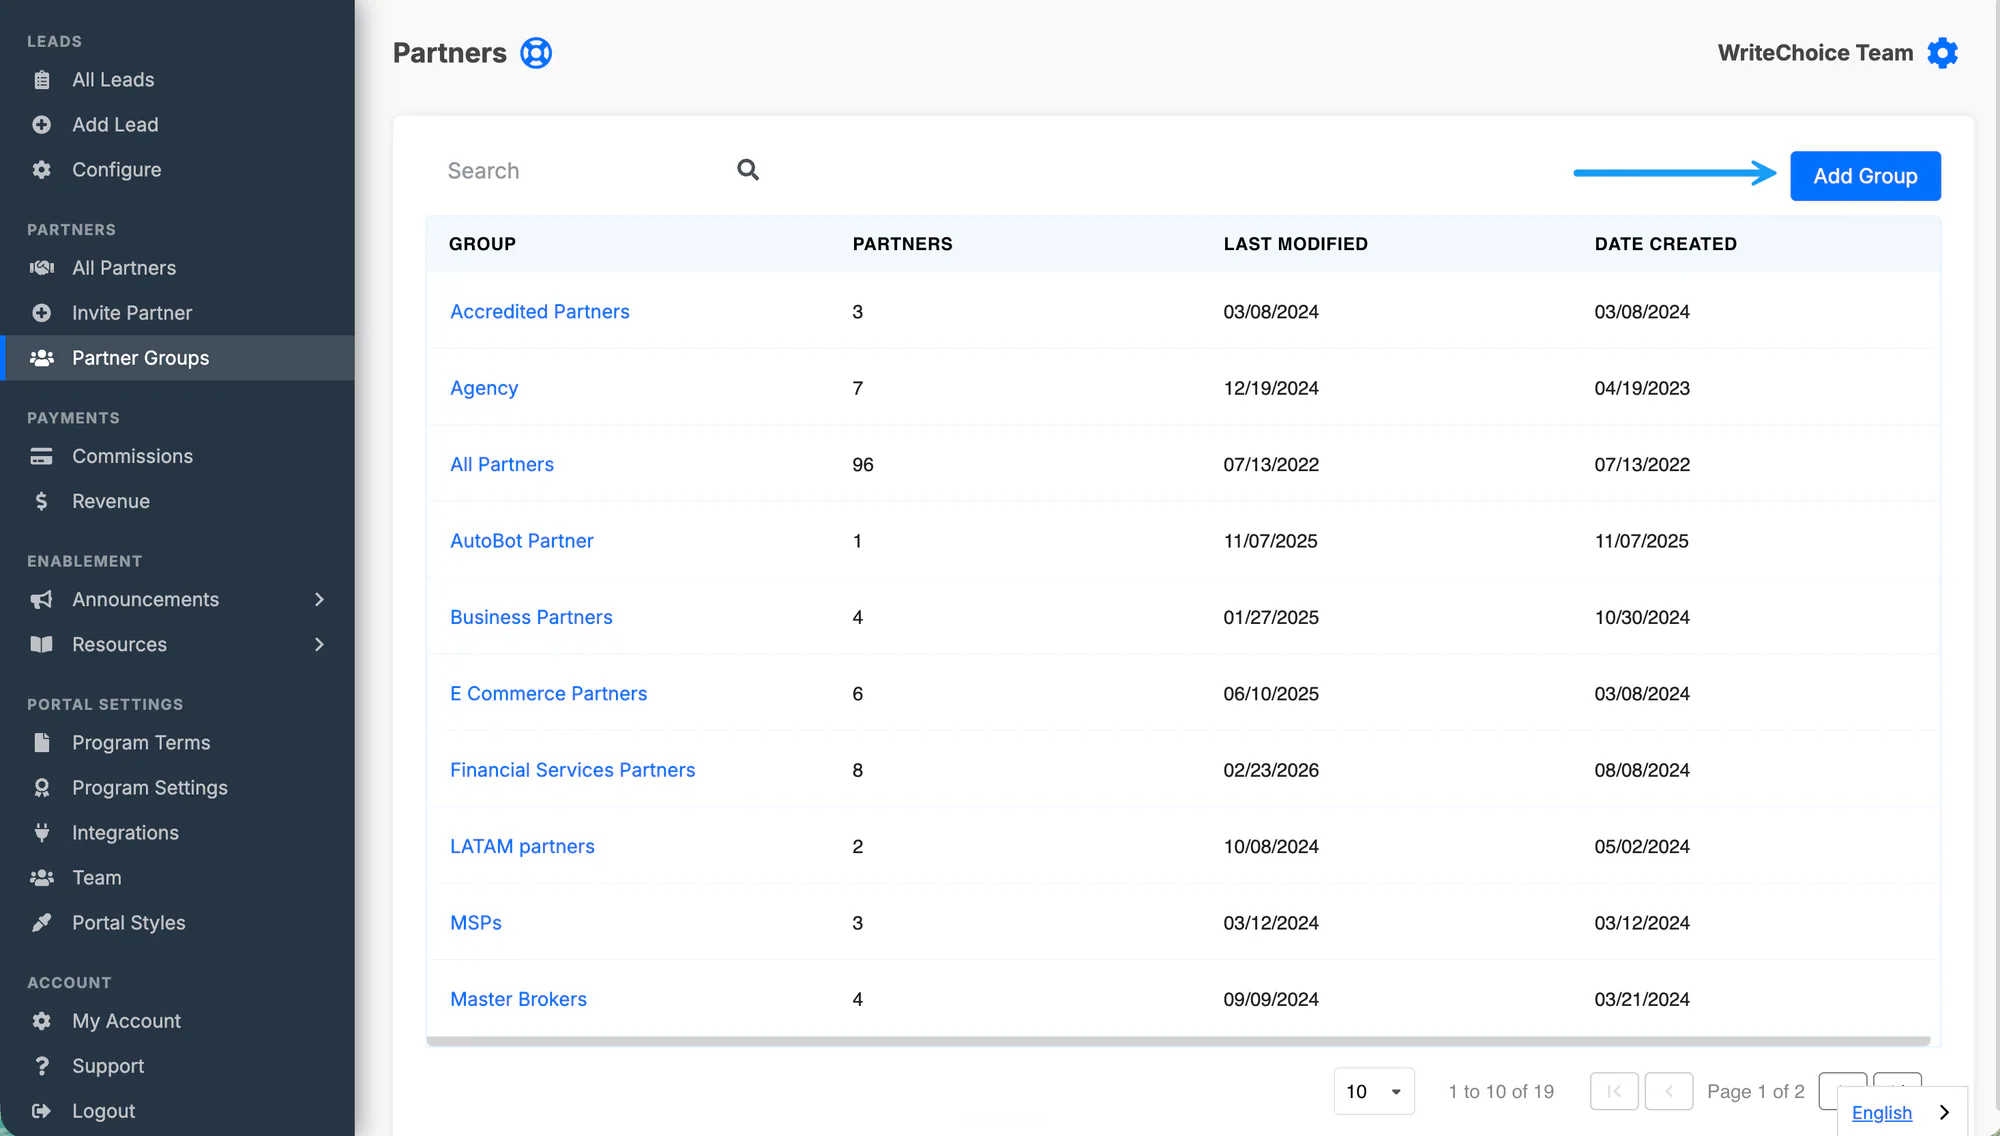
Click Add Group.
Enter a group name.
Select the partner companies you want to include.
Save the group.
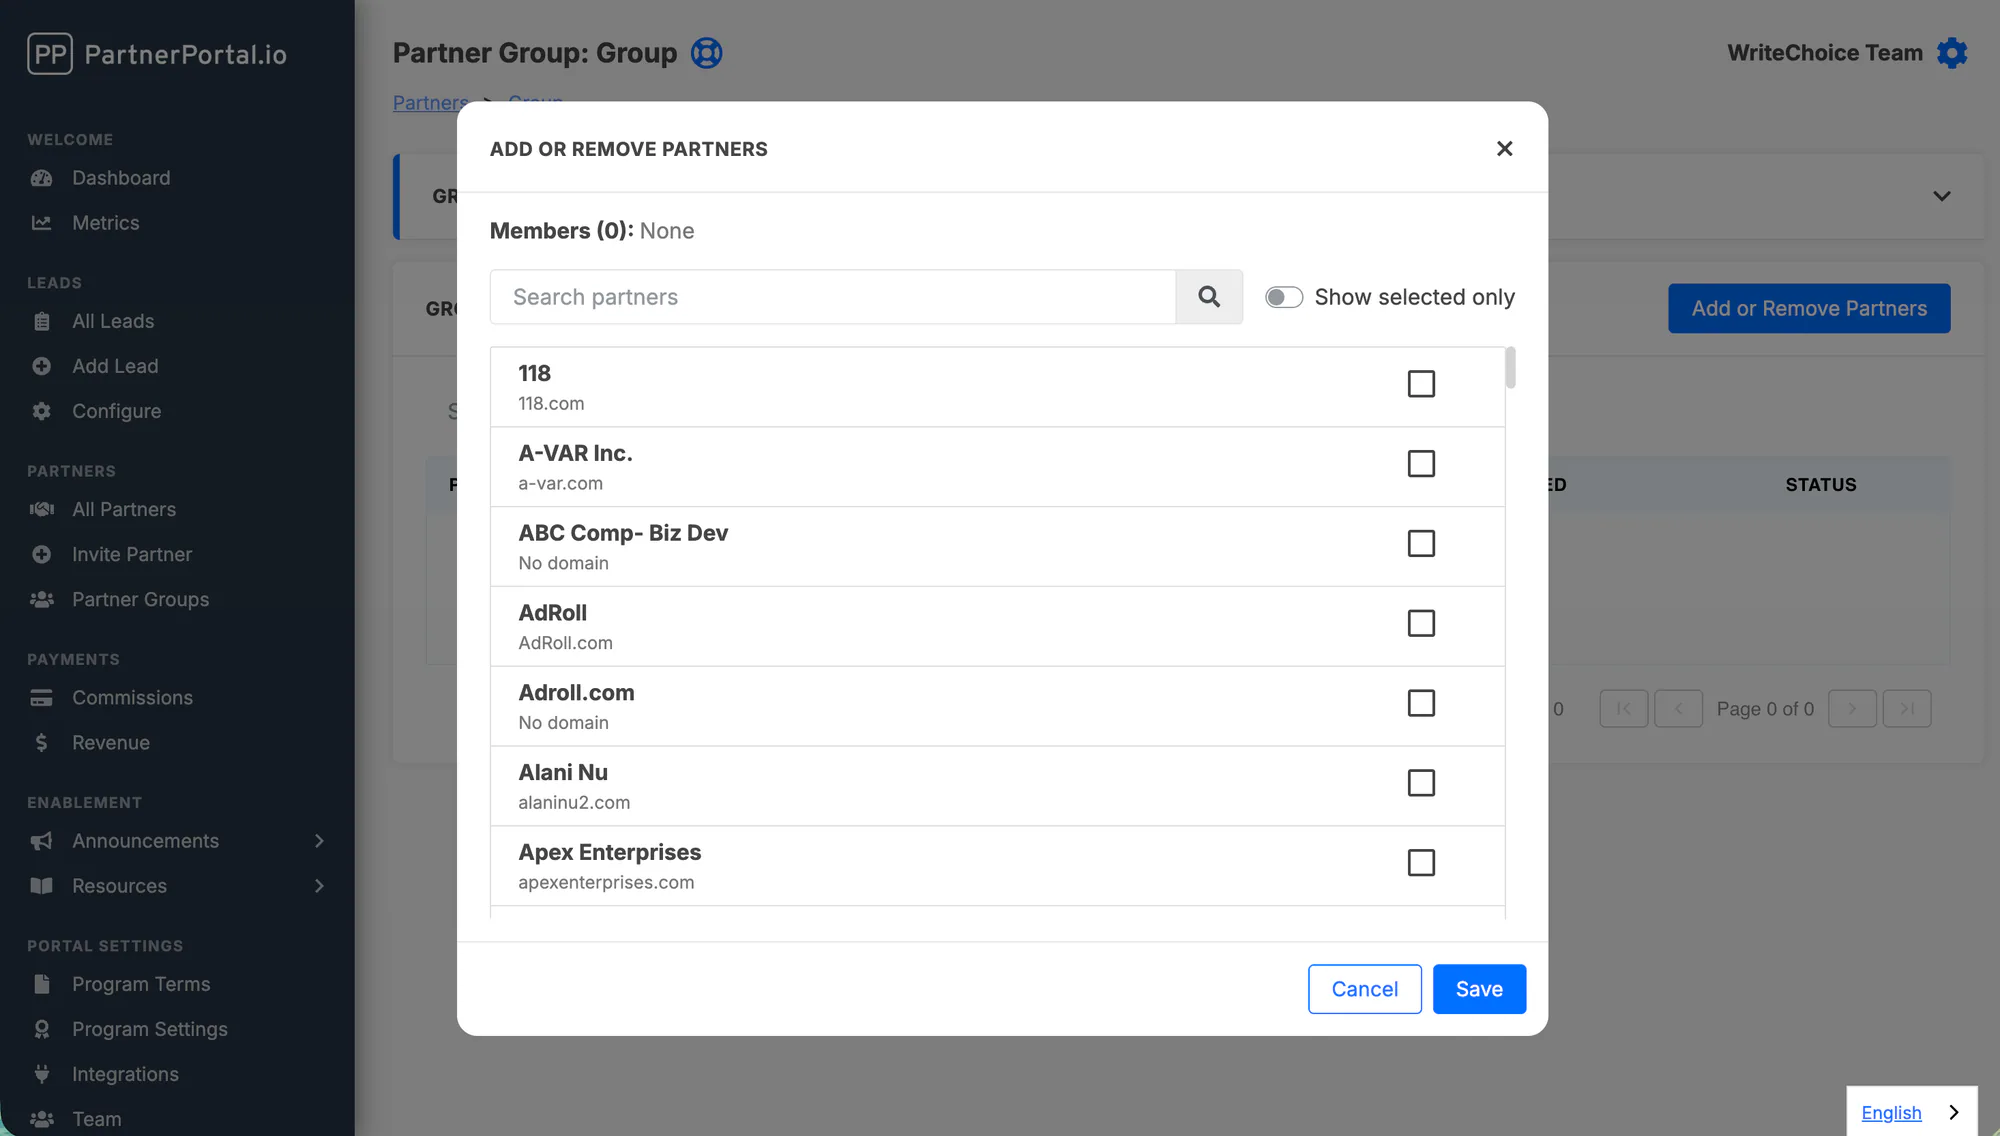
Partners are listed by company name, so search by the company name rather than an individual user’s name.
Edit an Existing Partner Group
Section titled “Edit an Existing Partner Group”Use the edit flow any time you need to add or remove partner companies from a group you already created.
Open Partner Groups.
Select the group you want to update.
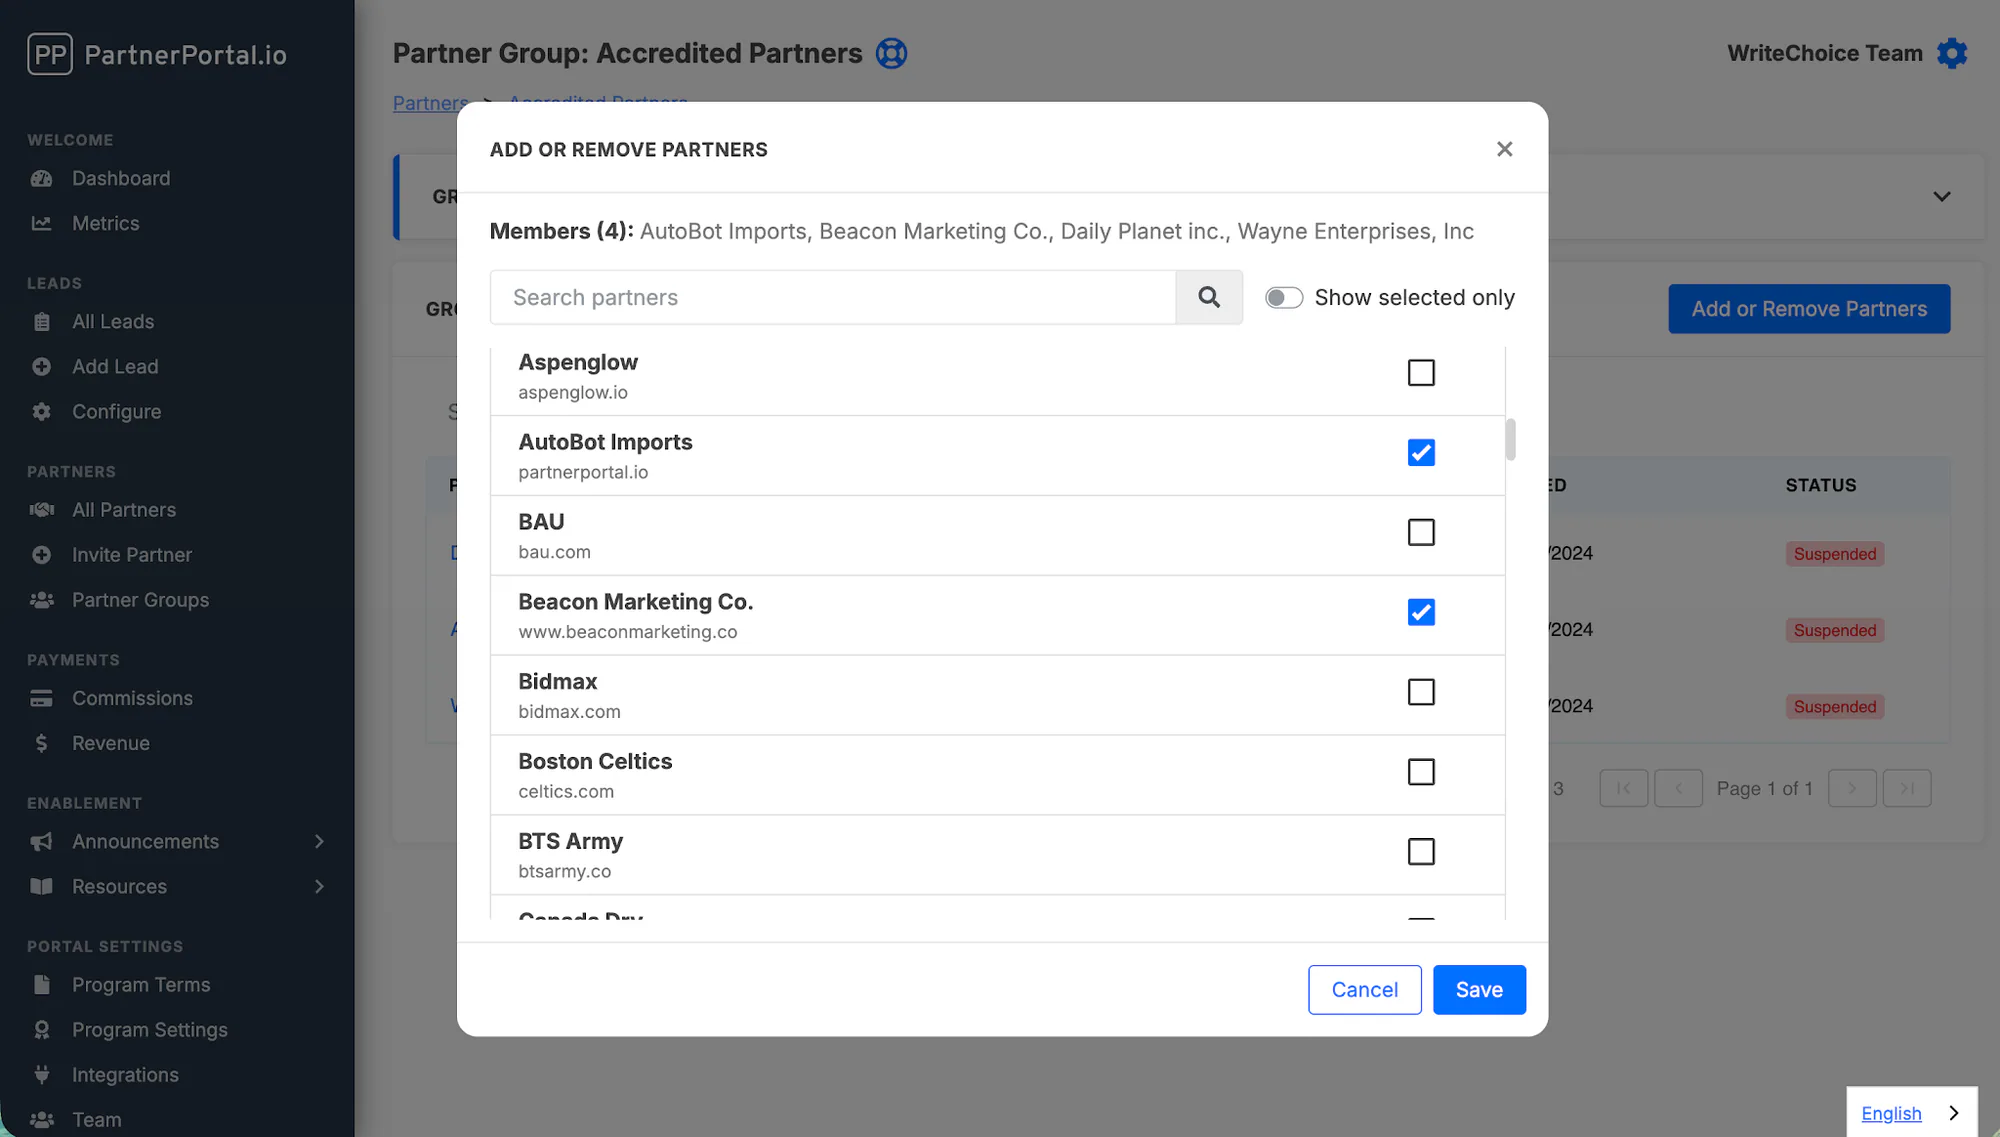
Open the edit flow and add or remove partners by checking or unchecking them.
Save your changes.
What Partner Groups Control
Section titled “What Partner Groups Control”Partner groups affect which partners can:
- see targeted announcements
- view resources in the Resource Center
- access courses
- see specific fields on the lead registration form
- agree to their own program terms (see below)
- be compensated on a different partner model — referral, reseller, or non-commercial (see below)
- see a tailored menu, dashboard and lead screen, and which cards your team sees on their partner record (see below)
Together, these make partner groups the core layer for tailoring the partner experience in PartnerPortal.
For more on configuring access in those areas, see:
Group Program Terms
Section titled “Group Program Terms”A partner group can have its own Program Terms that replace your portal-wide Program Terms for that group’s members. This is useful when a specific tier or partner type needs a different agreement from your general program.
Manage this on the group’s settings from a Program Terms card, below the group’s members.
On the card, you can:
- turn group terms on or off
- edit the group’s legal terms in a rich-text editor
- require partners in this group to agree before they can use the portal
- ask partners to re-accept when you change the group terms
Open Partner Groups and select the group.
In the Program Terms card, turn on Enable Program Terms and click Edit.
Enter the terms for this group, then save.
To gate access, also turn on Require partners in this group to agree.
Editing group terms works the same way as portal-wide terms: on save you choose whether partners who already agreed must re-accept the new version. See Require Partners to Agree for how the agreement gate and versioning behave.
Partner Model for a Group
Section titled “Partner Model for a Group”A partner group can set its own Partner Model — Referral, Reseller, or Non-commercial — for the partners in it, overriding your portal-wide default. This is useful when one segment of your program resells your product while the rest earn a referral commission, or when a group of technology partners or internal staff should never be paid at all.
Manage it from the group’s settings, in the Partner Model field.
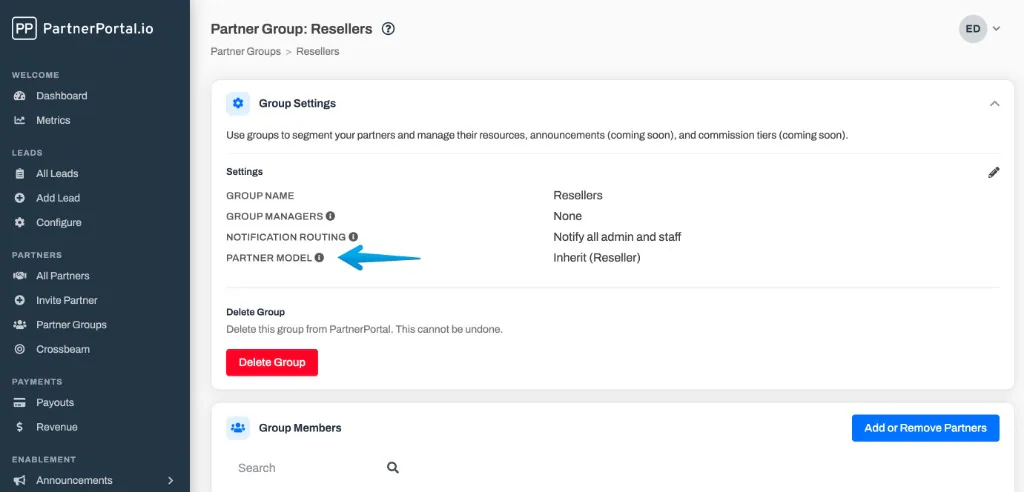
- Inherit follows your portal default (shown in parentheses so you know what it currently resolves to).
- Referral sets partners in this group to earn a commission on revenue.
- Reseller sets them to earn a margin on wholesale, with margin language throughout.
- Non-commercial sets them to earn nothing: no payouts are generated for their leads, and they see no commission or payout screens. This is the usual way to set up a technology-partner group, or a group for your own team to use the portal for training.
Customize Menu and Screens for a Group
Section titled “Customize Menu and Screens for a Group”A partner group can override your portal-wide Customize Menu & Screens settings for its members: the partner menu, the partner dashboard, and the cards on the partner and lead screens. This is useful when one group should not see a section of the portal that other partners use, or when you want to hide Close Value from one group while other partners still see it. If the reason is that the group’s partners are never paid, set the group’s partner model to Non-commercial instead — that hides the commission and payout screens for them and stops payouts being generated.
Manage it from the group’s settings, in the Customize Menu & Screens card below the group’s Program Terms. The card only appears on custom groups — the All Partners group always uses the portal default.
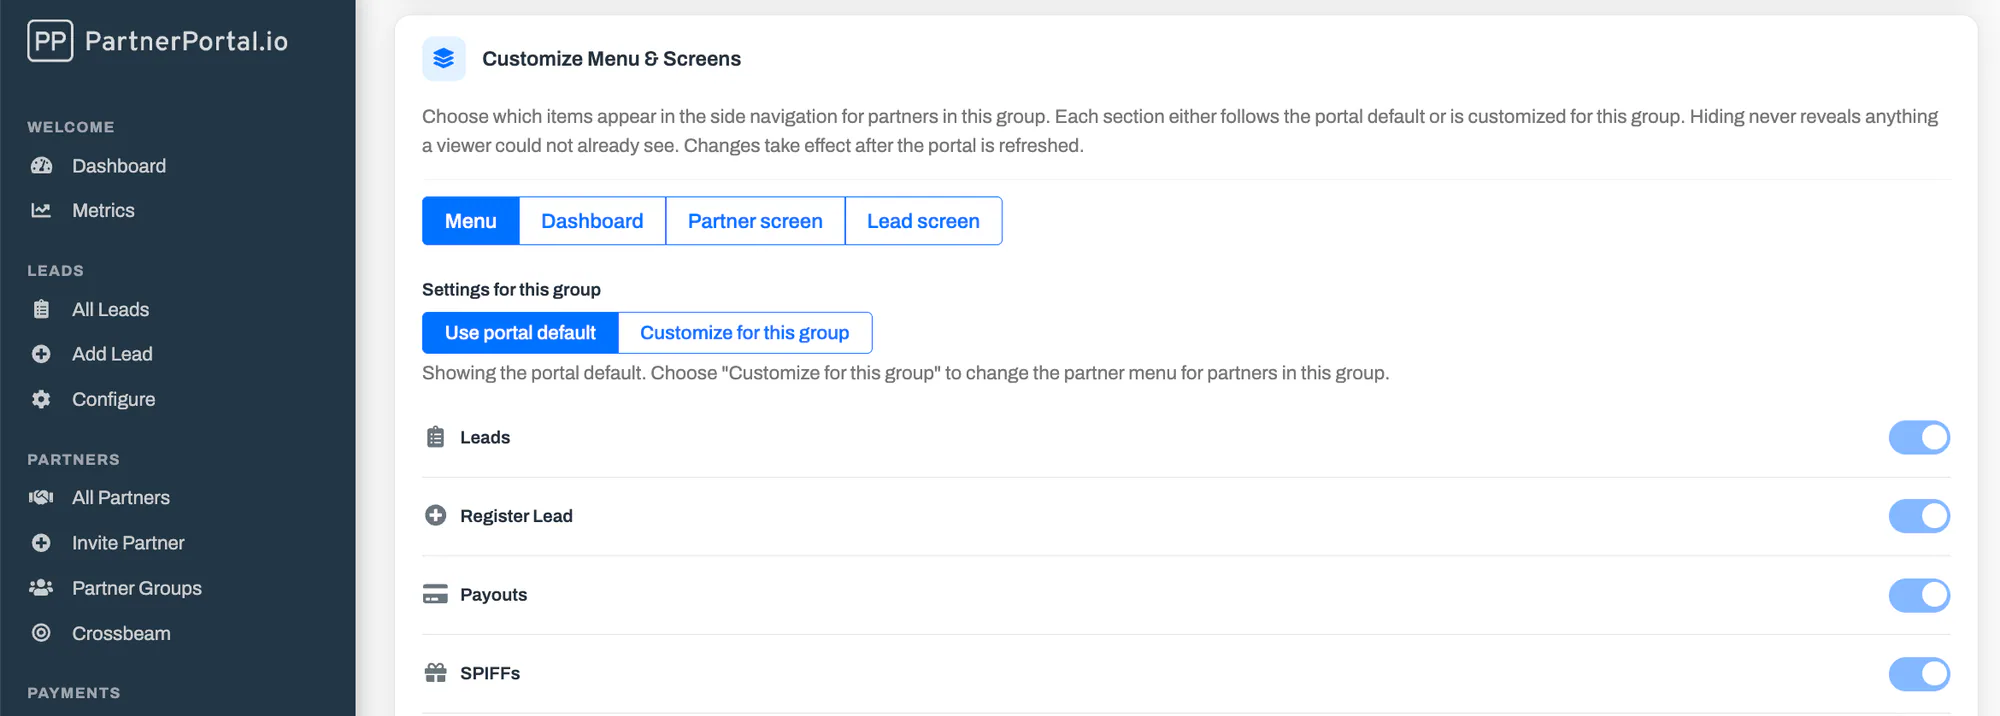
The card works like the portal-wide one, with one addition: under Settings for this group, each section — Menu, Dashboard, Partner screen and Lead screen — is either on Use portal default or Customize for this group.
- Use portal default follows your portal-wide settings, shown read-only so you can see what applies.
- Customize for this group starts from a copy of the portal-wide settings, which you then adjust for this group. Later changes to the portal-wide settings no longer affect that section for this group.
Only the partner menu can be customized for a group. The admin menu is your team’s and stays portal-wide.
Open Partner Groups and select the group.
In Customize Menu & Screens, choose Menu, Dashboard, Partner screen or Lead screen.
Under Settings for this group, click Customize for this group.
Toggle items on or off. Each toggle saves as soon as you flip it.
Group Account Managers
Section titled “Group Account Managers”You can also use partner groups to assign ownership on your portal team.
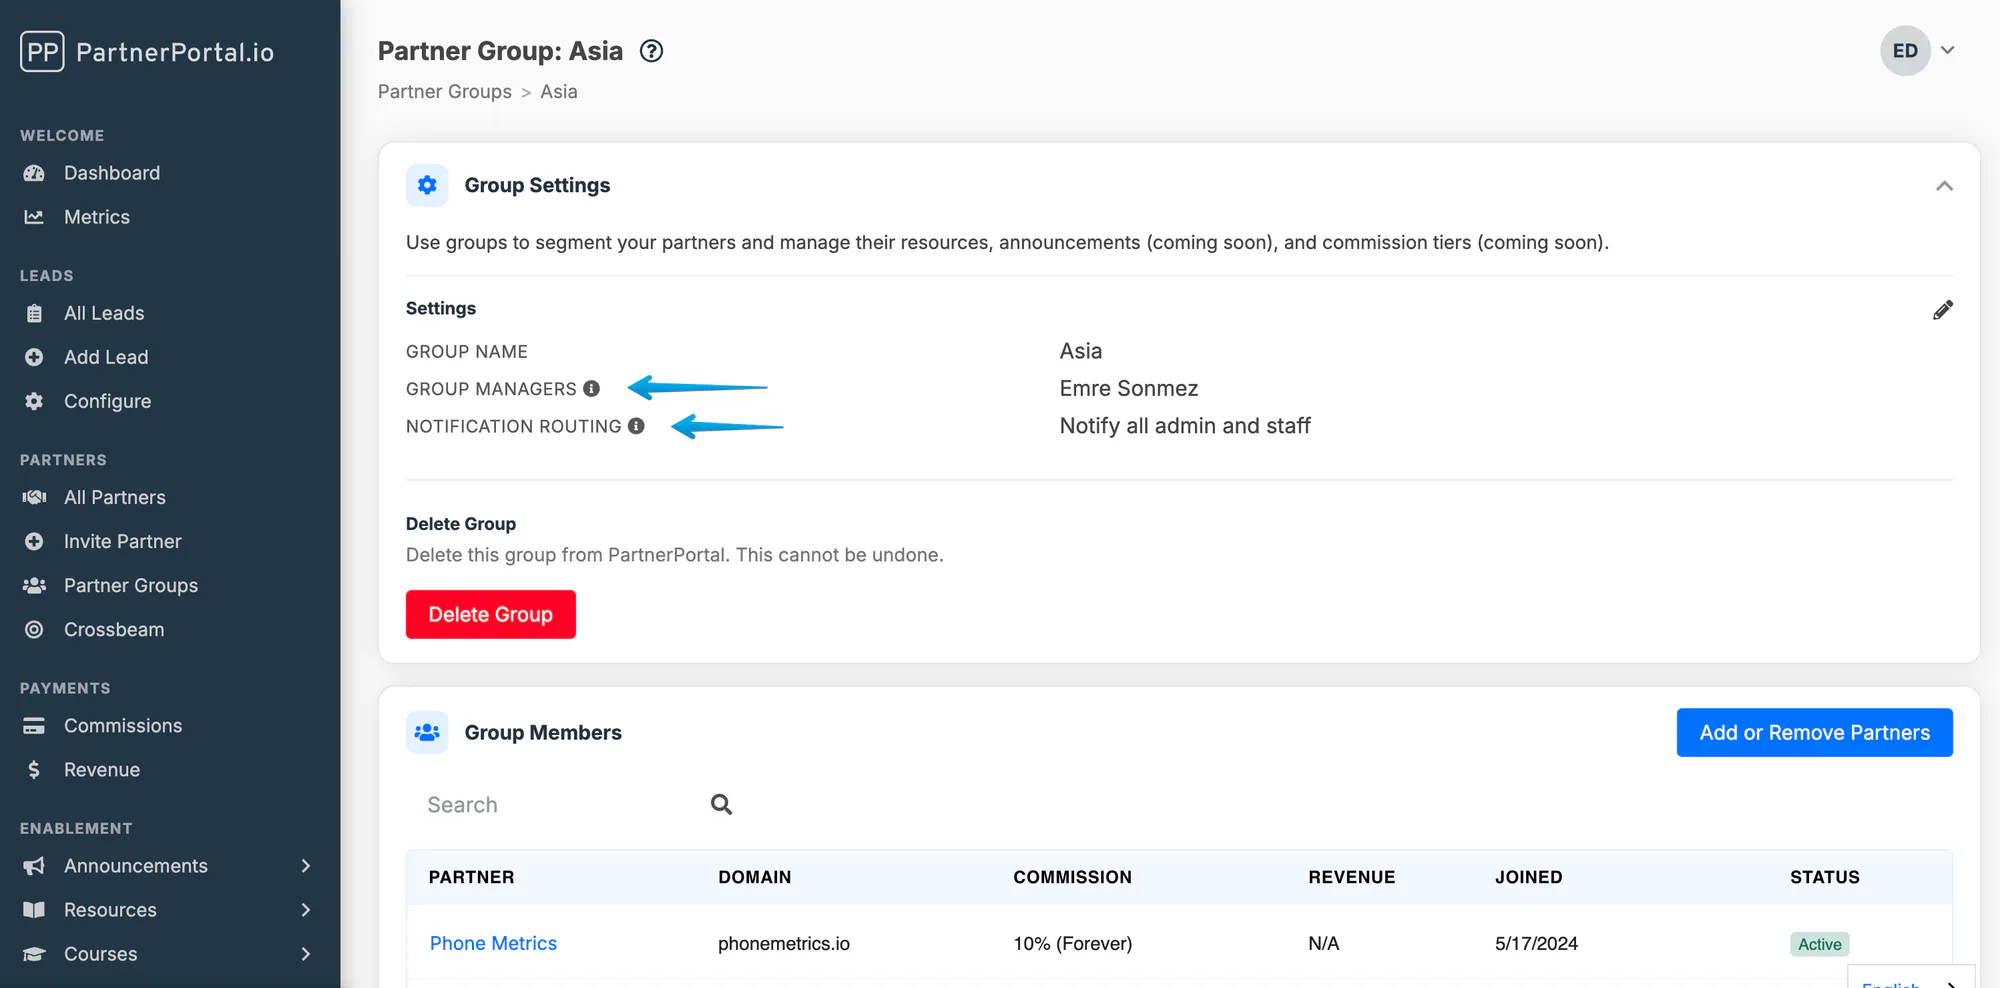
Each partner group can have one or more Group Managers. This is useful when you want to signal which portal-team members are responsible for a segment of partners.
On top of that, the group’s Notification Routing setting controls who on your portal team receives partner activity emails for partners in that group:
- Notify all admin and staff: the default behavior
- Notify only Group Managers and Account Managers: sends those notifications only to the group’s managers plus the directly assigned account manager for the partner
This routing applies to partner activity such as:
- lead submissions
- comments
- opportunity status changes
Troubleshooting
Section titled “Troubleshooting”A partner cannot see a resource or lead-field option
Section titled “A partner cannot see a resource or lead-field option”Check the groups that partner belongs to. If they are only in All Partners, they only see content configured for that default audience. Resource categories, courses, and announcements can also be shared with individual partners directly, so check the item’s Partners section as well as its groups.
I cannot find a partner while editing a group
Section titled “I cannot find a partner while editing a group”Search by the partner company’s name, not the individual user’s name.
A newly approved partner did not appear in my custom group
Section titled “A newly approved partner did not appear in my custom group”New partners are only added to All Partners automatically. If they should belong to a custom group, you need to assign that group manually after approval.