
Resources
The Resource Center is your partner enablement library. You publish resources — posts with a title, featured image, rich body, and downloadable attachments — and organize them into categories. Categories are also how you control access: you decide which partners can see a category (and everything in it) by assigning partner groups to it, or by sharing it with individual partners.
How the Resource Center Works
Section titled “How the Resource Center Works”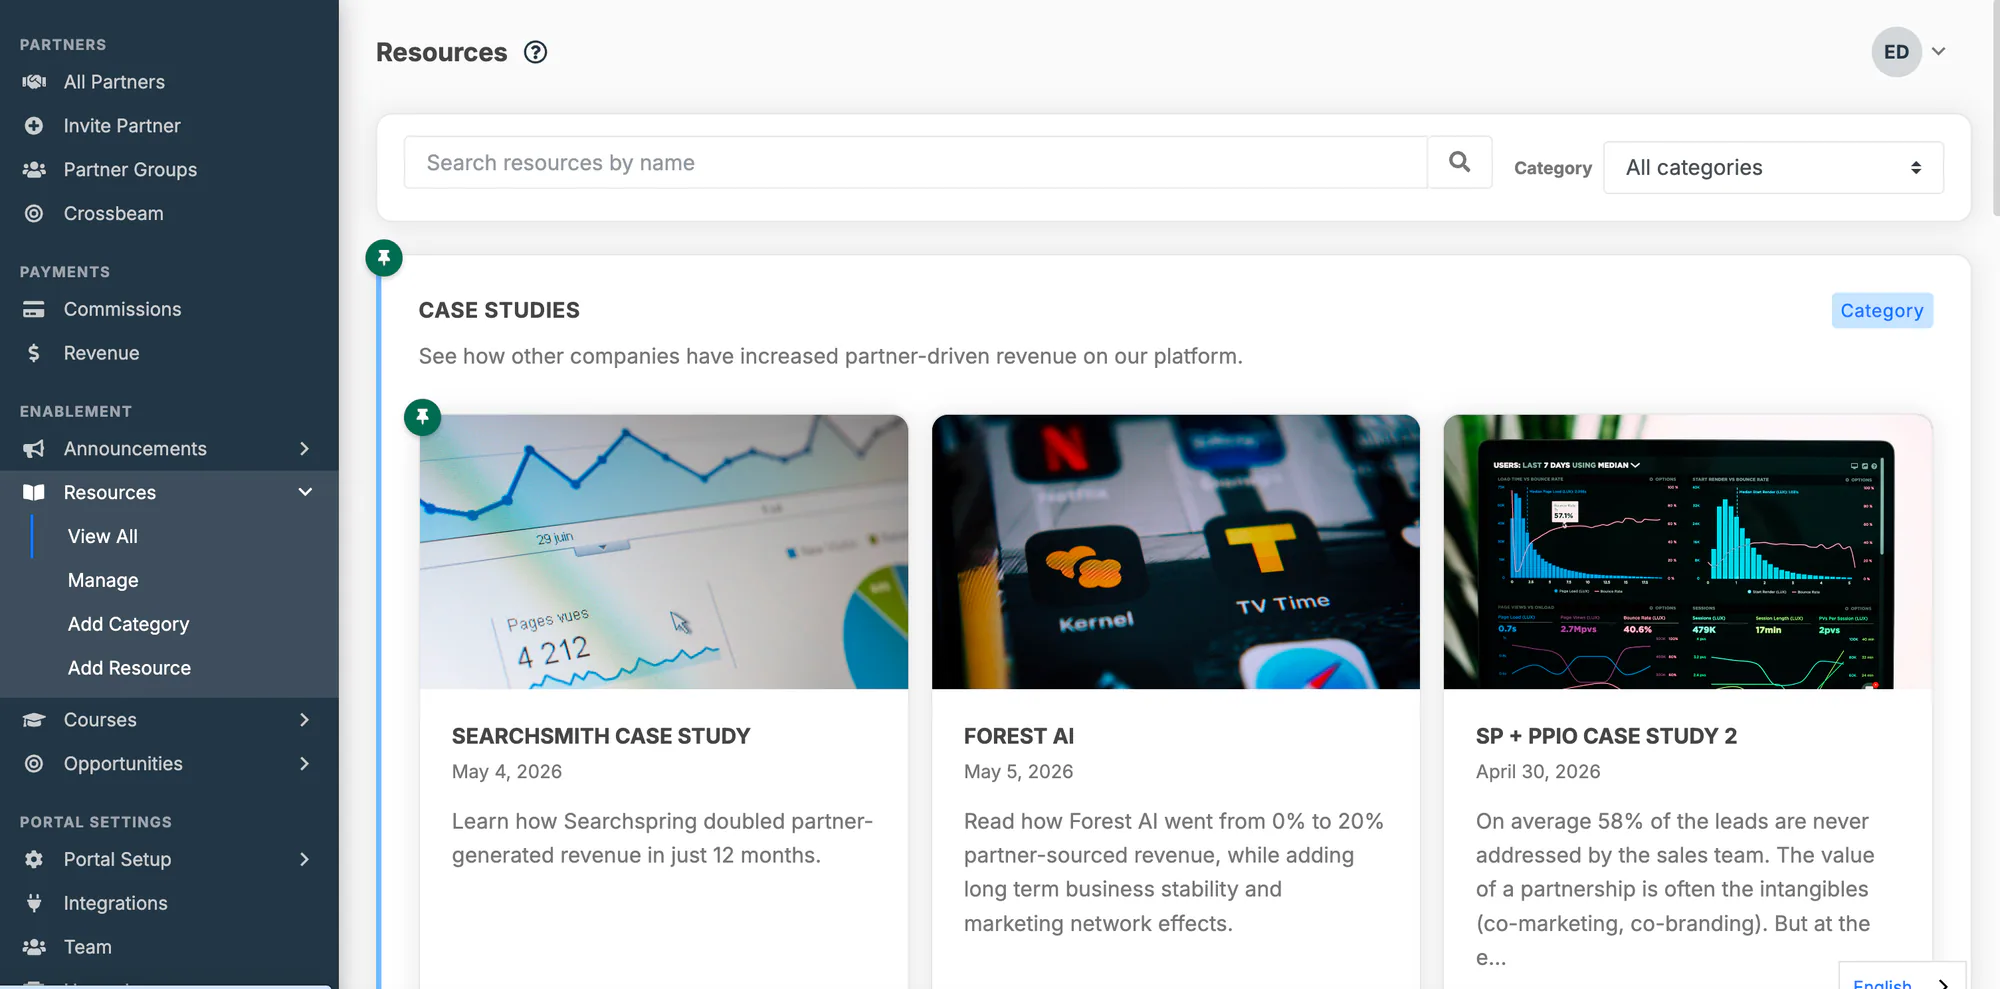
Categories and resources
Section titled “Categories and resources”There are two building blocks:
- Categories organize your library and control access. Every resource belongs to at least one category.
- Resources are the content itself — each one is a post.
Partners browse by category: they open the Resources area, pick a category, and open the resources inside it.
Anatomy of a resource
Section titled “Anatomy of a resource”Every resource is a post made up of:
- Title — the headline shown on the card and detail page.
- Excerpt — a short summary used on cards. If blank, PartnerPortal derives one from the body.
- Featured image — an optional image shown on the card and at the top of the detail page.
- Body — the main content, written in the rich-text editor (supports images, video, in-app links, and buttons).
- Attachments — optional downloadable files (PDFs, videos, images, and more).
- Category — one or more categories the resource belongs to (required).
How access works
Section titled “How access works”Access is controlled at the category level, in two ways that work together:
- Partner groups — assign one or more partner groups to a category, and every partner in those groups can see that category and all of its resources.
- Individual partners — share a category directly with specific partners, with no group needed.
A partner can see a category if either applies: they belong to an assigned group, or they were added directly. A partner who matches neither won’t see that category or its resources.
This means the primary way you manage who sees what is: create a category, add resources to it, then assign the right partner groups and, where needed, individual partners.
The View and Manage screens
Section titled “The View and Manage screens”There are two ways into the Resource Center:
- Resources — the browse/view experience that both you and your partners see (category cards, then resource cards, then the resource itself).
- Manage — an admin-only screen where you add and organize categories, add resources, and set the display settings. Only users with permission to manage resources can reach it.
Set Up the Resource Center
Section titled “Set Up the Resource Center”Setting up your library is three steps: create a category, add resources to it, and grant partners access.
Go to Resources → Manage and create your first category.
Add one or more resources to that category.
Assign partner groups or share it with individual partners so the right partners can see it.
Categories & Access
Section titled “Categories & Access”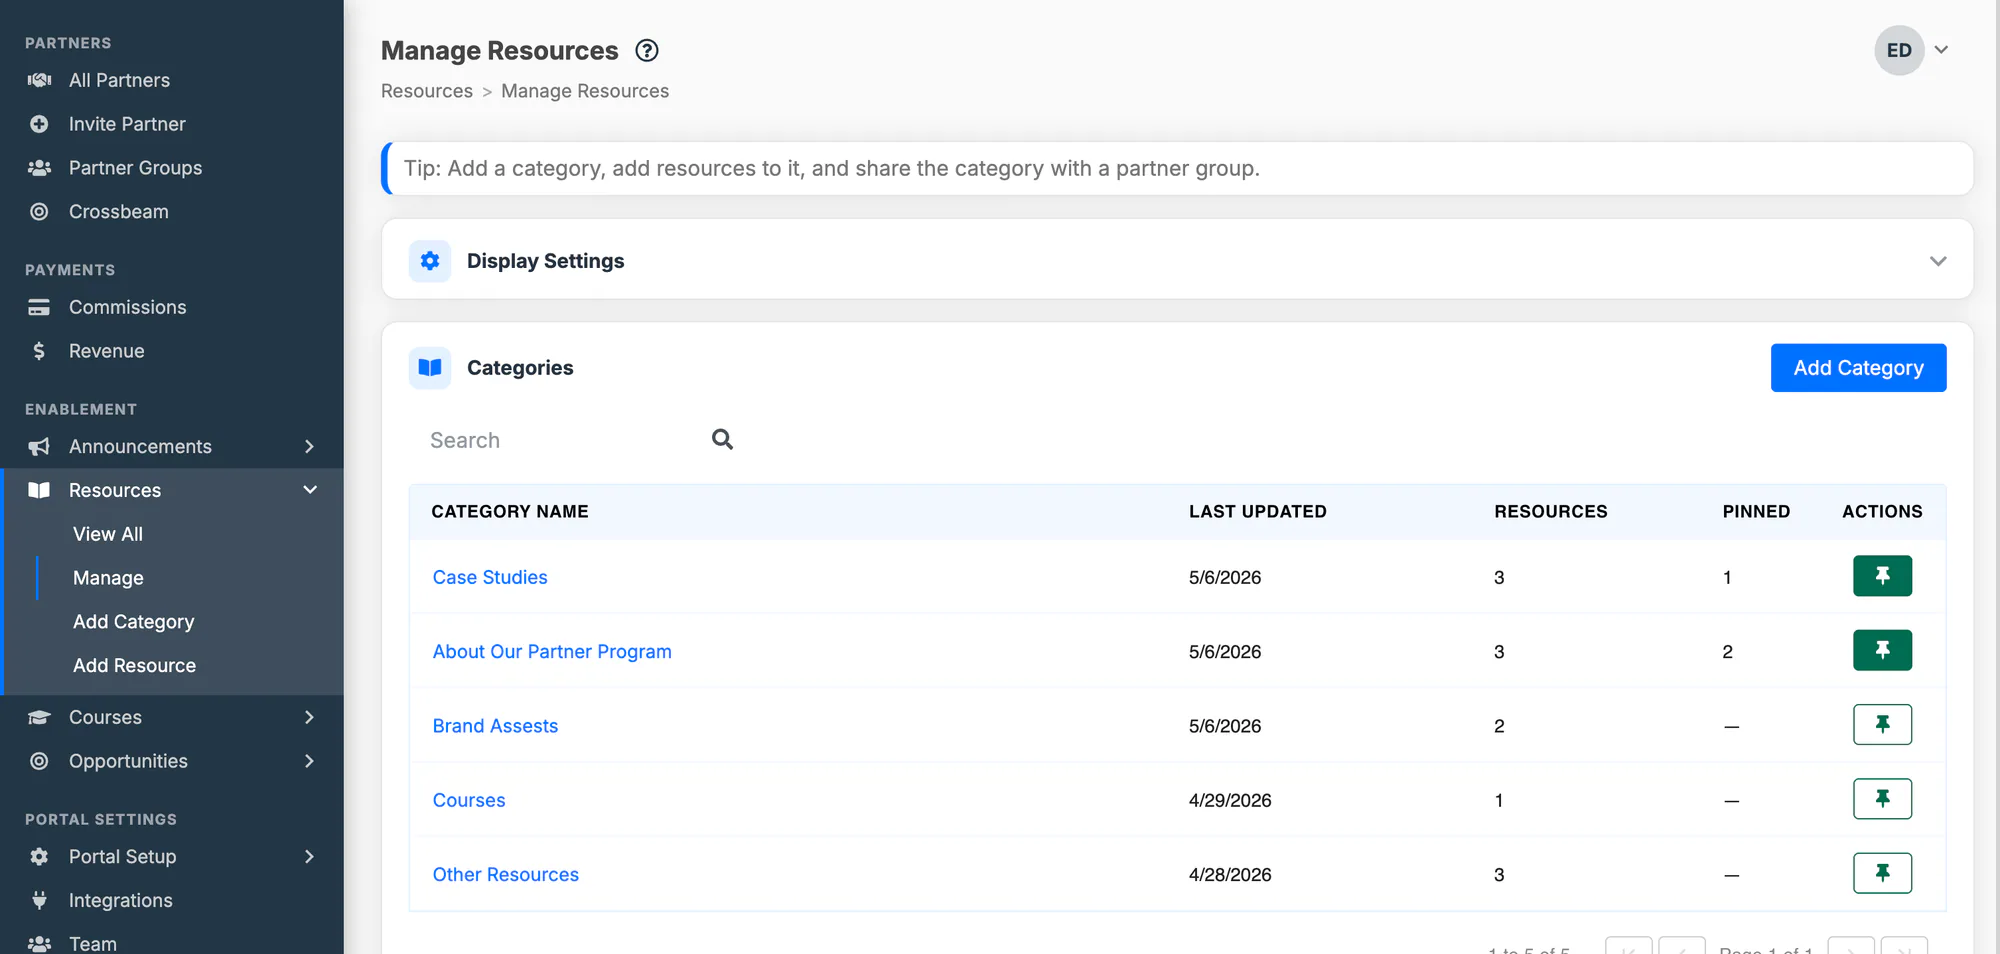
Categories live on the Manage screen. From there you can create categories, control their access, and delete them.
Create and edit a category
Section titled “Create and edit a category”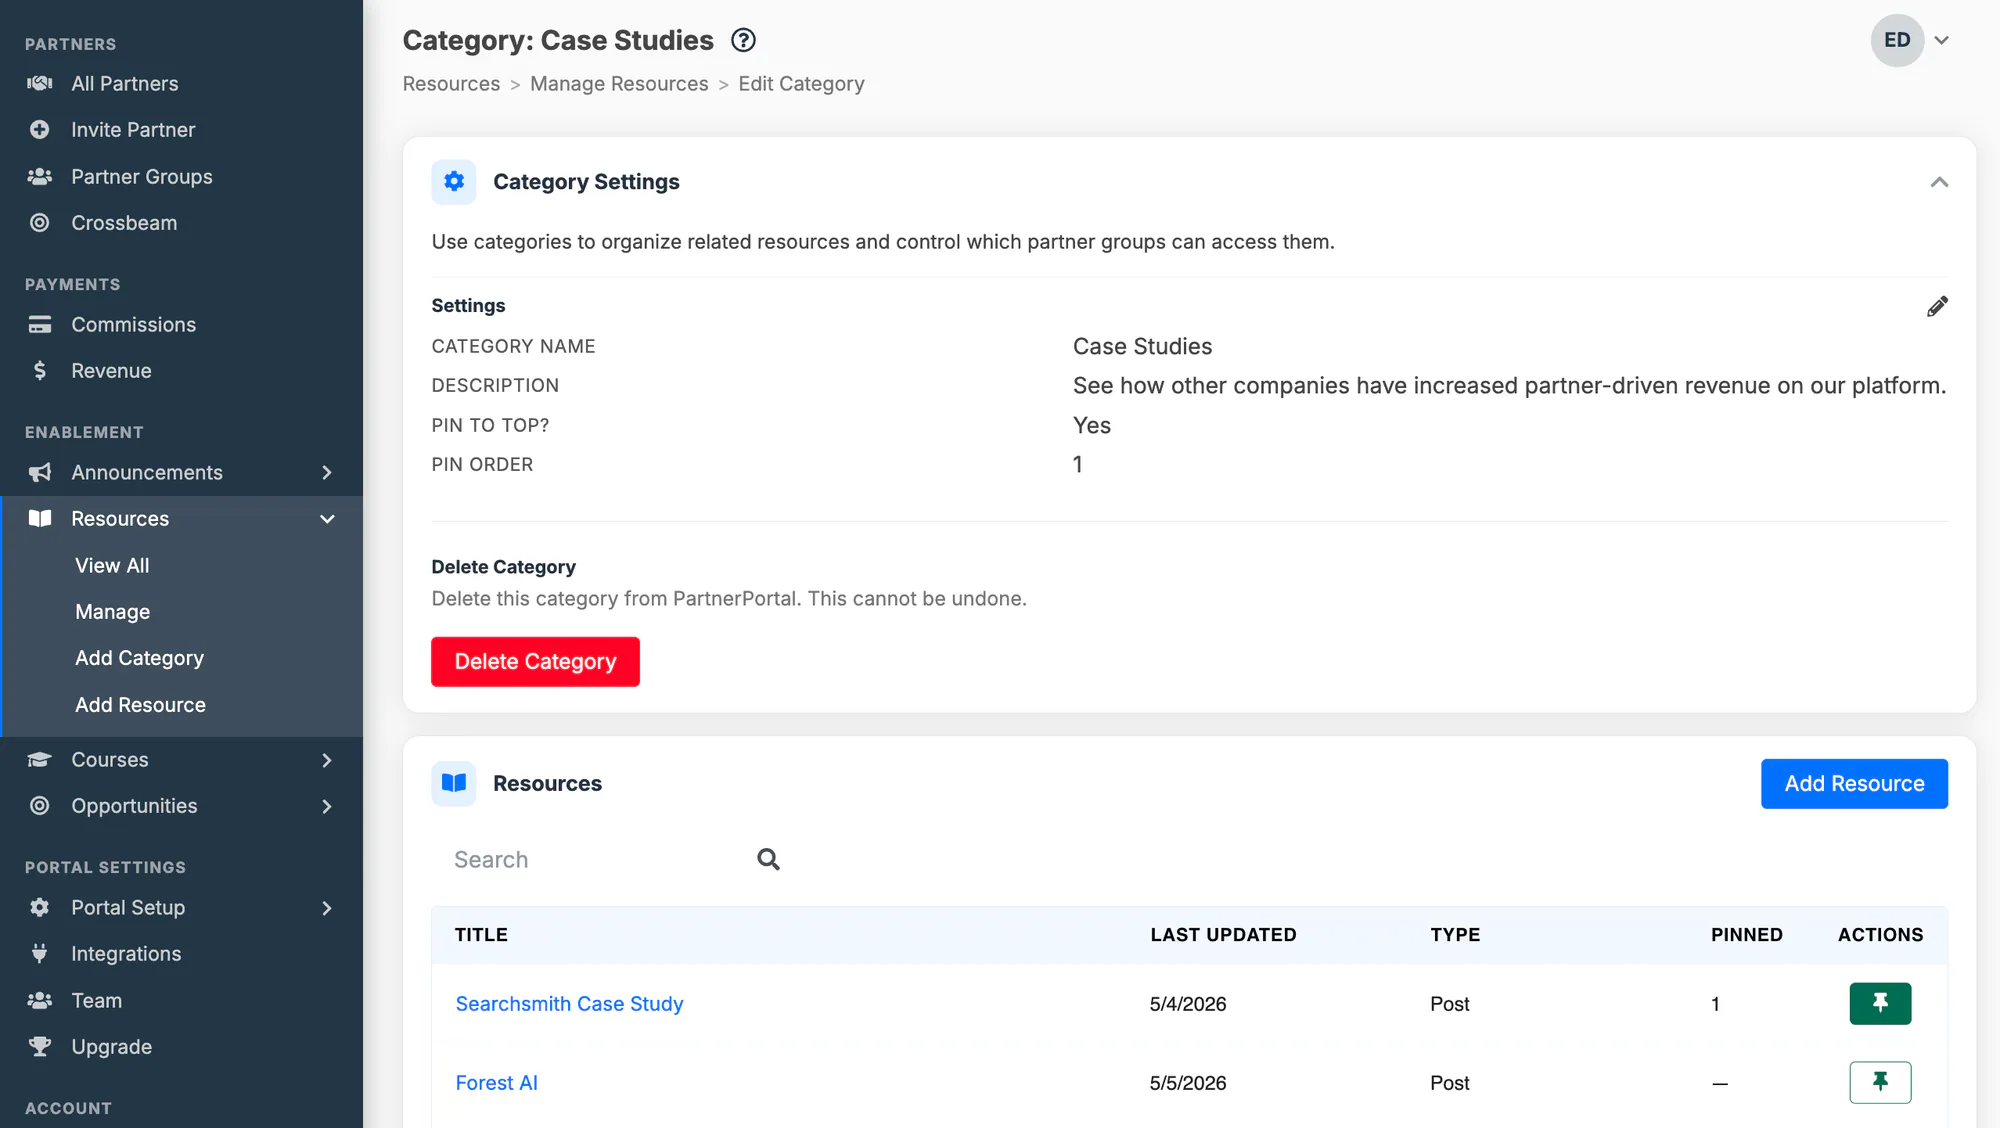
Go to Resources → Manage and select Add Category (or open an existing category to edit it).
Give the category a name and an optional description.
Save the category. Once saved, you can add resources to it, assign partner groups, and share it with individual partners.
You can also pin a category to keep it near the top of the browse view, and set a pin order.
Control access with partner groups
Section titled “Control access with partner groups”Assigning partner groups to a category is what grants partners access to everything in it.
Open the category from Manage.
In the Partner Groups section, add the partner groups that should have access.
Save. Partners in those groups can now see the category and its resources; removing a group removes that access.
Share a category with individual partners
Section titled “Share a category with individual partners”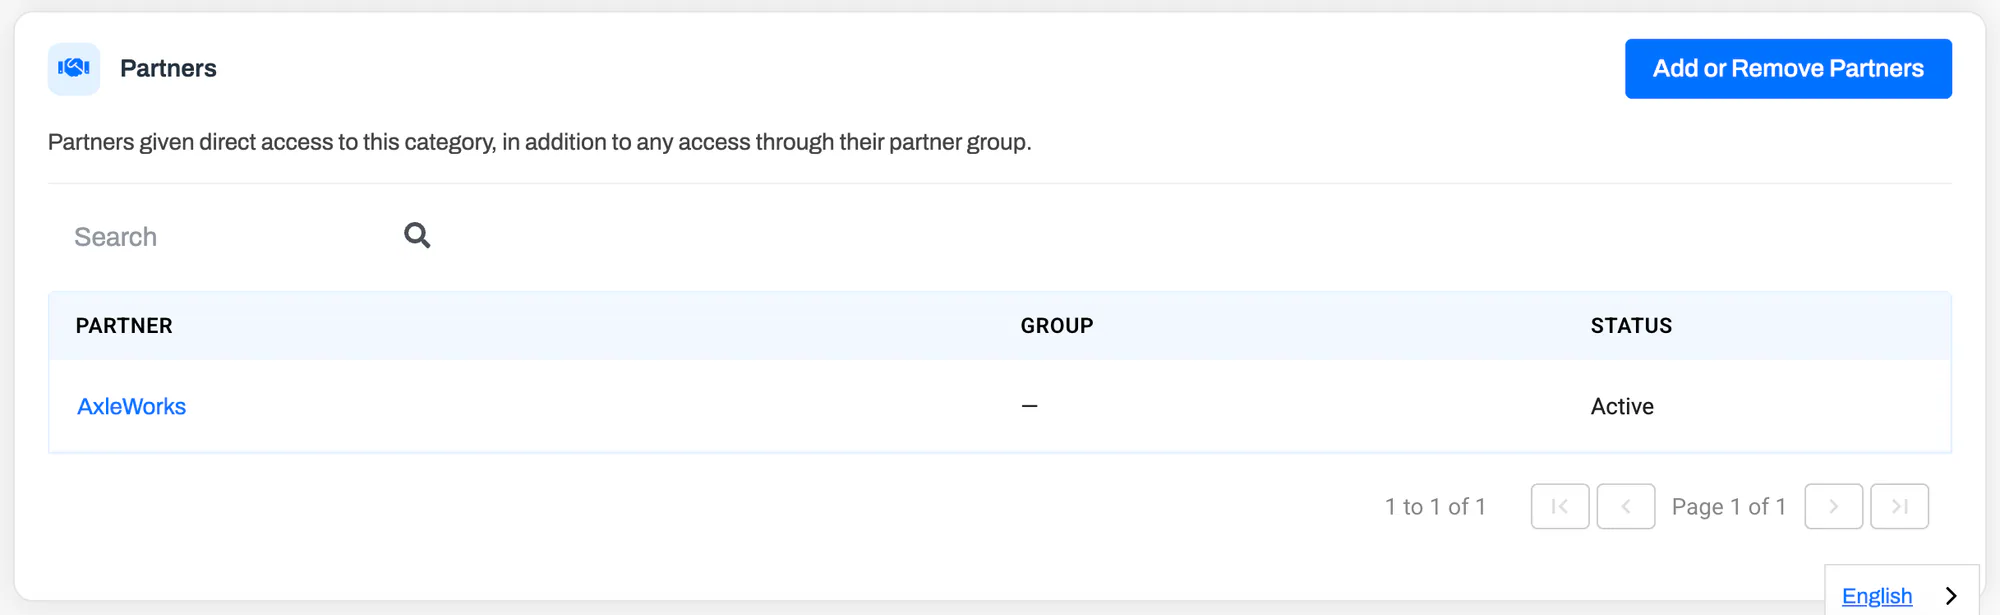
You can share a category directly with one partner or a handful of partners, without creating a group for them. Direct shares sit alongside group access: a partner sees the category if they are in an assigned group or were added directly.
Open the category from Manage.
In the Partners section, select Add or Remove Partners.
Search for a partner by company name (type at least two characters), tick the partners who should have access, and Save.
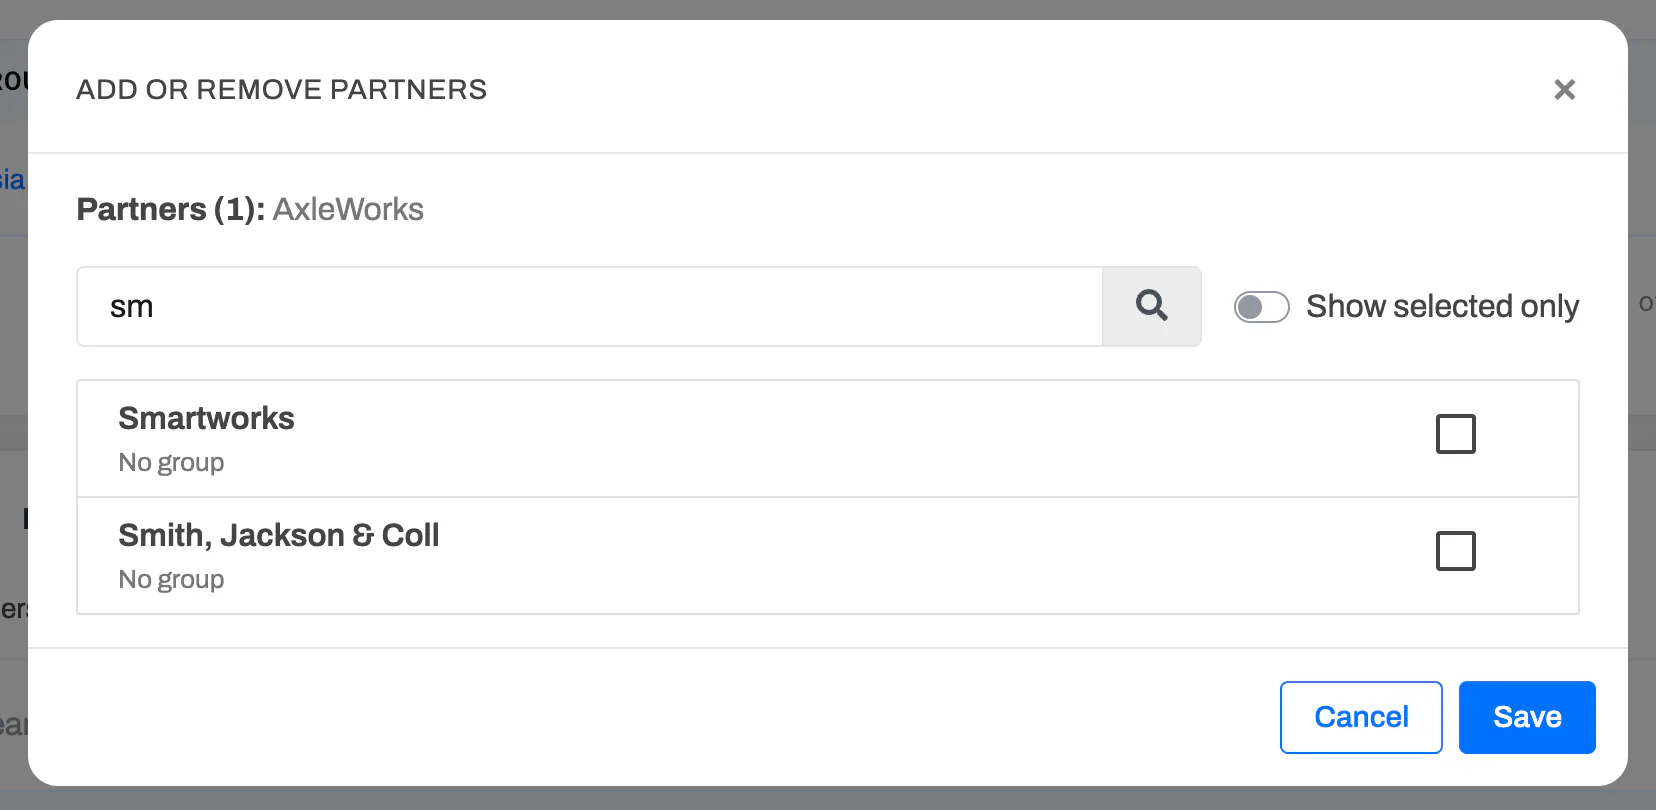
The Partners table on the category lists everyone with direct access, along with their partner group and status. Use the same button to remove a partner later; you’ll be asked to confirm.
Delete a category
Section titled “Delete a category”Open the category from Manage and use the delete action, then confirm. Deleting a category can’t be undone.
Resources (Posts)
Section titled “Resources (Posts)”Add a resource
Section titled “Add a resource”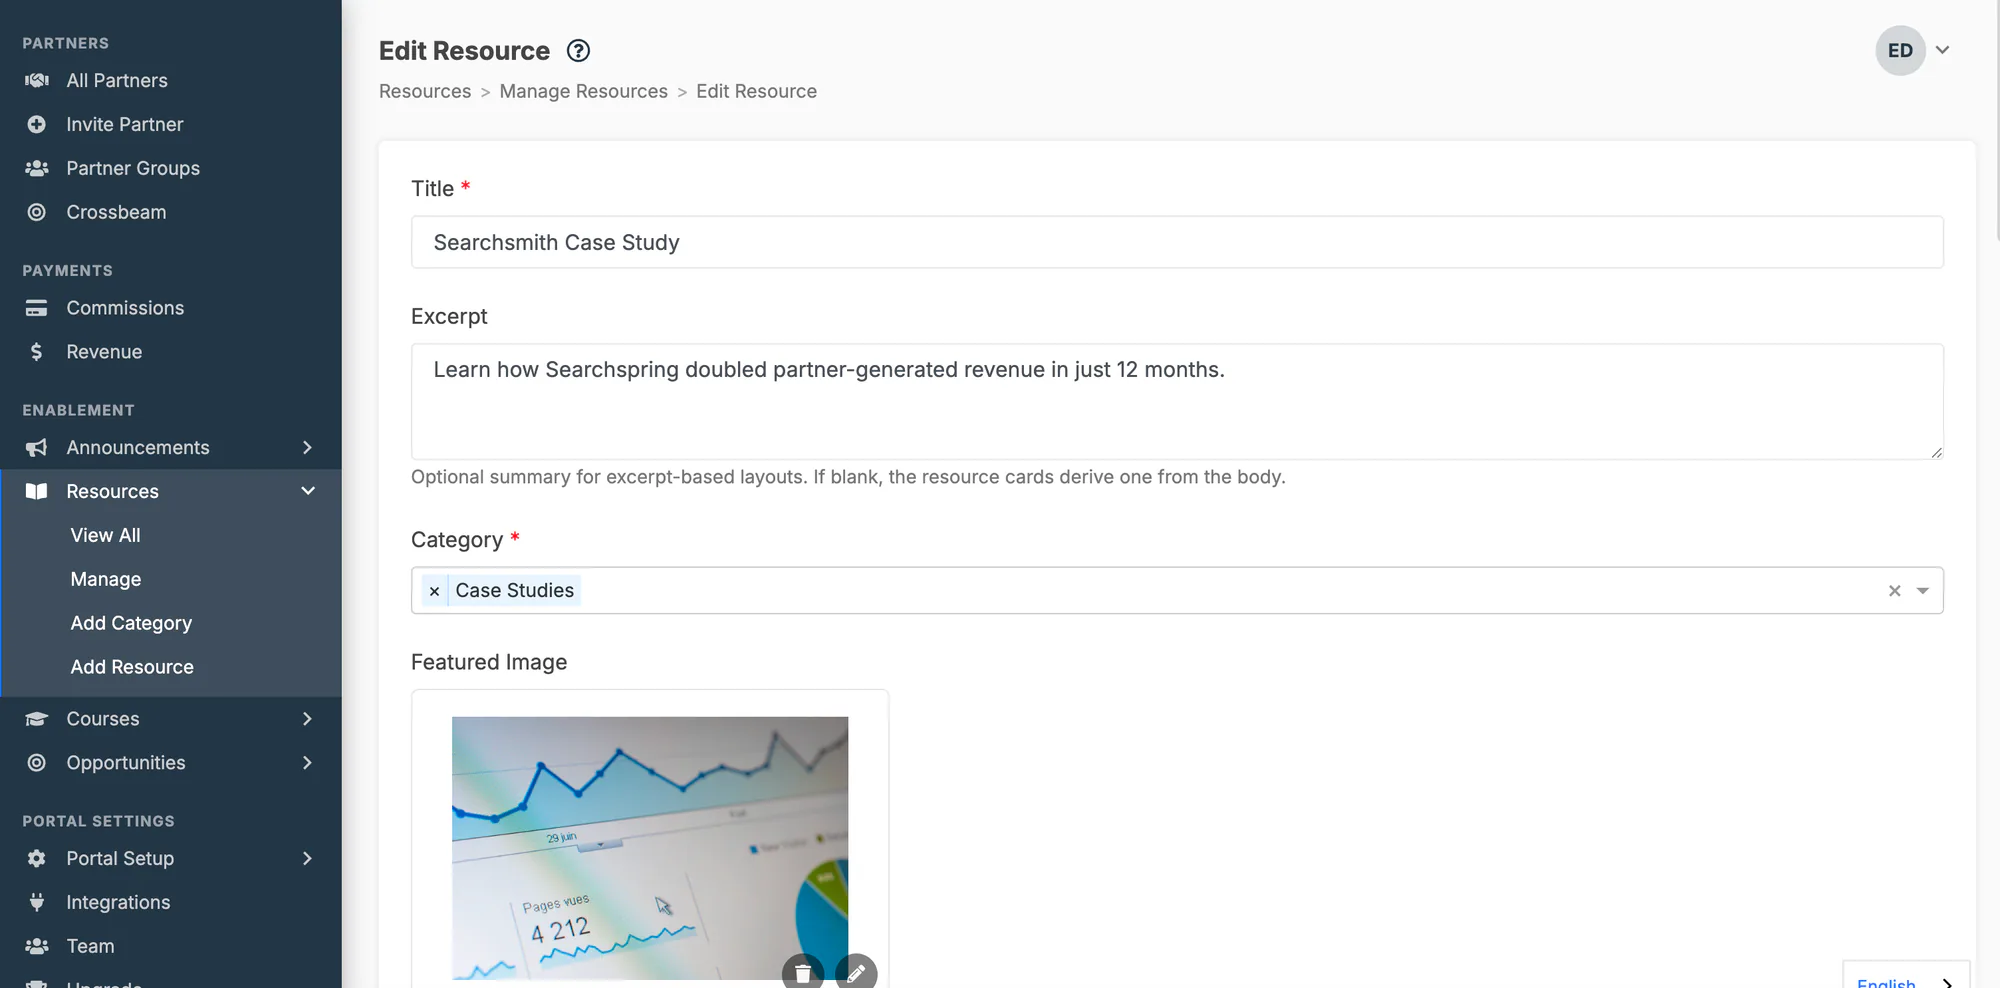
Go to Resources → Manage and select Add Resource. (Starting from a category pre-selects it.)
Enter a Title and, optionally, an Excerpt.
Add a Featured Image (optional).
Write the Body in the editor. See Add rich content to the body.
Add any Attachments (optional). See Add attachments.
Choose at least one category, then Save.
The edit screen includes a live Full Page | Card preview so you can see how the resource will appear before you save.
Add rich content to the body
Section titled “Add rich content to the body”The body uses the same rich-text editor as announcements. Beyond text formatting, you can:
- Insert images — use the image button in the toolbar (or Insert → Image) to upload an image into the body; PartnerPortal hosts it for you.
- Embed a video — use Insert → Media and paste a share URL (for example, YouTube or Vimeo) to embed a player inline.
- Add in-app links — use Insert → In-App Link to link to another screen inside the portal (enter a path that starts with
/, like/leads/register). For outside websites, use the regular Insert → Link. - Add a button — use Insert → Button to add a call-to-action button. Enter the link (a web address starting with
https://, or an in-app path starting with/), the button text, and a style: Primary (filled) or Outline. Buttons use your portal’s button colors, so they match the rest of the portal automatically.
Add attachments
Section titled “Add attachments”Attachments are downloadable files that sit alongside the body — PDFs, videos, images, slide decks, and more. Add them from the attachments section on the edit screen; partners download or open each attachment from the resource’s detail page.
Pin and edit a resource
Section titled “Pin and edit a resource”- Pin a resource to keep it near the top of its category, with an optional order.
- Edit a resource from the category or the Manage screen; saving keeps you on the page.
Delete a resource
Section titled “Delete a resource”Delete a resource from its edit screen (confirm when prompted). Deleting removes it and its attachments and can’t be undone.
Customize How Resources Look
Section titled “Customize How Resources Look”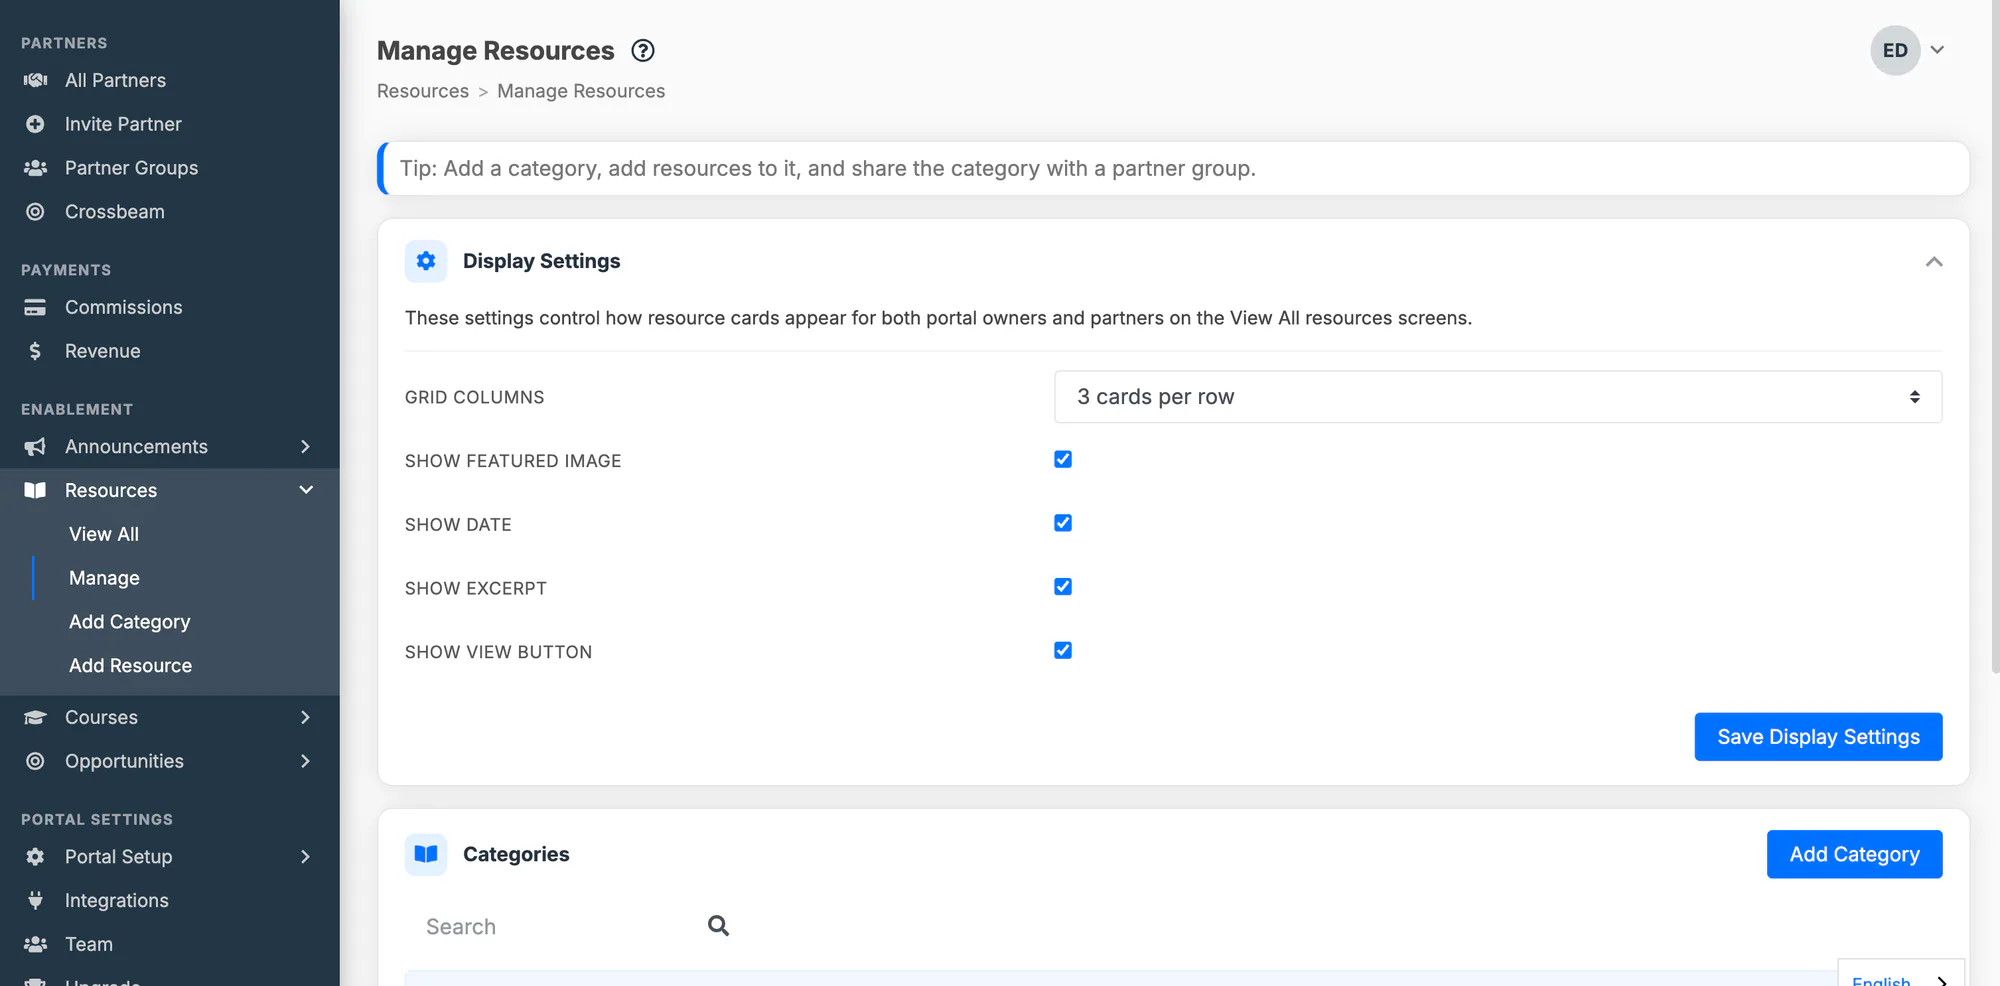
Display settings on the Manage screen control how resource cards appear when partners browse:
- Grid Columns — how many cards per row (2, 3, or 4).
- Show Featured Image — show or hide the featured image on cards.
- Show Date — show or hide the updated date.
- Show Excerpt — show or hide the excerpt text.
- Show View Button — show or hide the view button on cards.
Select Save Display Settings to apply your changes.
Partner Engagement History
Section titled “Partner Engagement History”Each resource records which partners have viewed it, so you can see who’s engaging with your content. On a resource, the engagement history shows each partner organization along with how many of its users have viewed the resource, and you can drill in to see individual users and when they last viewed it.
Why can’t a partner see a resource?
Section titled “Why can’t a partner see a resource?”Check the resource’s category, then that category’s partner groups and Partners sections. A partner only sees a resource if they belong to a partner group assigned to a category the resource is in, or were given direct access to such a category. If the resource isn’t in any category the partner can access, they won’t see it.
What’s the difference between the body and attachments?
Section titled “What’s the difference between the body and attachments?”The body is content partners read directly on the page — text, embedded images, and embedded video. Attachments are separate files partners download or open (PDFs, decks, videos). A single resource can use both.