
Announcements
Announcements are how you publish news, updates, and onboarding content to your partners inside PartnerPortal. Each announcement is a post with a title, excerpt, featured image, and body that appears on the partner dashboard and the Announcements page, and can optionally email your partners when you publish it.
How Announcements Work
Section titled “How Announcements Work”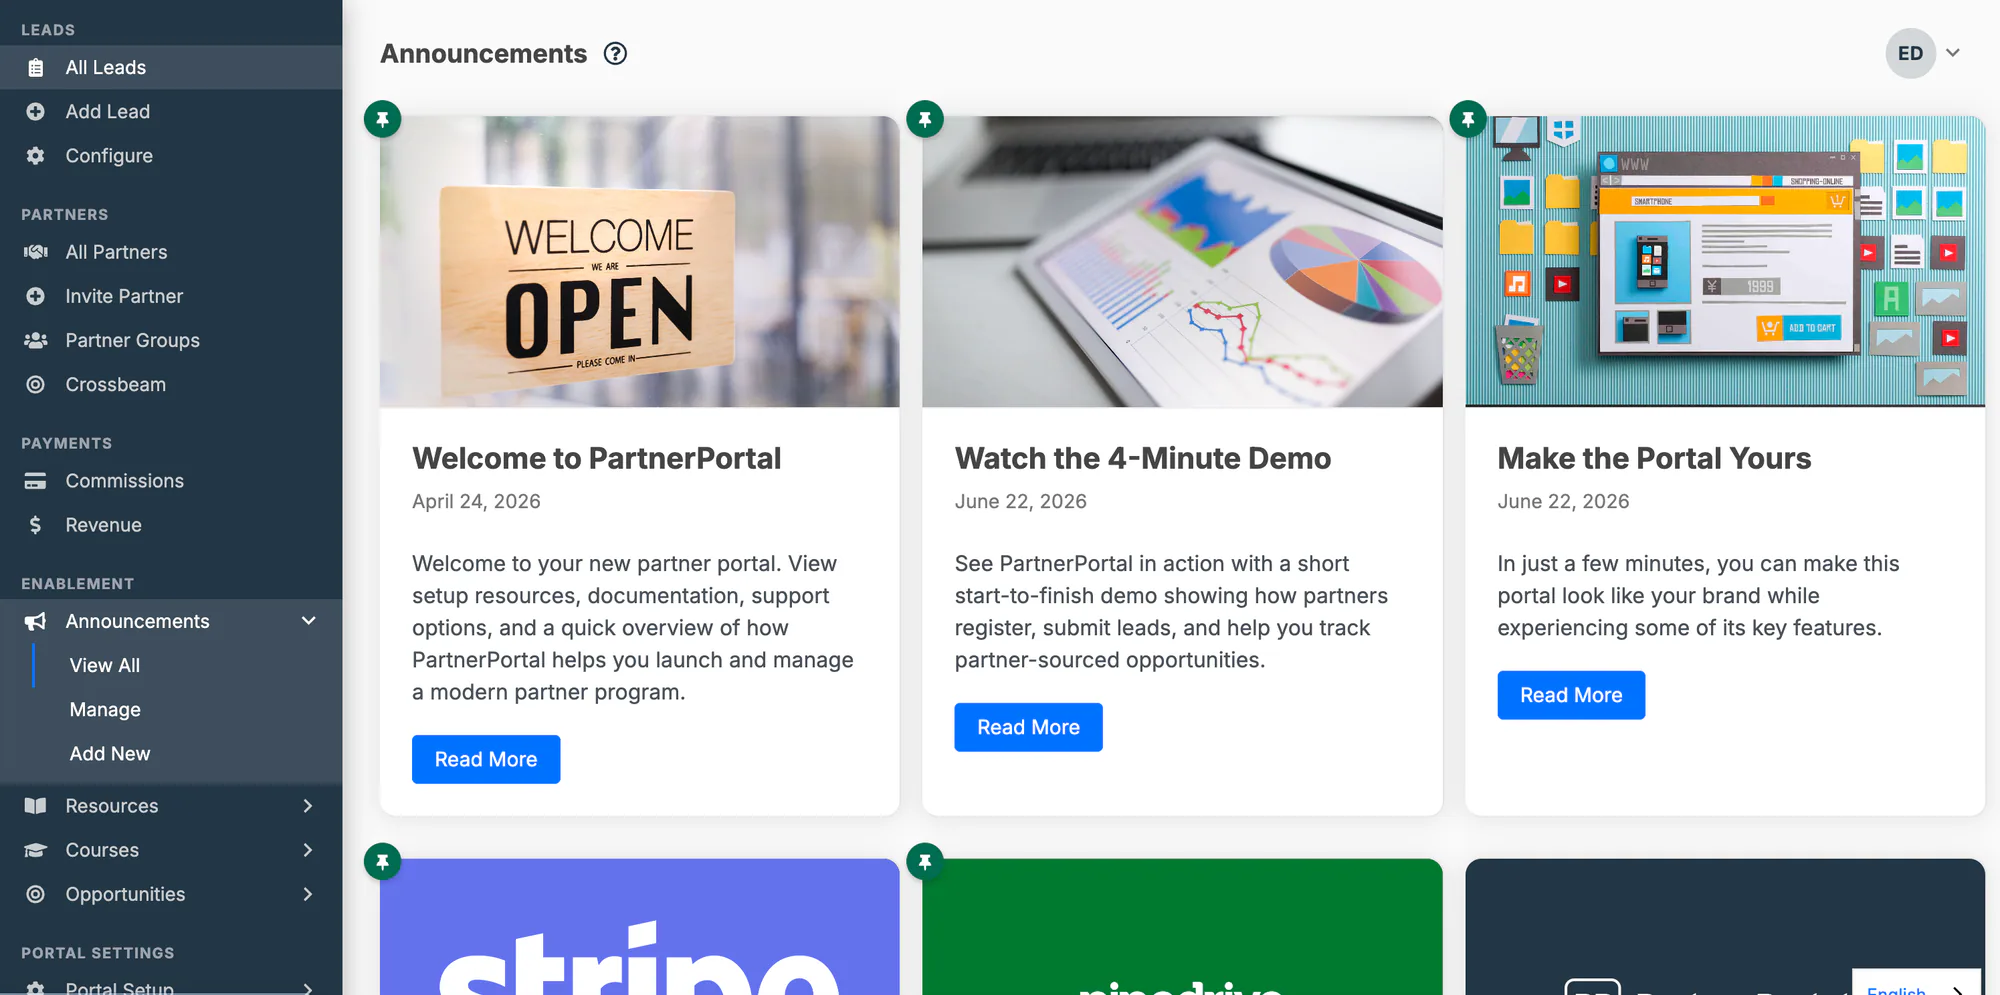
Where partners see announcements
Section titled “Where partners see announcements”Published announcements can appear in two places for your partners:
- The dashboard — the first thing partners see when they log in, so it’s ideal for onboarding steps and timely news.
- The Announcements page — the full, browsable history of your announcements.
You control which of these surfaces each announcement appears on (see Manage visibility and notifications).
Anatomy of an announcement
Section titled “Anatomy of an announcement”Every announcement is a post made up of:
- Title — the headline shown on the card and detail page, and used as the email subject.
- Excerpt — a short summary used in excerpt-based layouts. If you leave it blank, PartnerPortal derives one from the body.
- Featured image — an optional image shown on the card and at the top of the detail page.
- Body — the main content, written in the rich-text editor (supports images, video, in-app links, and buttons).
Draft vs. published
Section titled “Draft vs. published”Announcements have two states:
- Draft — visible only to users who manage announcements. New announcements start as drafts, so nothing goes live until you choose to publish.
- Published — live to its audience (see Manage visibility and notifications). Publishing is also what triggers the email notification.
The Announcements and Manage screens
Section titled “The Announcements and Manage screens”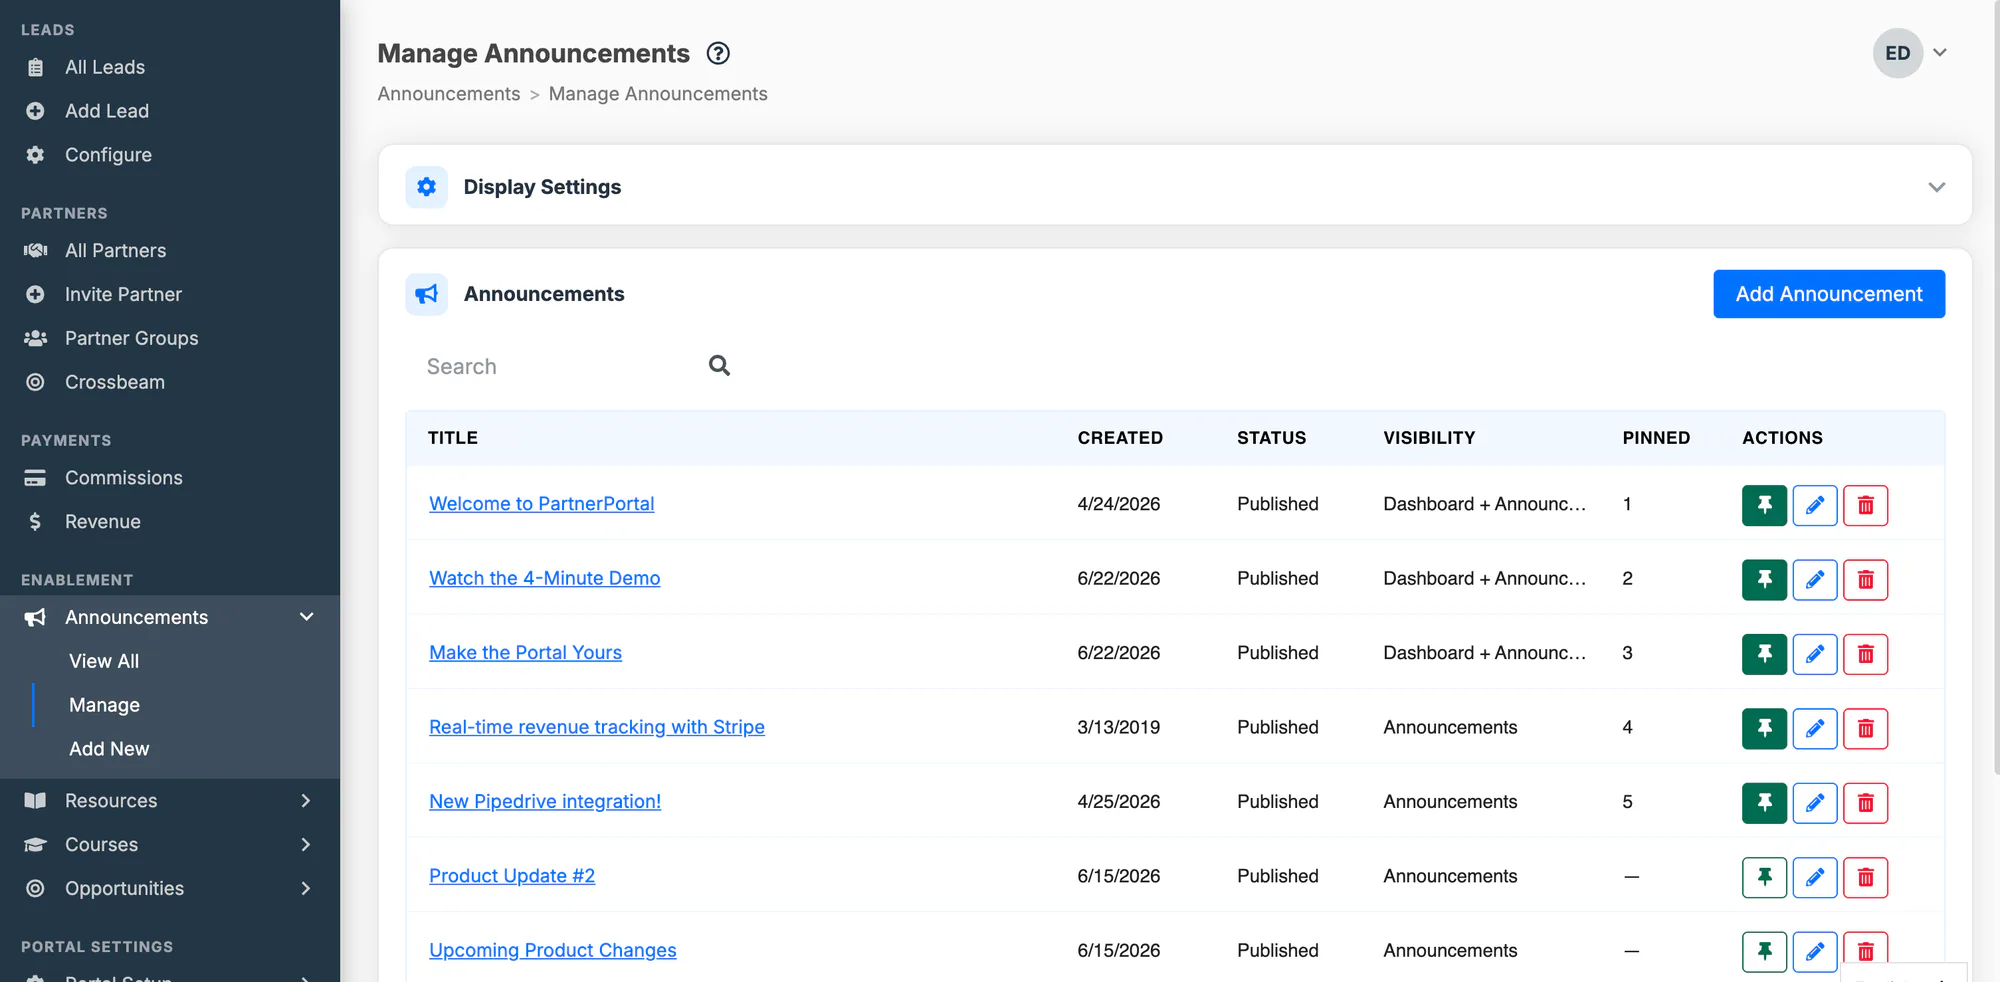
There are two screens for working with announcements:
- Announcements — the list/view screen that both you and your partners see. Partners only ever see this screen and the individual announcement pages.
- Manage — an admin-only screen where you add announcements, edit or delete them from a table, and set the display settings. Only users with permission to manage announcements can reach it.
Create & Edit an Announcement
Section titled “Create & Edit an Announcement”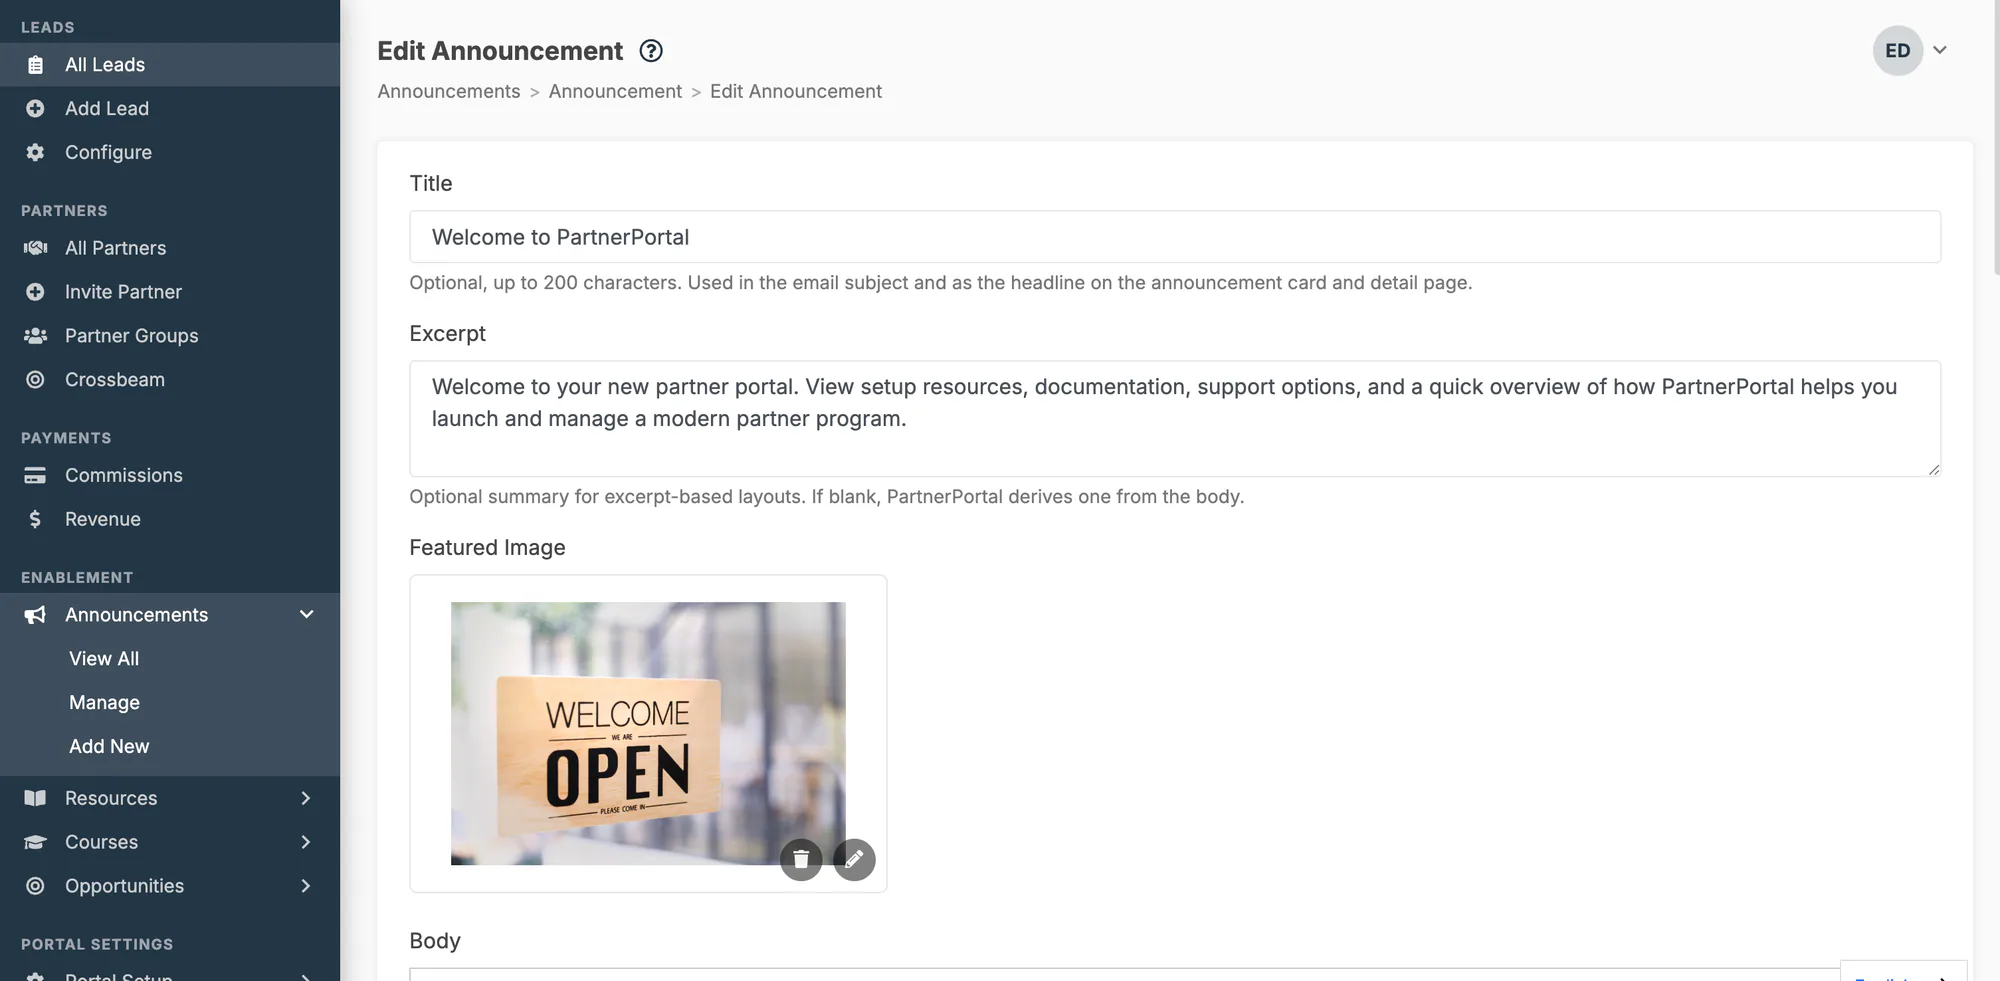
Go to Announcements and open Manage, then select Add Announcement. (To edit an existing one, choose Edit from the table.)
Enter a Title and, optionally, an Excerpt.
Write the Body in the editor. See Add rich content to the body for images, video, and links.
Choose the audience: which partners see it, and whether to include your own team. A new announcement has no audience until you pick one.
Optionally add a featured image, set where it shows and the email option, and pin the post.
Choose Save Draft to keep working, or Publish to make it live. You cannot publish until the announcement has an audience.
Add rich content to the body
Section titled “Add rich content to the body”The body editor is a full rich-text editor. Beyond text formatting, you can add:
Insert images
Section titled “Insert images”Use the image button in the editor toolbar (or Insert → Image) to add an image to the body. You can upload an image directly; PartnerPortal hosts it for you so it displays reliably to partners and in emails.
Embed a video
Section titled “Embed a video”Use Insert → Media in the editor and paste the share URL of your video (for example, a YouTube or Vimeo link). The video is embedded inline in the announcement body.
Add in-app links
Section titled “Add in-app links”Use Insert → In-App Link to link to another screen inside the portal — for example the lead registration form or the resource center. Enter a path that starts with / (such as /leads/register or /resources). In-app links open inside the portal without a full page reload. For links to outside websites, use the regular Insert → Link option instead.
Add a button
Section titled “Add a button”Use Insert → Button to add a call-to-action button to the body — for example, “Register a lead” or “Book a call”. Enter the link (a full web address starting with https://, or an in-app path starting with / such as /leads/register), the button text, and a style: Primary is filled in your portal’s button color, and Outline is the lighter, bordered version. Buttons use your portal’s button colors, so they match the rest of the portal automatically. If you select text before opening the dialog, it’s used as the button text.
Add a featured image
Section titled “Add a featured image”In the Featured Image tile on the edit screen, select Upload image to add one, or use the replace and remove controls to change it. The featured image appears on the announcement card and at the top of the detail page, and is used in grid layouts.
Pin an announcement
Section titled “Pin an announcement”Turn on Pin to keep an announcement at the top of the list. Optionally set a rank to control the order among pinned posts (1 is highest). Leave the rank empty to pin without a fixed position.
Preview, edit, and delete
Section titled “Preview, edit, and delete”- The edit screen includes a Preview panel so you can see the post in both Full Page and Card form before publishing.
- Editing a published announcement and choosing Save Changes updates it without re-sending the email.
- Delete permanently removes an announcement. Partners who already received the email will still have it in their inbox.
Manage Visibility & Notifications
Section titled “Manage Visibility & Notifications”Three independent controls decide who sees an announcement and who gets emailed. Think of them in layers:
- Draft vs. published — is it live at all?
- Where it shows — the dashboard and/or the Announcements page.
- Who it’s for — which partners, and whether your own team is emailed and notified. A new announcement is for nobody until you choose.
Show on the dashboard and Announcements page
Section titled “Show on the dashboard and Announcements page”On the edit screen, two toggles control where a published announcement appears:
- Show on dashboard — include it in the dashboard announcements.
- Show on announcements page — include it in the Announcements list.
Turning both off lets you send an email-only announcement, or retire an old post from the in-app surfaces without deleting it. Direct links to the announcement still work.
Choose the audience
Section titled “Choose the audience”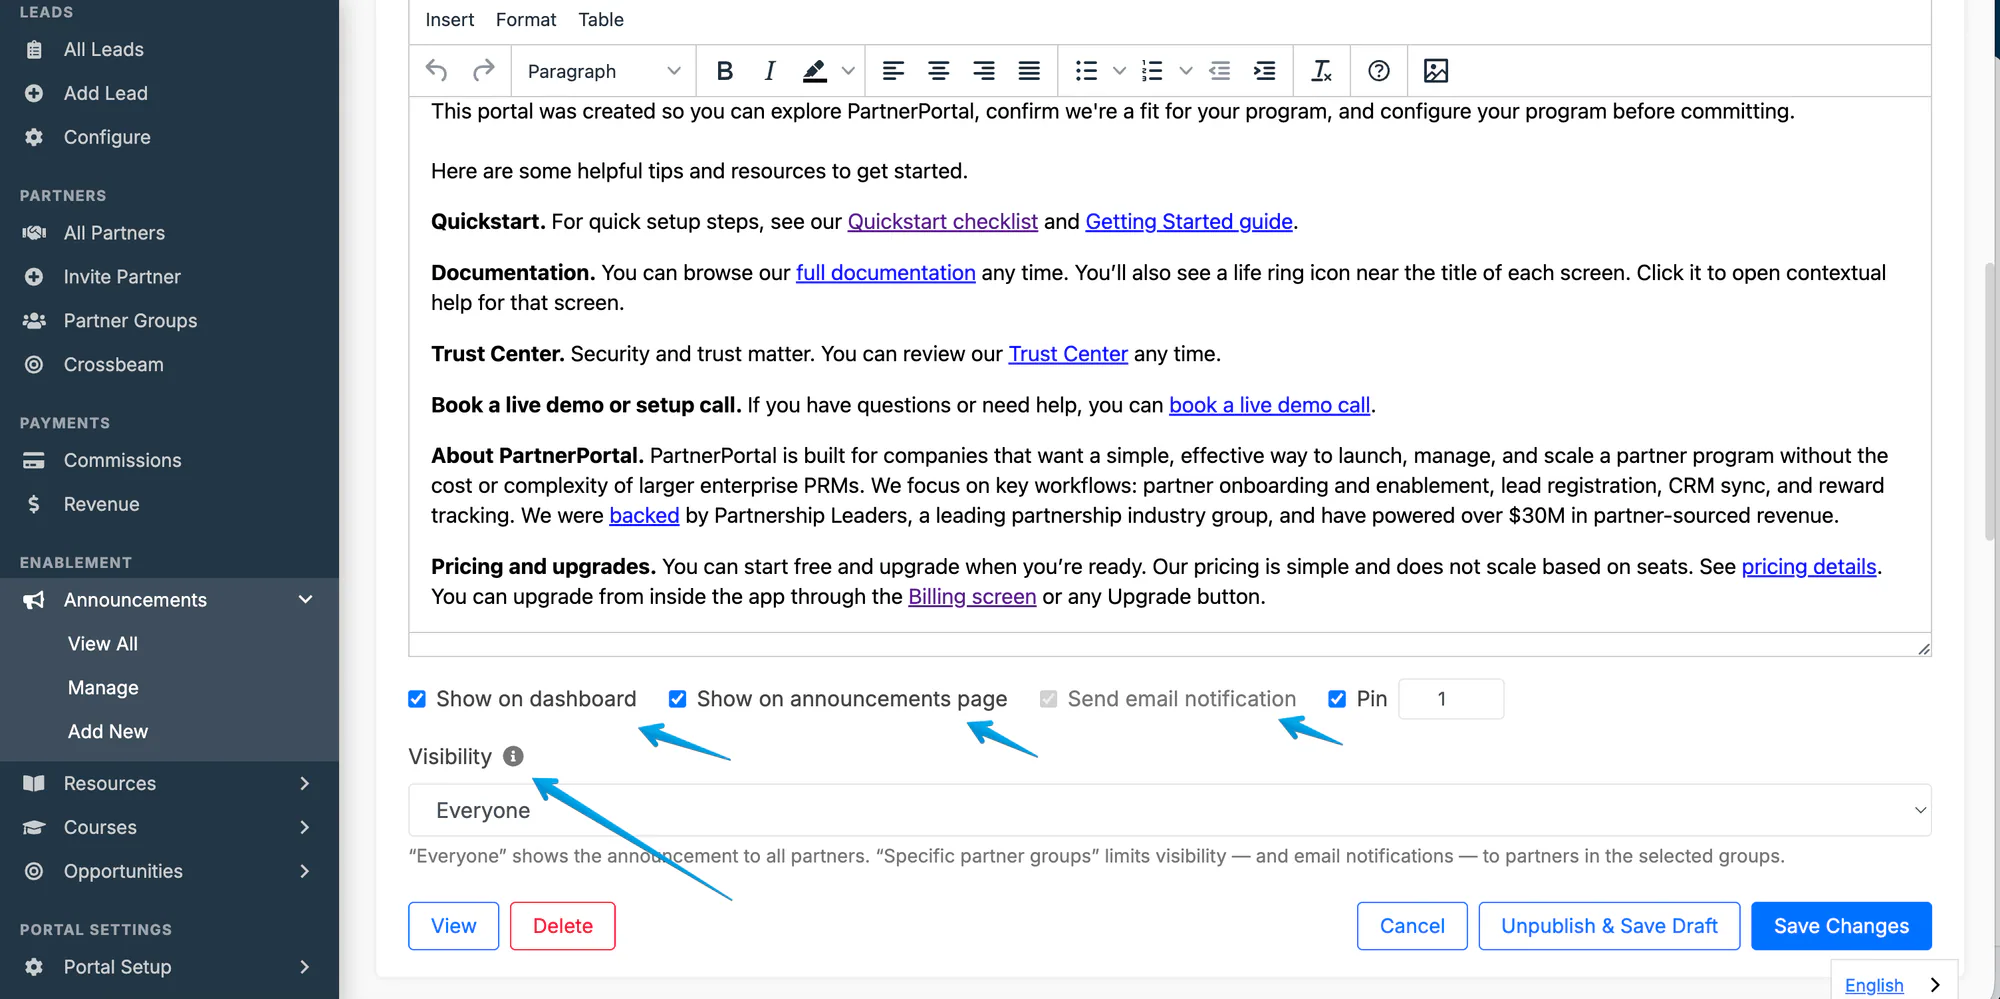
The Visibility setting has two parts, and together they decide who can see the announcement and who receives the email.
Which partners. The dropdown offers four choices:
- No partners — the starting point for every new announcement. No partner sees it.
- All partners — every partner in your portal.
- Specific partner groups — only partners in the groups you select. Choose one or more groups from the picker.
- Specific partners — only the partners you pick by name. See Target specific partners.
Your team. Turn on Include my team (admins and staff) to email your own admins and staff when the announcement publishes and to show it in their in-app notifications. It is off for a new announcement, so an announcement meant for partners does not land in your team’s inboxes. For an announcement meant only for your team, set the dropdown to No partners and turn the toggle on: partners never see it.
The partner dropdown controls both in-app visibility (partners outside the audience won’t see the announcement) and email routing (only partners in the audience are emailed). The team toggle controls the email and the notification for your team. Team members who can manage announcements can always open every announcement in the portal, whether or not the toggle is on.
Target specific partners
Section titled “Target specific partners”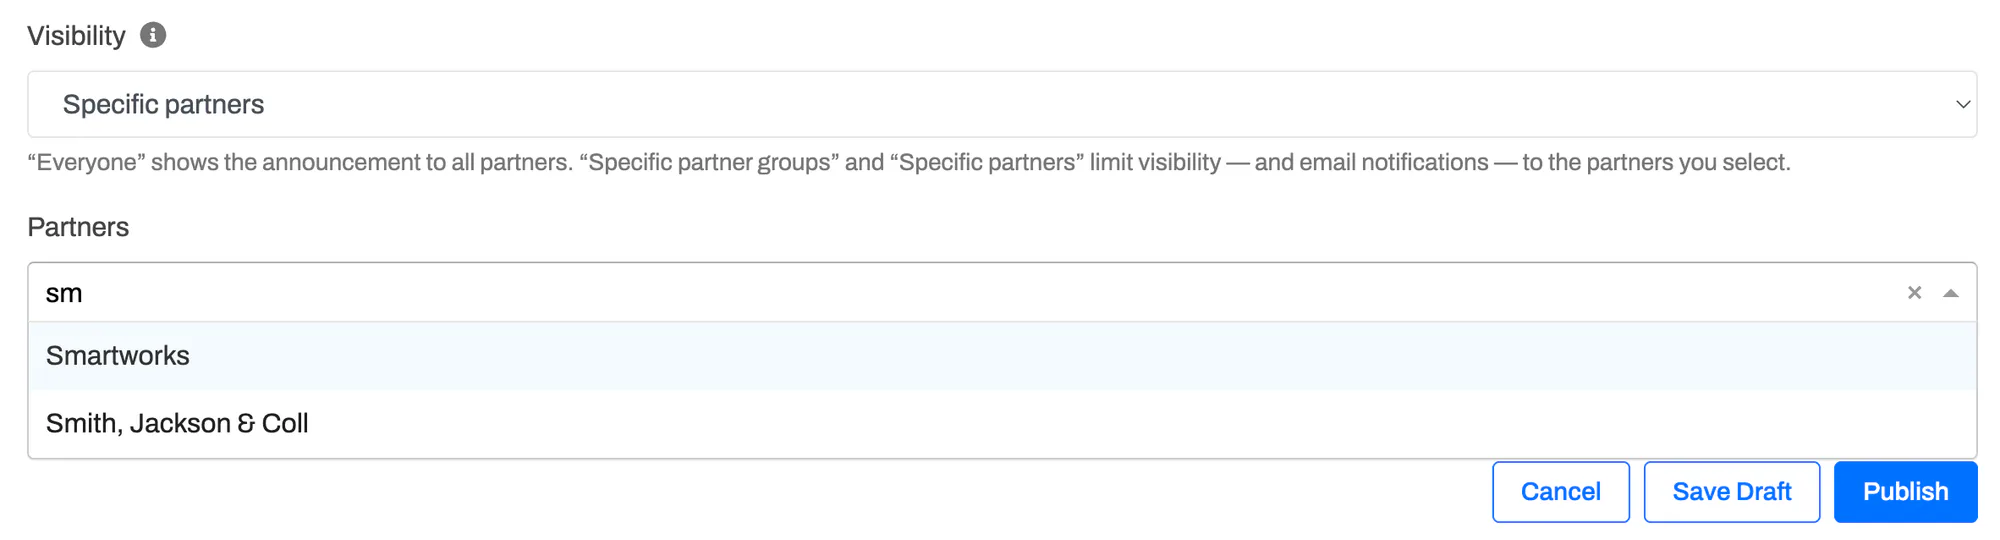
Choose Specific partners when an announcement is meant for one partner or a short list of them — a renewal reminder for one account, a note to the partners in a pilot, a heads-up to a few partners affected by a change. No partner group is needed.
On the edit screen, set Visibility to Specific partners.
In the Partners field, type at least two characters of a partner’s company name and pick them from the results. Repeat to add more partners.
Save or publish as usual.
Every user at the selected partner companies can see the announcement and receives the email (when notifications are on). Partners you didn’t select never see it, even if they share a group with a selected partner.
Send email notifications
Section titled “Send email notifications”Turn on Send email notification to email the audience when you publish. When you publish, PartnerPortal asks you to confirm before the email goes out.
- Emails are sent to the announcement’s audience: the partners you chose (all, the selected groups, or the selected partners), plus your admins and staff when the team toggle is on.
- Email is sent only on the draft → published transition. Re-saving an already-published announcement does not resend it, and the toggle is disabled once an announcement is published. Widening the audience of a published announcement (adding a group, say) makes it visible to the added people in the portal but does not email them.
Customize How Announcements Look
Section titled “Customize How Announcements Look”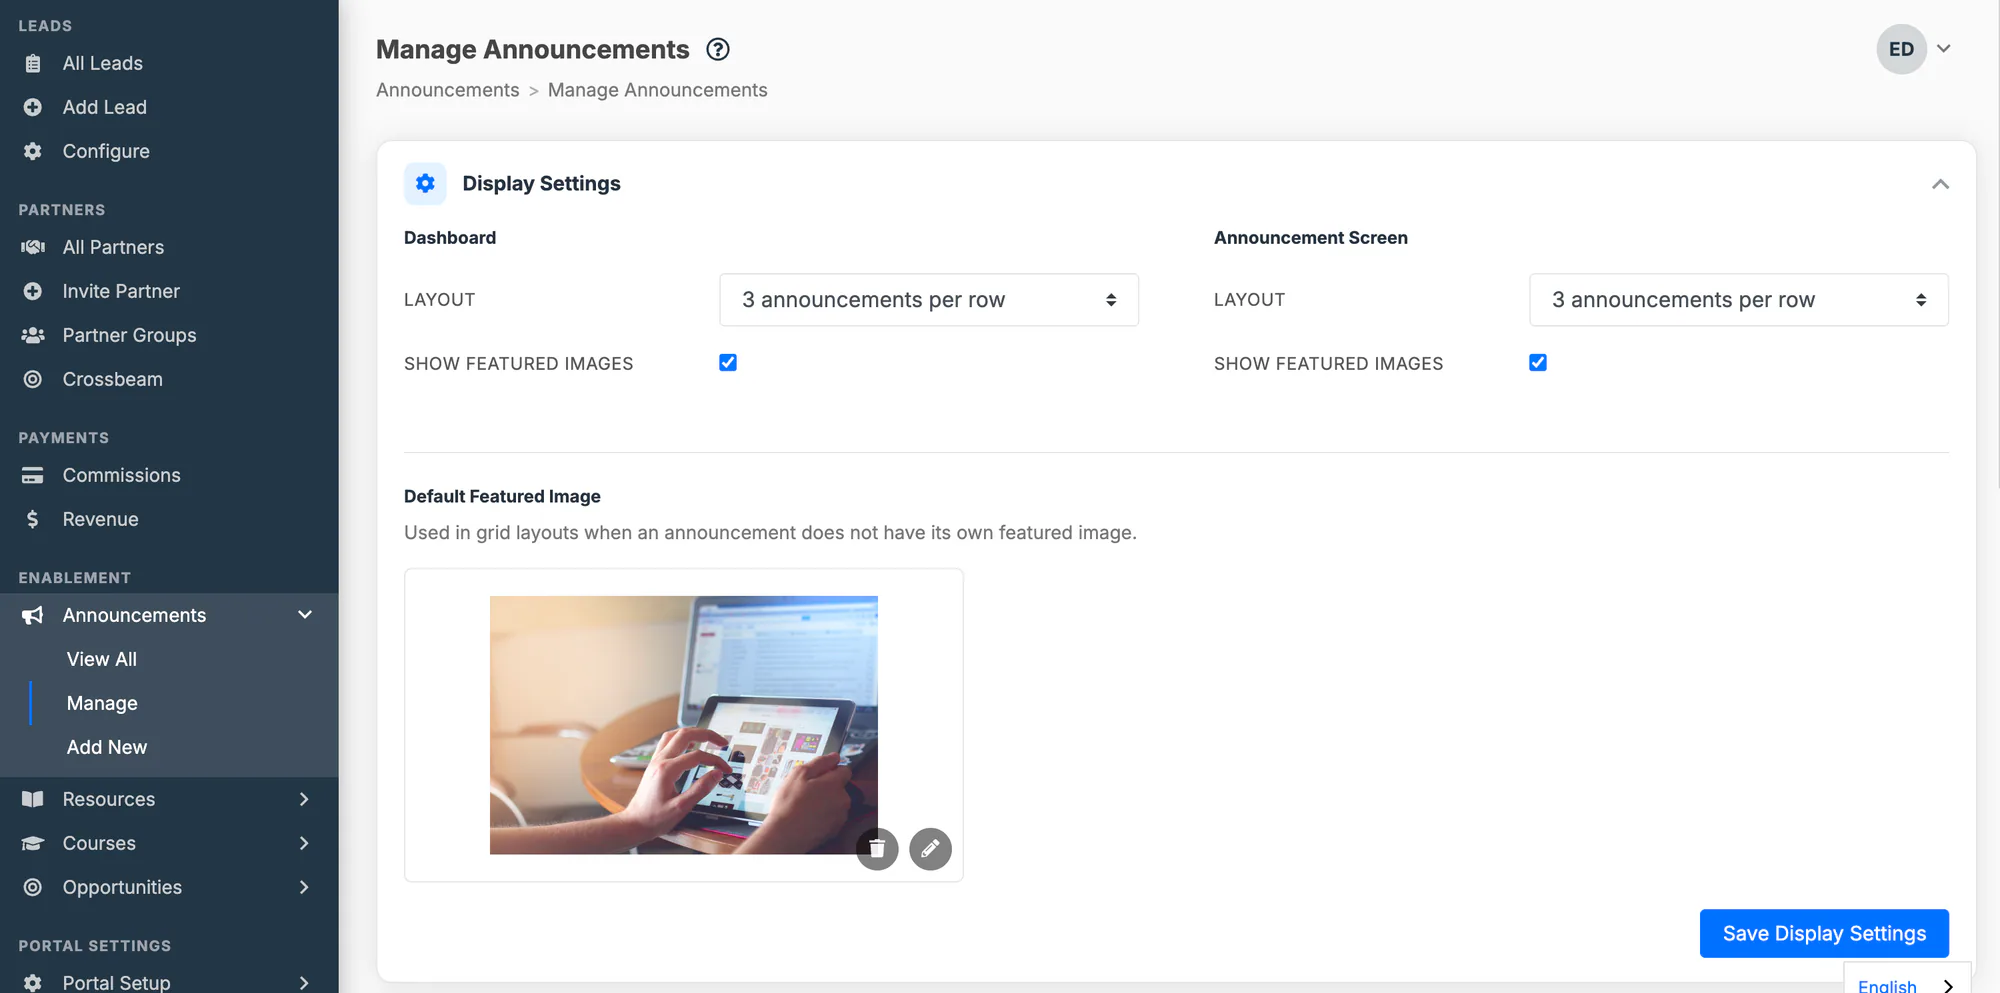
Display settings live on the Manage screen and control how announcements are laid out. You can set them separately for the Dashboard and the Announcements page:
- Layout — choose a list or grid layout (for example, one-column list, two-column grid, or three-column grid).
- Content — show the full body or just the excerpt (available for list layouts).
- Show Featured Images — turn featured images on or off for that surface.
You can also set a Default Featured Image — used in grid layouts for any announcement that doesn’t have its own featured image. Select Save Display Settings to apply your changes.
Why can’t a partner see my announcement?
Section titled “Why can’t a partner see my announcement?”Check three things: it must be published (not a draft); it must be set to show on the surface they’re looking at (dashboard or Announcements page); and the partner dropdown must include them — not No partners, and if it is set to specific partner groups or specific partners, that partner must belong to one of the selected groups or be one of the selected partners.
Why didn’t my team get the email?
Section titled “Why didn’t my team get the email?”Your admins and staff are emailed and notified only when Include my team (admins and staff) is turned on for that announcement. They can still open it in the portal.
Can I send an announcement to just one partner?
Section titled “Can I send an announcement to just one partner?”Yes. Set Visibility to Specific partners and pick the partner by company name. Everyone at that partner company sees it and gets the email; no other partner does. See Target specific partners.
Why didn’t the notification email send?
Section titled “Why didn’t the notification email send?”Email is sent only when you publish a draft with Send email notification turned on (and after you confirm the send). Saving a draft, or re-saving an announcement that was already published, does not send email. Only the audience is emailed: the partners you chose, plus your admins and staff when the team toggle is on. If the dropdown says No partners, no partner is emailed; if the team toggle is off, none of your team is.