
How to Integrate Salesforce with PartnerPortal
Use this guide to connect Salesforce to PartnerPortal, understand how sync flows work, map the Salesforce objects your portal should sync, and configure the Salesforce settings that control ongoing behavior.
Connect Salesforce
Section titled “Connect Salesforce”Before you start
Section titled “Before you start”- Admin access to PartnerPortal
- Administrative access to Salesforce
- Permission in Salesforce to create and manage integrations
Connect your Salesforce account
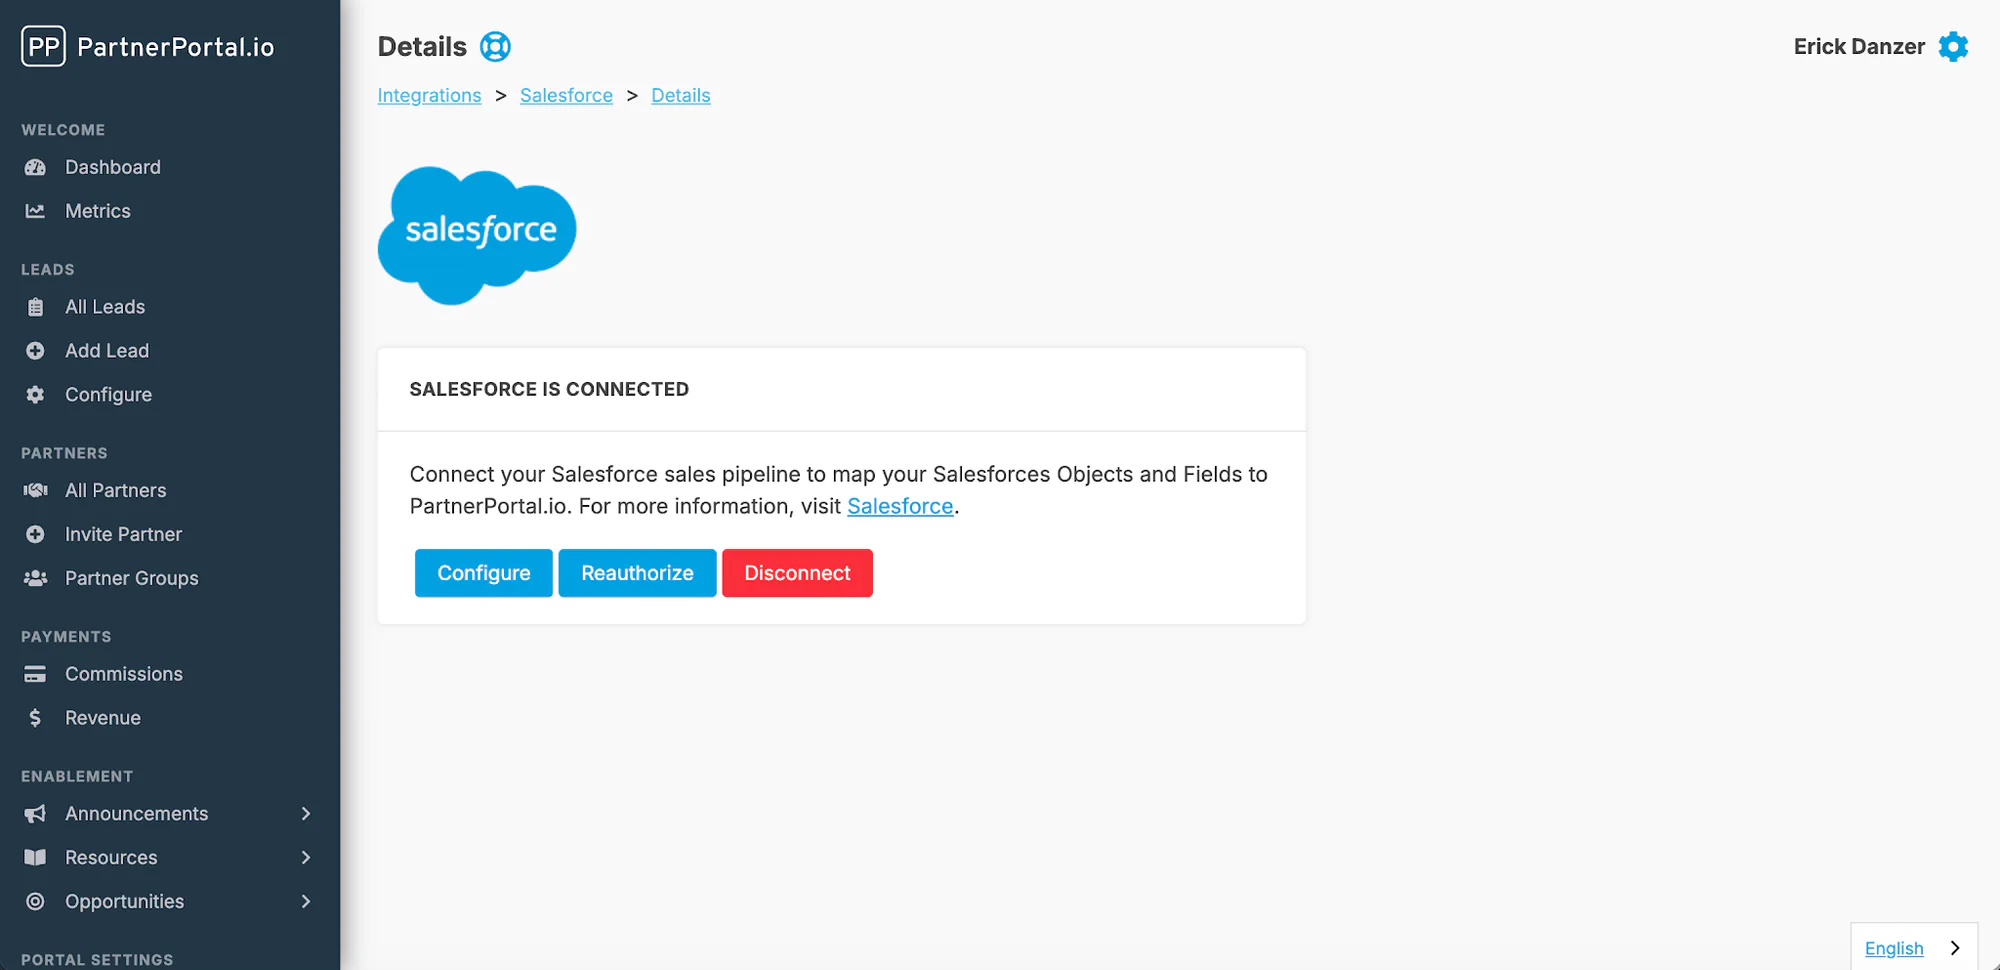
Section titled “Connect your Salesforce account”Open Integrations from the PartnerPortal sidebar.
Click Enable Salesforce.
Sign in to Salesforce and approve the connection when prompted.
Reauthorize Salesforce
Section titled “Reauthorize Salesforce”If Salesforce asks you to reconnect, use the Reauthorize action from the integration settings instead of disconnecting and reconnecting from scratch.
Sync Direction
Section titled “Sync Direction”Portal to CRM
Section titled “Portal to CRM”When a lead is approved in PartnerPortal and Salesforce records are created, PartnerPortal sends the mapped portal data into Salesforce using the object structure and field rules you configured.
CRM to Portal
Section titled “CRM to Portal”Once the lead is linked, Salesforce can become the source of truth for ongoing synced deal details back into PartnerPortal. If Sync Deal Details Back to PartnerPortal is enabled in CRM Settings below, Salesforce updates to stage, close value, close date, and won/lost status can flow back into the linked portal lead.
Changes made in PartnerPortal do not push back into Salesforce automatically. Salesforce also does not support the separate Two-Way Sync setting that exists on the HubSpot integration.
Mapping
Section titled “Mapping”Salesforce is more flexible than the other CRM integrations. Instead of always creating one fixed three-object pattern, you choose which Salesforce objects to create and which one should act as the primary object.
Map Salesforce objects and fields
Section titled “Map Salesforce objects and fields”Use the mapping interface to decide which Salesforce objects should be created and how each field should be populated.
In the mapping area, use the object dropdown in the gray box to choose the Salesforce object you want to configure.
Start mapping fields for that object.
Add more objects from the boxes next to or below the object you just configured.
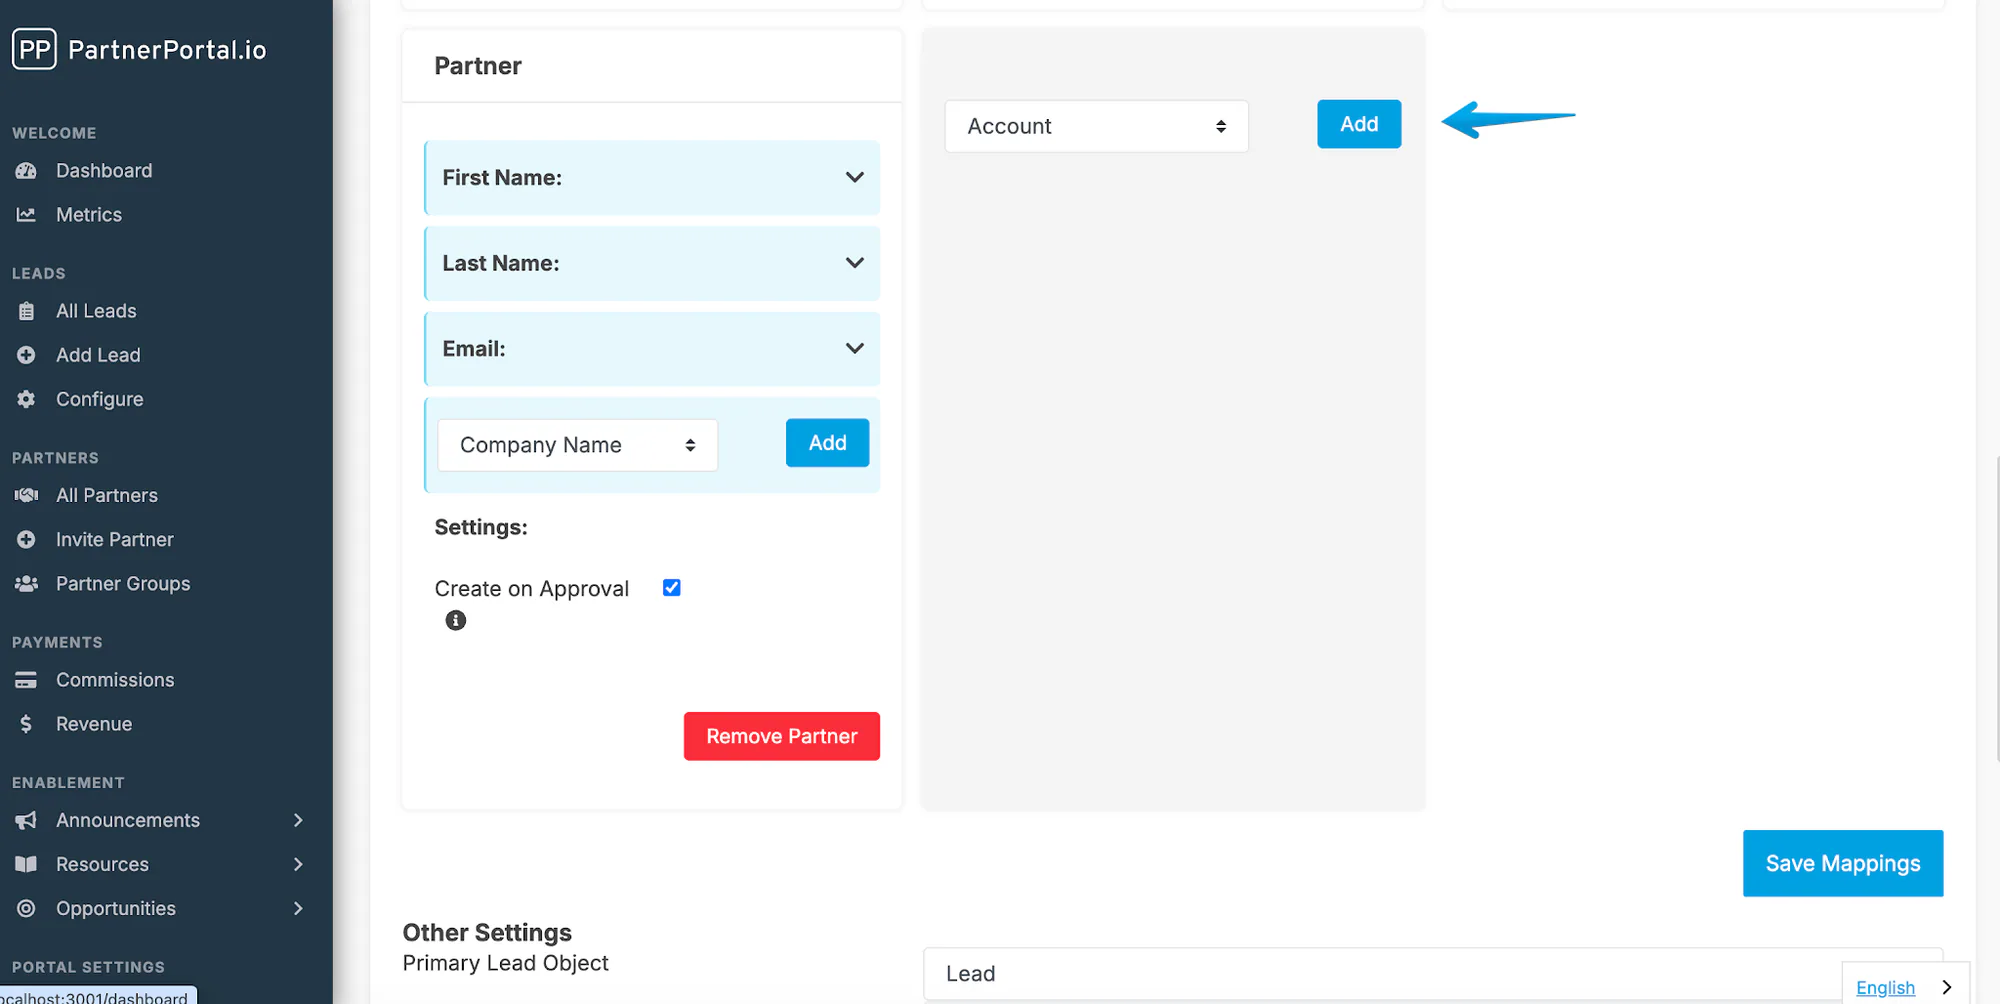
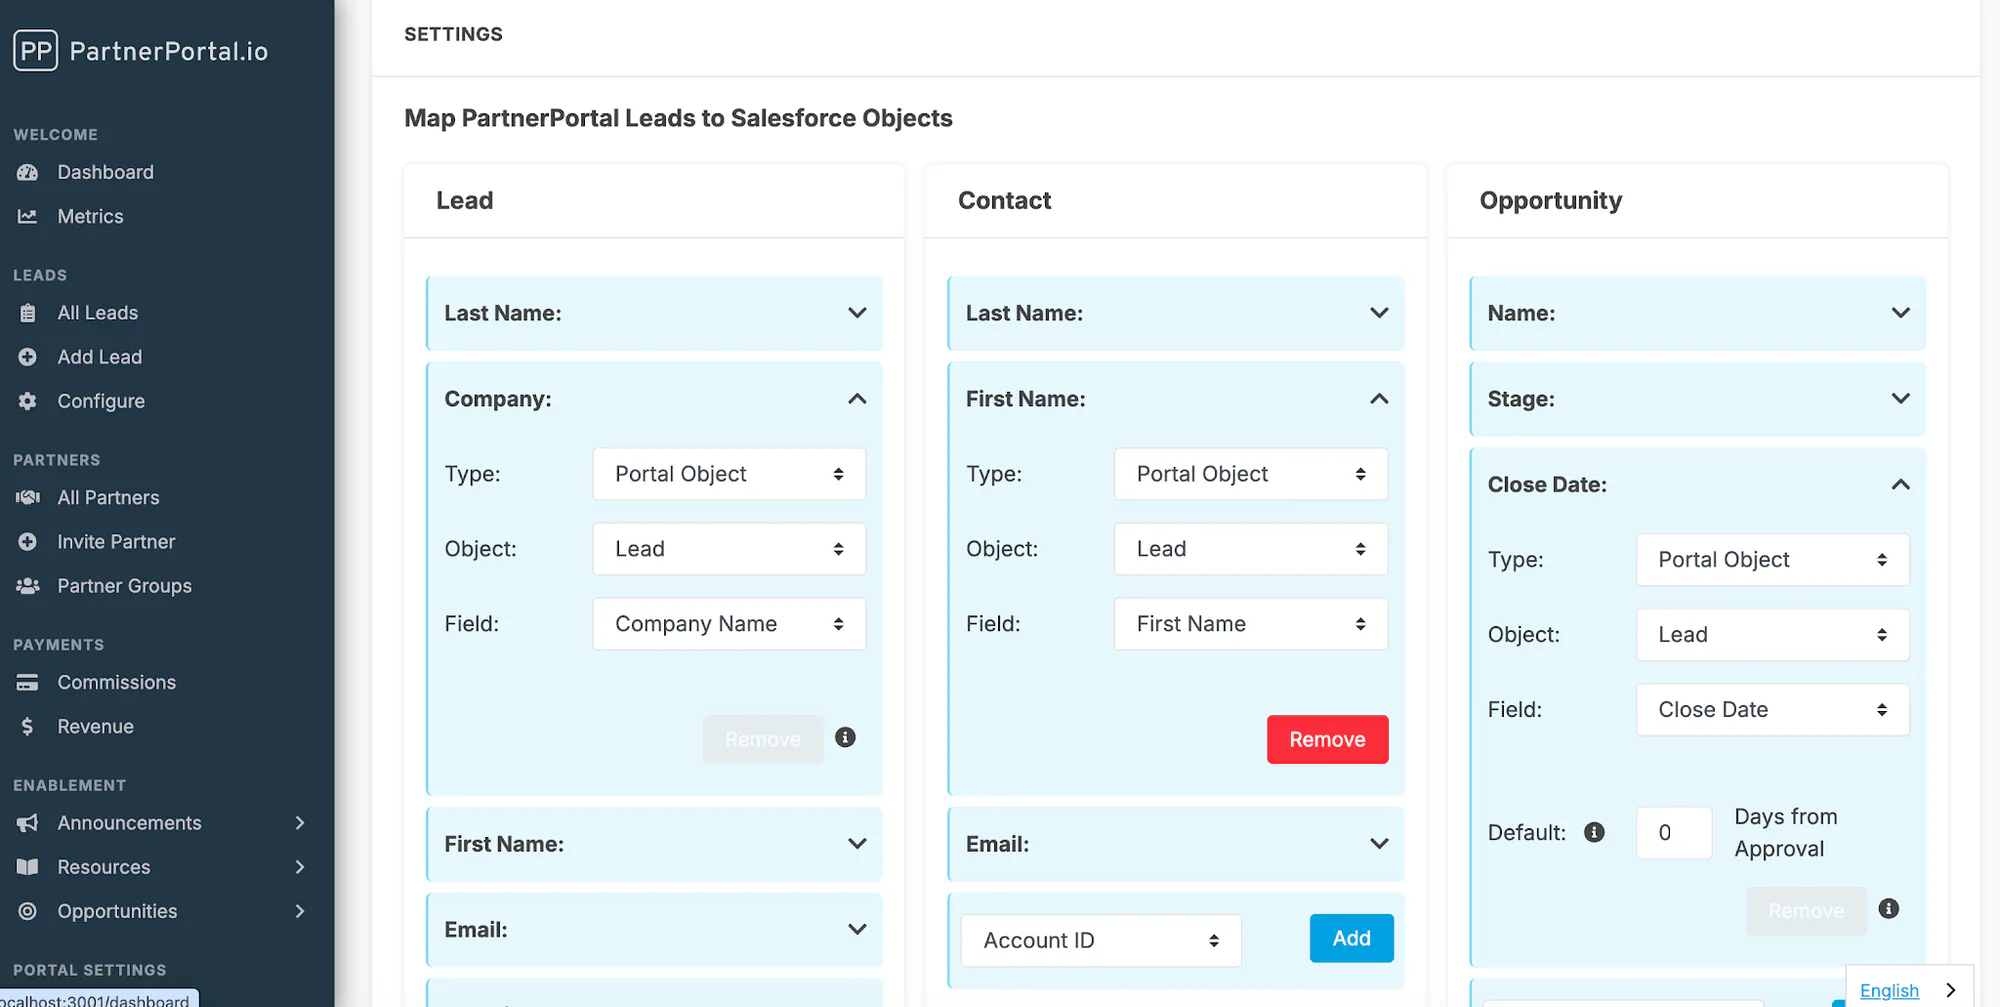
For each mapped field, you normally choose these settings:
| Setting | Options | When to use it |
|---|---|---|
| Type | Static Value, Portal Object, Related Object | Use Portal Object for lead-form data and Static Value when the same value should always be sent |
| Object | Lead, Partner | Choose the PartnerPortal object where the source data lives |
| Field | Any available field from that object | Choose the exact PartnerPortal field you want to send to Salesforce |
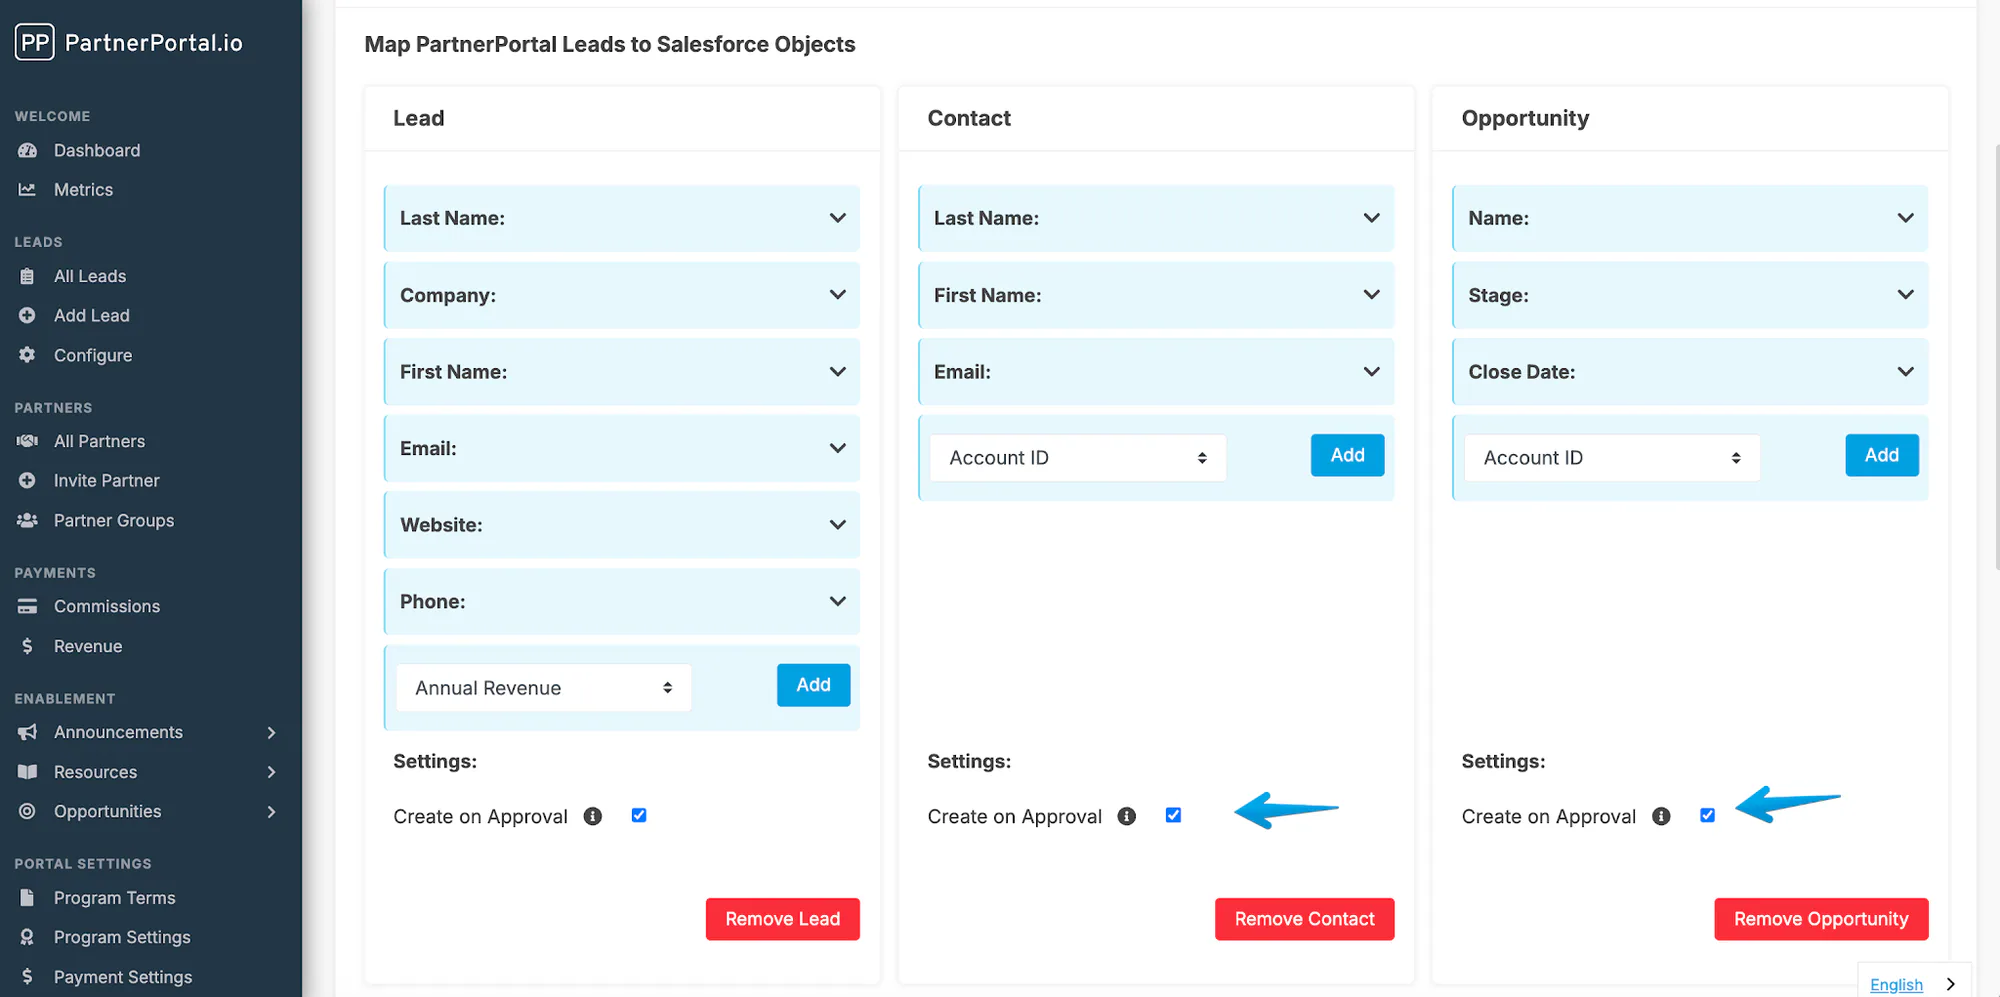
If you need extra source data on the PartnerPortal side, first update your lead registration form or the relevant partner fields so those values are available to map.
Map lead phases to opportunity stages
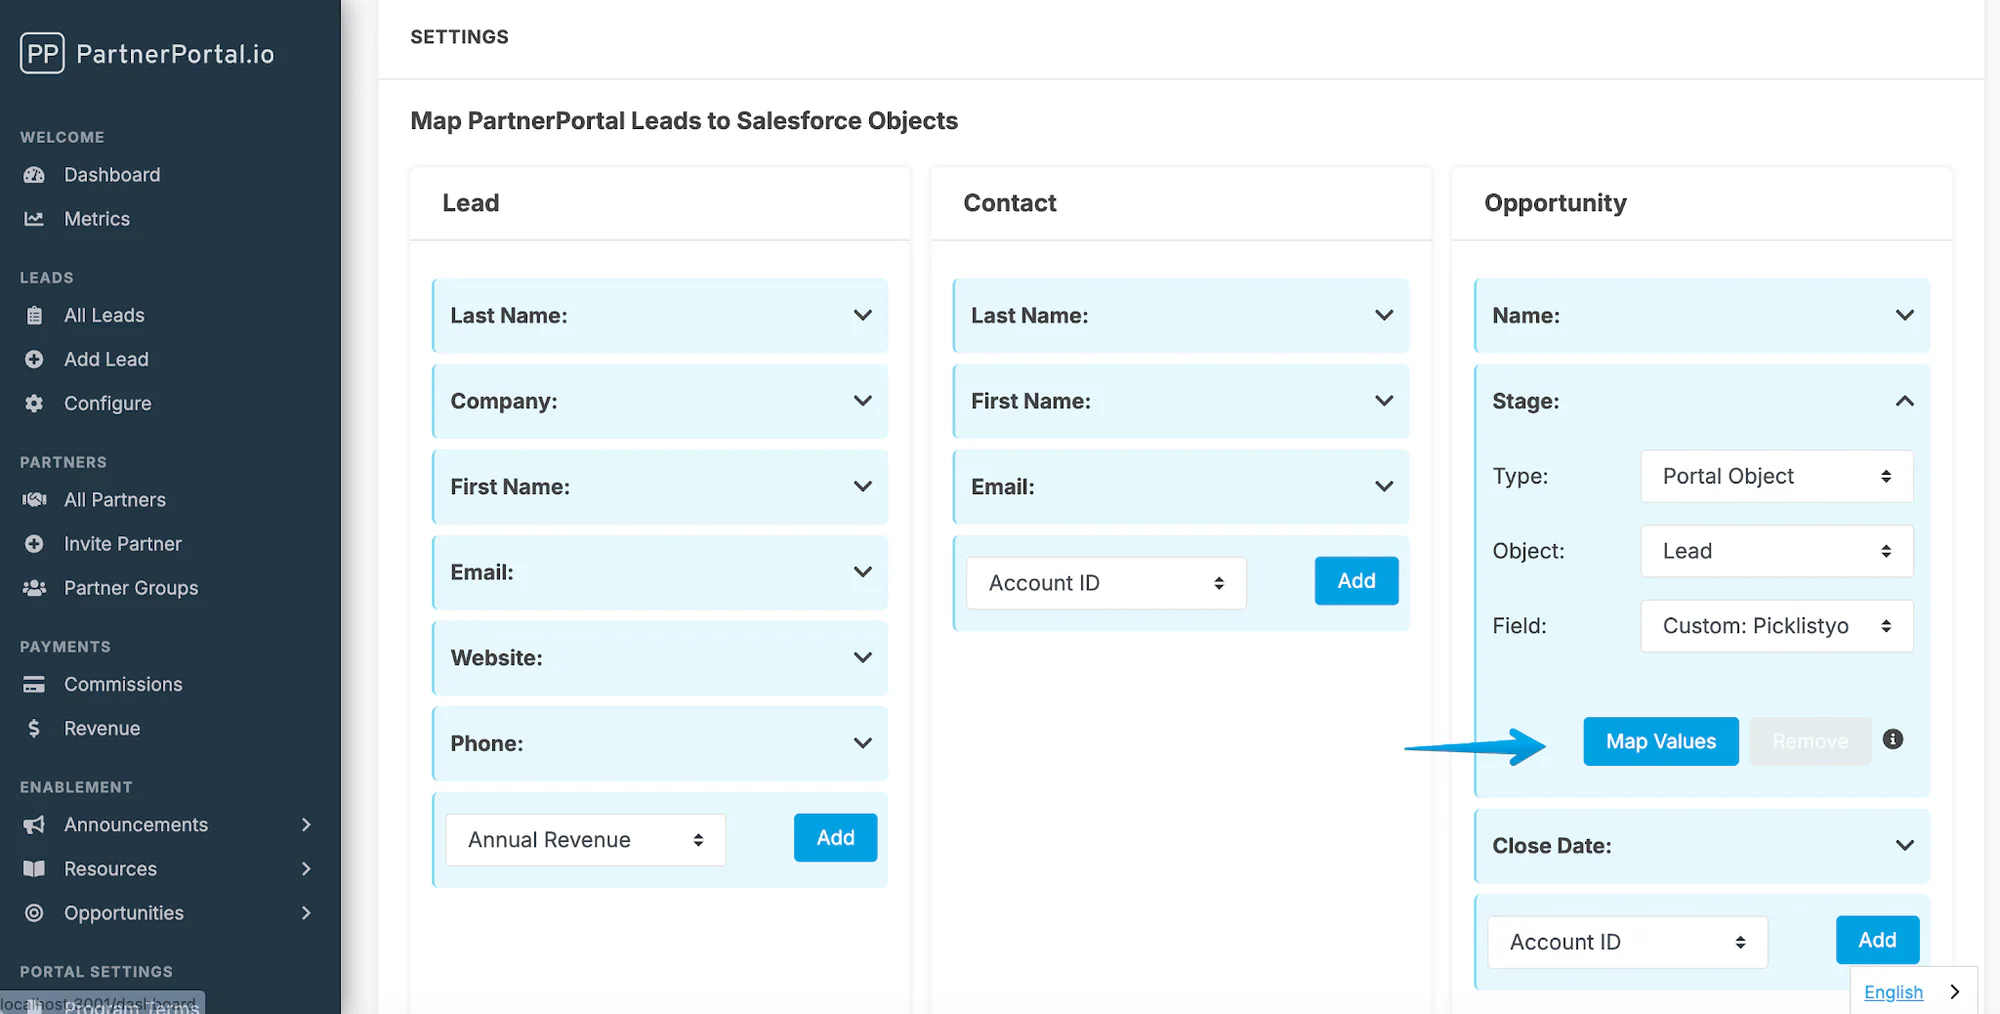
Section titled “Map lead phases to opportunity stages”Use the Opportunity object’s Stage field to decide which Salesforce stages partners can see and how portal phases should translate into Salesforce.
Add or open the Opportunity object in the mapping view.
Find the Stage field.
Set:
- Type to Portal Object
- Object to Lead
- Field to Phase
Click Map Values.
Map each PartnerPortal phase to the Salesforce opportunity stage that should represent it.
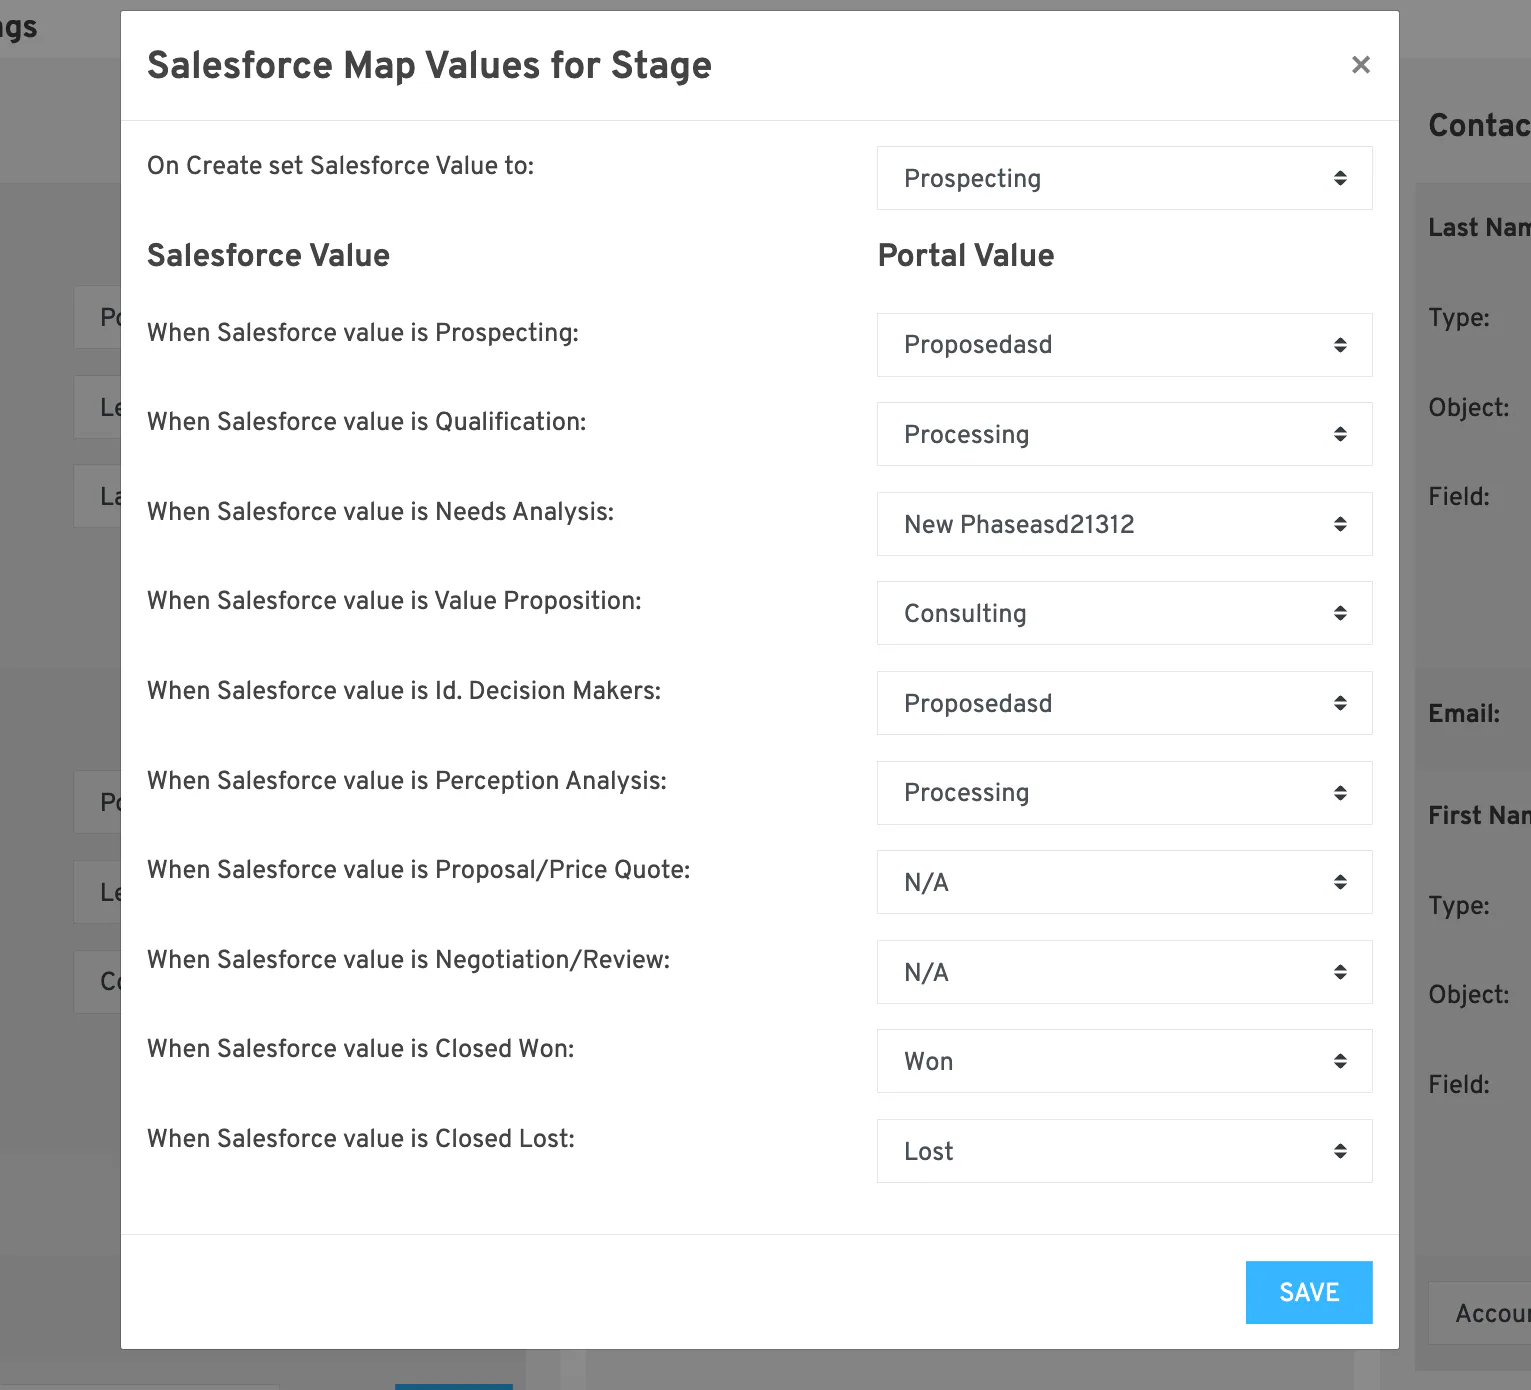
You can map phases one-to-one, or collapse several portal phases into fewer Salesforce stages if you only want partners to see a simplified sales process.
CRM Settings
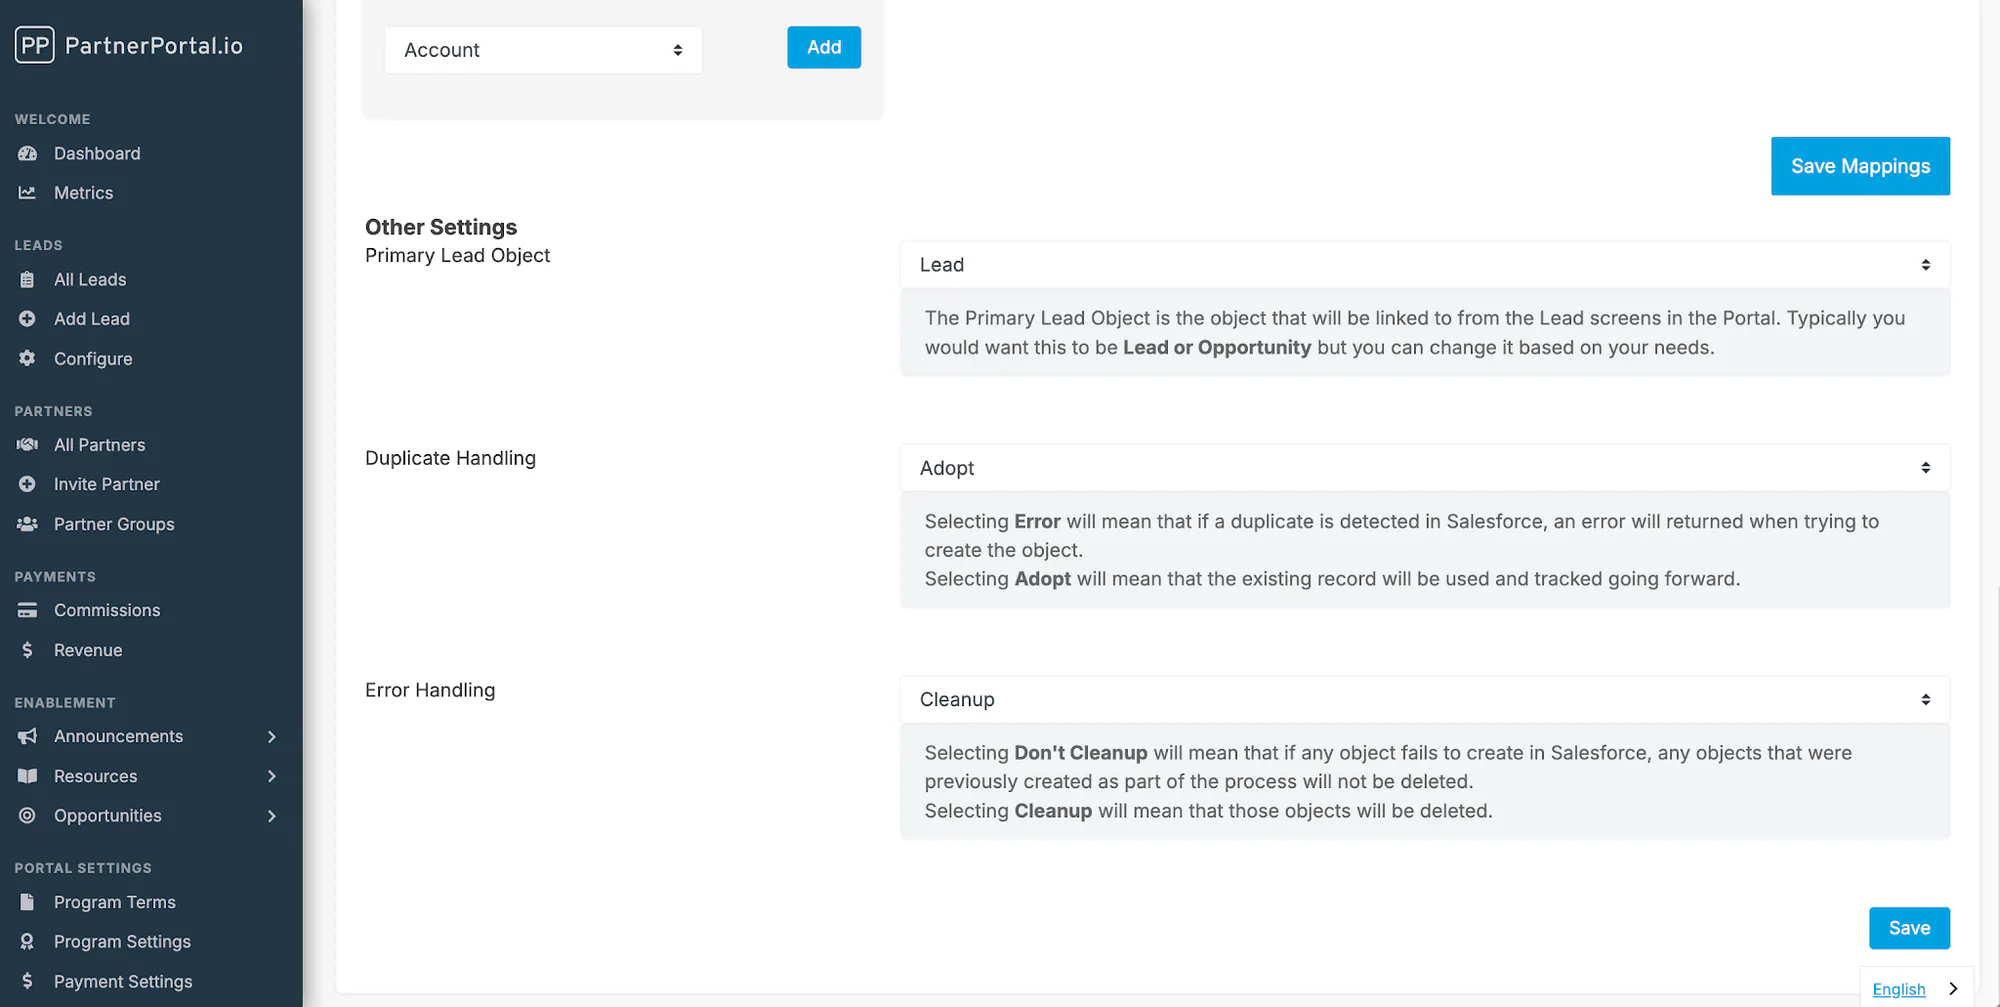
Section titled “CRM Settings”These settings live below the mapping interface on the Salesforce configuration screen.
Primary lead object
Section titled “Primary lead object”Use Primary Lead Object to choose which Salesforce object PartnerPortal should treat as the main linked record for the integration. Salesforce is the only one of these four CRM integrations where the ideal primary object can vary by workflow, which is why this setting matters more here than it does on HubSpot, Pipedrive, or Zoho.
Sync Deal Details Back to PartnerPortal
Section titled “Sync Deal Details Back to PartnerPortal”Turn this on when you want Salesforce to update linked lead details in PartnerPortal after the records are created.
When enabled, Salesforce can update:
- stage
- close value
- close date
- won/lost status
When disabled, PartnerPortal still creates and links Salesforce records, but later changes in Salesforce do not update the portal lead.
Track lead conversion
Section titled “Track lead conversion”Use this when your Salesforce process creates a lead first and converts it into an opportunity later. With Track Lead Conversion enabled, PartnerPortal can switch the connection over to the converted opportunity and keep syncing its details.
This works best when Sync Deal Details Back to PartnerPortal is also enabled.
Lead conversion workflow
Section titled “Lead conversion workflow”When a lead is approved in PartnerPortal, Salesforce can either create the downstream records immediately or wait until your team reviews the lead inside Salesforce.
| Approach | How to configure it | Best for |
|---|---|---|
| Create all objects on approval | Leave Create on Lead Approval turned on for every mapped object | Teams that want leads, contacts, accounts, and opportunities created right away |
| Validate in Salesforce first | Turn Create on Lead Approval off for every object except the lead | Teams that want sales to review the lead in Salesforce before creating the rest of the record set |
If you use the validate-first approach, your Salesforce team will convert the lead into contacts, accounts, and opportunities manually after review.
Duplicate Handling
Section titled “Duplicate Handling”This setting controls what PartnerPortal should do if Salesforce says the record already exists.
| Option | What happens |
|---|---|
| Error | PartnerPortal stops the create action and returns an error when Salesforce detects a duplicate |
| Adopt | PartnerPortal uses the existing Salesforce record and continues tracking it |
PartnerPortal follows your Salesforce account’s own duplicate and matching rules, so the exact outcome depends on how Salesforce is configured.
Error Handling
Section titled “Error Handling”This setting controls what happens if one part of a multi-object create flow fails.
| Option | What happens |
|---|---|
| Don’t Cleanup | Objects that were created earlier in the flow stay in Salesforce even if a later object fails |
| Cleanup | PartnerPortal deletes the objects it created in that flow if a later object fails |
Save the Salesforce configuration
Section titled “Save the Salesforce configuration”Save the Salesforce configuration when you are done. New approved leads will start syncing according to the rules you configured above.