
How to Integrate QuickBooks with PartnerPortal
Use this guide to connect QuickBooks to PartnerPortal, map each portal lead to the right QuickBooks customer, and choose whether your portal should stay on the legacy commission-time lookup flow or use the newer in-app revenue ledger.
Connect QuickBooks
Section titled “Connect QuickBooks”Before you start
Section titled “Before you start”- Admin access to PartnerPortal
- A QuickBooks account
- QuickBooks customer accounts created for the leads you want to map
Connect your QuickBooks account
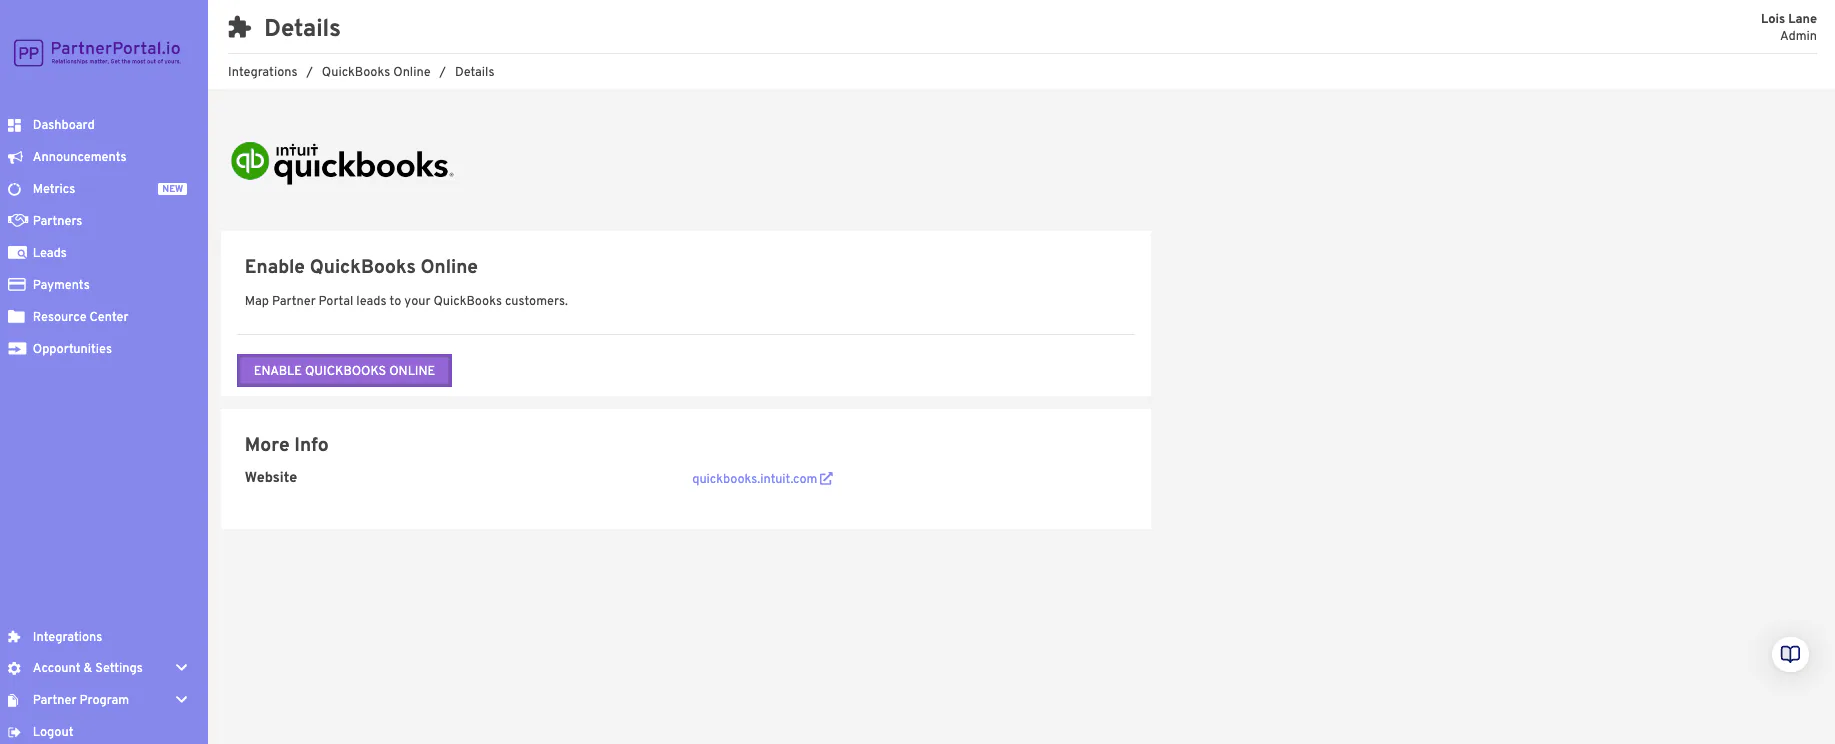
Section titled “Connect your QuickBooks account”Open Integrations from the PartnerPortal sidebar.
Click Enable QuickBooks.
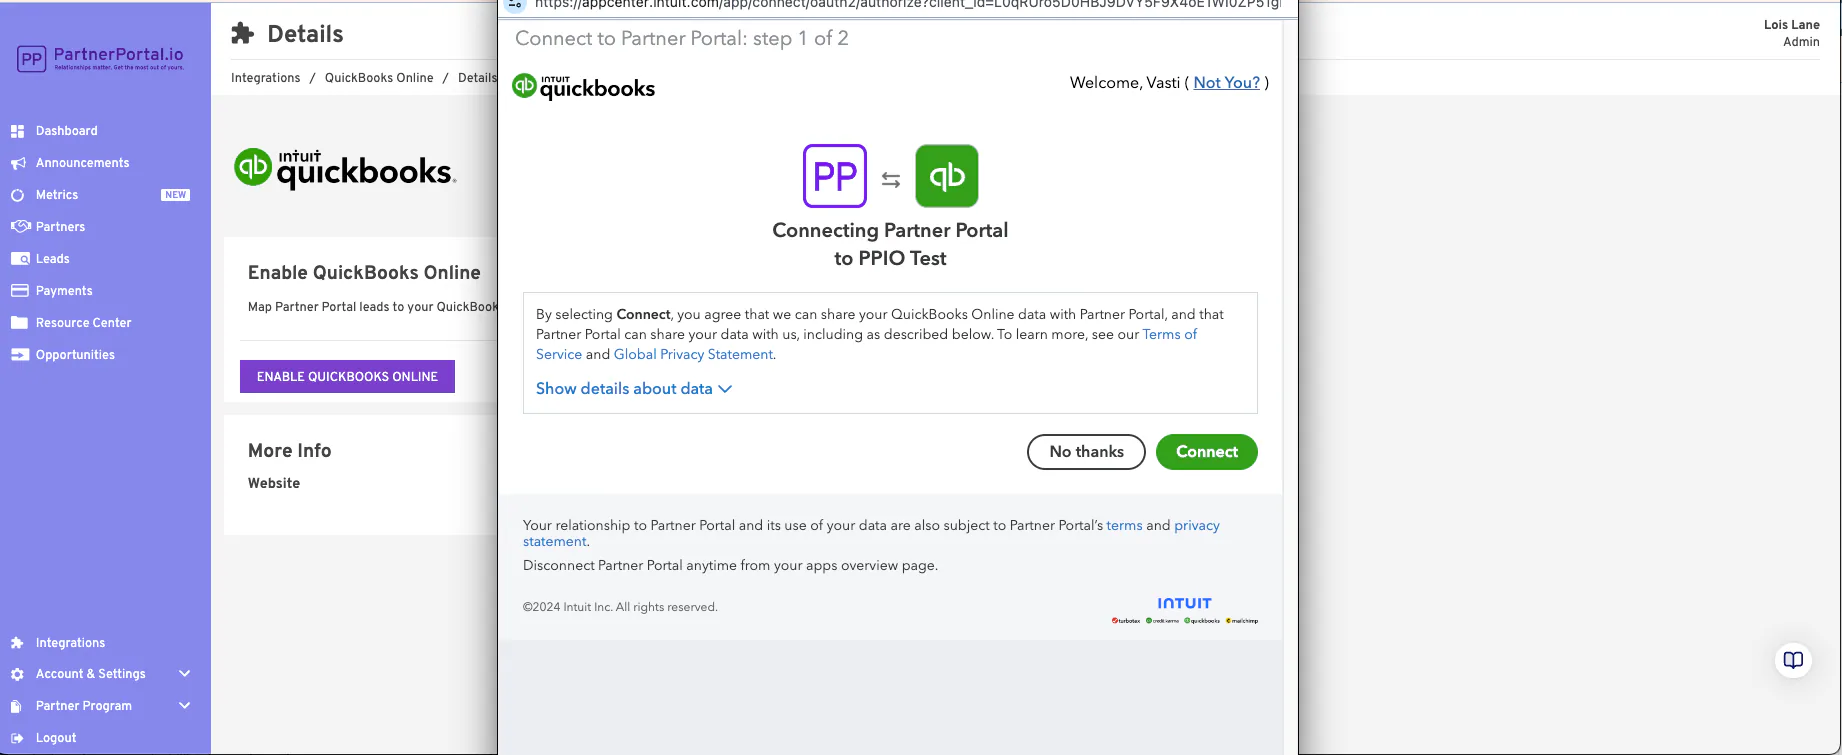
Sign in to QuickBooks and approve the connection.
Reauthorize QuickBooks
Section titled “Reauthorize QuickBooks”If QuickBooks asks you to reconnect, use the Reauthorize action from the integration card instead of disconnecting and reconnecting from scratch.
Legacy Revenue Tracking
Section titled “Legacy Revenue Tracking”Use this workflow when your portal still wants commission generation to read revenue directly from QuickBooks when the scheduler runs.
In the legacy workflow:
- QuickBooks is the source of truth for revenue lookup
- PartnerPortal reads QuickBooks revenue at commission-generation time
- the separate Revenue page is not the main source of truth
- lead-to-customer mapping is what tells PartnerPortal which QuickBooks revenue belongs to which lead
Map leads to QuickBooks customers
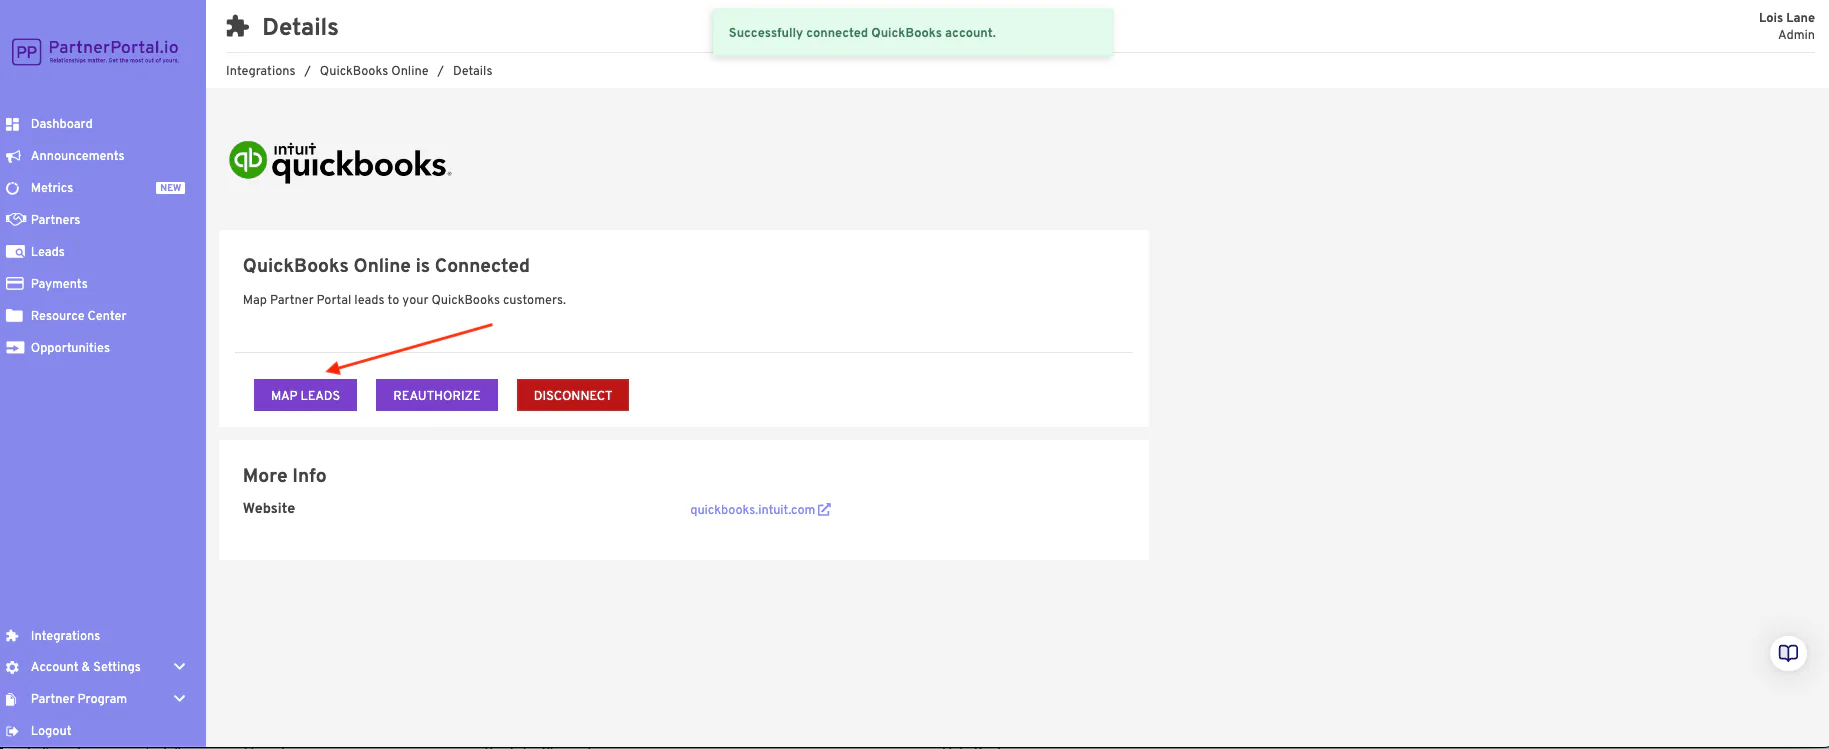
Section titled “Map leads to QuickBooks customers”Click Map Leads on the QuickBooks integration.
For each lead, choose the matching QuickBooks customer account.
Save the mappings.
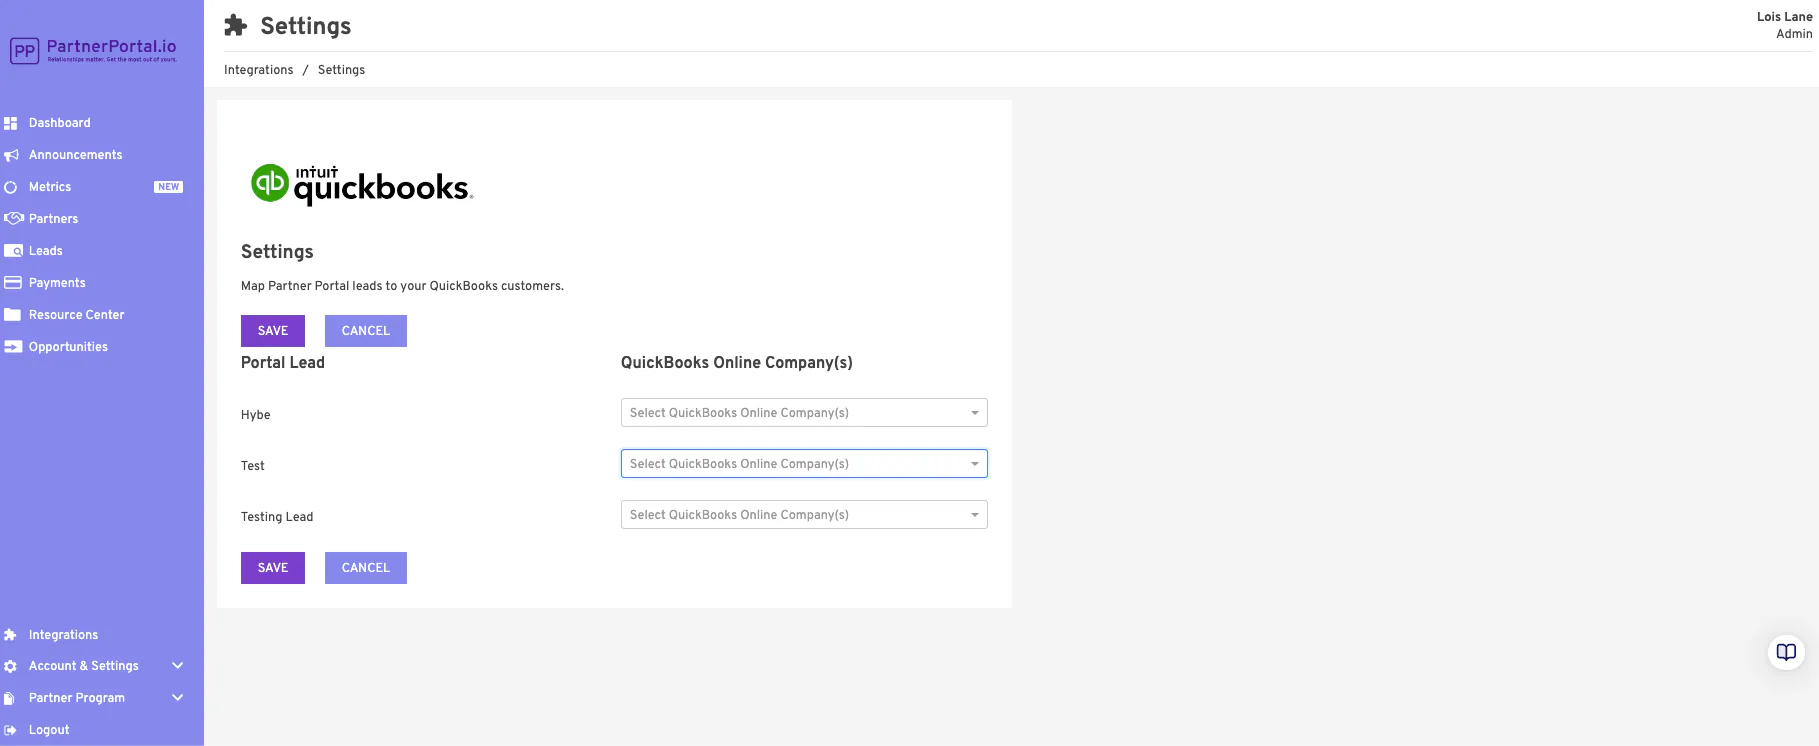
If needed, one lead can keep more than one saved QuickBooks customer mapping. That is useful when the same lead’s revenue might come from more than one QuickBooks customer record.
How legacy commission generation works
Section titled “How legacy commission generation works”When Commission Source stays on Legacy, PartnerPortal does not wait for revenue to be stored in the app first. Instead, scheduled commission generation reads the mapped QuickBooks payments directly from QuickBooks for the period being processed.
This is the older workflow. It is still supported, but it gives your team less visibility before commissions are created because the accounting system remains the main revenue source.
Modern Real-Time Revenue Tracking
Section titled “Modern Real-Time Revenue Tracking”Use this workflow when you want QuickBooks payments to flow into PartnerPortal’s in-app Revenue ledger as they happen, so your team can review revenue before or while commissions are created.
In the modern workflow:
- new QuickBooks payments are captured into PartnerPortal
- the Revenue page becomes the main working screen for review
- PartnerPortal tries to match each payment to a lead automatically
- scheduled commissions can later use the in-app revenue ledger instead of pulling directly from QuickBooks
How QuickBooks revenue is matched
Section titled “How QuickBooks revenue is matched”When QuickBooks payments are captured, PartnerPortal tries to match them in this order:
- saved QuickBooks customer mapping first
- exact customer-email match next
- website-domain match last
Email and domain matches can still need review. Once your team confirms the right lead, PartnerPortal saves that customer mapping so future QuickBooks payments from the same customer can match more directly.
Review captured revenue and import older history
Section titled “Review captured revenue and import older history”Turning on capture handles new QuickBooks payments. It does not automatically pull in older QuickBooks history that existed before capture was enabled.
If you want older QuickBooks revenue available inside PartnerPortal:
- turn on capture
- open the Revenue page
- use the import tools there to backfill older QuickBooks payments
If you also want scheduled commissions to use that in-app ledger rather than the legacy QuickBooks pull, change Commission Source to In-App Revenue in Payment Settings.
Settings
Section titled “Settings”Most QuickBooks revenue settings now live in Portal Setup → Payment Settings, while the QuickBooks integration page remains the place for lead-to-customer mappings.
Once QuickBooks is connected, the shared Payment Settings page is where the QuickBooks-specific revenue controls appear. That is where your team manages revenue capture, import status, deleting captured revenue, and the Commission Source setting that decides whether scheduled commissions use the legacy QuickBooks lookup or the in-app revenue ledger.
Revenue Tracking
Section titled “Revenue Tracking”Use Capture QuickBooks Revenue when you want PartnerPortal to store QuickBooks payments inside the app.
When it is enabled:
- new QuickBooks payments appear on the Revenue page
- PartnerPortal stores the time capture was enabled
- the integration can show revenue-import status if a historical import is running, completed, or failed
Delete Captured Revenue
Section titled “Delete Captured Revenue”If you need to clear the in-app QuickBooks revenue ledger, the destructive delete action lives under the QuickBooks revenue settings in Payment Settings.
This deletes captured QuickBooks revenue records from PartnerPortal, but it does not remove saved lead-to-customer mappings and it does not disconnect QuickBooks.
Commission Source
Section titled “Commission Source”In Payment Settings → Commission Generation, choose which revenue source scheduled commission generation should use:
- Legacy: read revenue directly from QuickBooks at scheduler time using your saved mappings
- In-App Revenue: generate commissions from the revenue records already stored on PartnerPortal’s Revenue page
If your team wants a review step before commissions are generated, In-App Revenue is usually the clearer workflow. If your team still wants PartnerPortal to pull directly from QuickBooks at generation time, keep it on Legacy.